はじめに
PHPからPythonを実行して画像認識した結果を表示するソフトをLaravelベースで実装してみます。
画像認識の実装はTensorFlowでMNISTの学習をしてみるで、学習とテストを分離したものを実装していたので、それをベースにします。
[2020/4/15]ビューにBootstrapを導入
環境
- OS: Ubuntu 18.04.4 LTS (Virtual BOX上)
- PHP:7.2
- Laravel:7.5.2
- Python:3.8.0
- tensorflow:1.14.0
- numpy:1.18.2
- opencv:4.2.0.34
Ubuntu 18.04.4 LTSにデフォルトで入ってるPython3は3.6.9だったので、最新に上げています。併せて、Pythonで使うライブラリも入れます。
$sudo apt install python3.8
$sudo apt-get install python3-pip python3-dev
$pip3 install tensorflow
$pip3 install numpy
$pip3 install opencv-python
$sudo apt-get install python-pip python-devとpipコマンドでインストールするとPython2のライブラリが入るので注意が必要。
"~/.bashrc"を書き換えて、python3.8を使うようにします。
alias python3='/usr/bin/python3.8'
プロジェクトの作成
laravelAIという名前のプロジェクトを作成します。
$ composer create-project laravel/laravel laravelAI --prefer-dist
ディレクトリ・ファイル構成
今回追加・修正するものだけ記載します。赤字が追加したものです。
laravelAI
┗ app
┗ Http
┗ MnistController.php
┗ Python:Python関連のファイルを格納
┗ mnist_test.py
┗ DeepConvNet.py
┗ ckpt:学習結果を格納
┗ resources
┗ views
┗ mnist
┗ index.blade.php
┗ routes
┗ wab.php
PHP (コントローラ)
コントローラーを作成します。
$ php artisan make:controller MnistController
<?php
namespace App\Http\Controllers;
use Illuminate\Http\Request;
class MnistController extends Controller
{
public function index(Request $request)
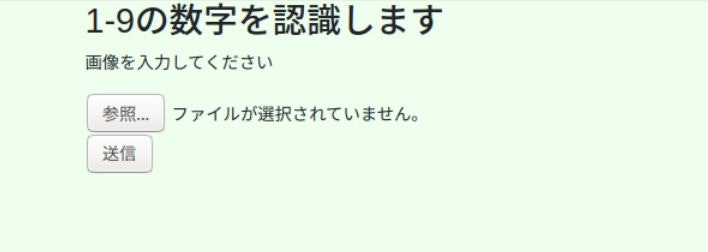
{
$data = [
'msg' => "画像を入力してください",
];
return view('mnist.index', $data);
}
public function test(Request $request)
{
if(!empty($request->test_image))
{
// POSTで送信された画像を取得します
$image = $request->file('test_image');
// 保存先は"storage/app/public/image"になります
// ファイル名は自動で割り振られます
$up_pass = $image->store('public/image');
$image_pass = "./storage/image/".basename($up_pass);
// Pythonのファイルがあるパスを設定
$pythonPath = "../app/Python/";
$command = "/usr/bin/python3 " . $pythonPath . "mnist_test.py " . $pythonPath . " " .$image_pass;
exec($command , $outputs);
//正規表現で結果行の抽出
$results = preg_grep('/result:.*/' , $outputs);
if(count($results) == 1){
// 連想配列の先頭を取得
$result = reset($results);
$result = substr($result , strlen('result:') , 1 );
}
else {
$result = "解析に失敗しました。";
}
$data = [
'msg' => "あってますか?",
'image_pass' => $image_pass,
'result' => $result,
'lines' => count($outputs),
'outputs' => $outputs,
];
}
else {
$data = [
'msg' => "画像がありません",
];
}
return view('mnist.index', $data);
}
}
説明
Pythonコマンドの実行
// Pythonのファイルがあるパスを設定
$pythonPath =  "../app/Python/";
$command = "/usr/bin/python3 " . $pythonPath . "mnist_test.py " . $pythonPath . " " .$image_pass;
exec($command , $outputs);
PHPからのコマンドの実行は、exec()関数を使用します。第1引数で実行するコマンドを指定し、第2引数にコマンドの出力結果を格納する変数を指定します。詳細はここで。
/usr/bin/python3 PythonファイルでPythonを実行します。
上記の$commandの文字列は次のようになります。
/usr/bin/python3 ../app/Python/mnist_test.py ../app/Python/ ./storage/image/FxY92Ji6j04cyozrx62yGHu9NQzLgsIqQq23YIcH.png
コマンドを$command = "pwd"; のように修正して実行すると、Laravelの実行パスは"/home/hogehoge/laravelAI/public"であることが分かります。それを前提にPythonファイルがある場所を指定します。
mnist_test.pyの第1引数には「学習データのパス」、第2引数には「画像のパス」を指定するようにしています。
受信画像の保存場所に関して
// POSTで送信された画像を取得します
$image = $request->file('test_image');
$up_pass = $image->store('public/image');
$image_pass = "./storage/image/".basename($up_pass);
画像の保存先は"storage/app/public/image"になります。
以下のコマンドで"public/storage"から"storage/app/public"にシンボリックリンクを張ります。mnist_test.pyの第2引数、および、ビューで表示する画像は"public/storage"配下のパスを指定します。
$ php artisan storage:link
$ cd public
$ ls -la
=> storage -> /home/hogehoge/laravelAI/storage/app/public
PHP(ルーティング)
routes/web.phpに以下を追加します。
Route::get ('mnist', 'MnistController@index');
Route::post('mnist', 'MnistController@test');
Pyhton
学習結果はTensorFlowでMNISTの学習をしてみるのものをそのまま使用可能です。"Python/ckpt"フォルダに格納します。
テスト用のコードは少しだけ修正します。コマンドライン引数で「学習データのパス」と「画像のパス」を指定できるようにします。
# -*- coding: utf-8 -*-
print('mnist_test.py START')
import sys
import tensorflow as tf
import cv2
import numpy as np
import DeepConvNet as CNN
#コマンドライン引数を取得
args = sys.argv

IMAGE_SIZE  = 28    # 画像サイズ
NUM_CLASSES = 10    # 識別数

if __name__ == "__main__":
    tf.reset_default_graph()

    print('設定 START')
    # 式に用いる変数設定
    x_image = tf.placeholder("float", shape=[None, IMAGE_SIZE * IMAGE_SIZE])    # 入力
    y_label = tf.placeholder("float", shape=[None, NUM_CLASSES]) # 出力
    keep_prob = tf.placeholder("float")

    # モデルを作成
    logits = CNN.CNN.makeMnistCNN(x_image, keep_prob , IMAGE_SIZE , NUM_CLASSES)
    sess = tf.InteractiveSession()

    saver = tf.train.Saver()
    #変数を初期化して実行
    sess.run(tf.global_variables_initializer())
    print('設定 END')

    print('Restore Param Start')
    ckpt = tf.train.get_checkpoint_state(args[1] + 'ckpt')
    #print(os.path.exists(args[1] + 'ckpt'))
    if ckpt: # checkpointがある場合
        last_model = ckpt.model_checkpoint_path # 最後に保存したmodelへのパス
        print ("Restore load:" + last_model)
        saver.restore(sess, last_model) # 変数データの読み込み
    else:
        print('Restore Failed')
    print('Restore Param End')


    # 画像読み込み
    inputNum = 1
    for count in range(int(inputNum)):
        fileName =  args[2]
        print('fileName:' + fileName)

        # 初期化
        ximage = []

        # 画像読み込み
        image = cv2.imread(fileName, cv2.IMREAD_GRAYSCALE)
        if not image is None:
            image = cv2.resize(image, (IMAGE_SIZE, IMAGE_SIZE))
            ximage = image.flatten().astype(np.float32)/255.0
        else:
            print('Error:File Read Failed !!')

        if len(ximage)!=0:
            pred = np.argmax(logits.eval(feed_dict={x_image: [ximage], keep_prob: 1.0})[0])

            print("result:" + str(pred))
    sess.close()
    print('mnist_test.py END')
PHP (ビュー)
ビューを作成します。レイアウトは適当です。
<html>
<head>
    <title>Mnist</title>
    <link rel="stylesheet" href="https://stackpath.bootstrapcdn.com/bootstrap/4.3.1/css/bootstrap.min.css" >
    <style>
        body{
            background-color: #EEFFEE;
        }
    </style>
</head>

<body>
<div class="container">
        <div class="row">
            <div class="col-sm-10">
                <h2>1-9の数字を認識します</h2>
                <p>{{$msg}}</p>

                <form method = "POST" action="/mnist" enctype="multipart/form-data">
                    @csrf
                    <input type="file" name="test_image"><BR>
                    <input type="submit" id="submit" value="送信">
                </form>
            </div>
        </div>

        <div class="row">
            @isset($image_pass)
                <div class="col-sm-5">
                    <h3>結果</h3>
                    <img src="{{ asset($image_pass)}}" width="112" height="112"> <BR>
                    @isset($result)
                        <p>この画像は「 {{$result}} 」です</p>
                    @endempty
                </div>
            @endempty

            @isset($outputs)
                <div class="col-sm-5">
                    <h3>Python出力( {{$lines}} 行)</h3>
                    @foreach ($outputs as $output)
                        {{$output}}<BR>
                    @endforeach
                </div>
            @endempty
        </div>
    </div>
</body>
</html>
動作確認
以下のコマンドでサーバを起動します。
$ php artisan serve
ブラウザで"http://localhost:8000/mnist" にアクセスします。
ファイル選択して、送信します。
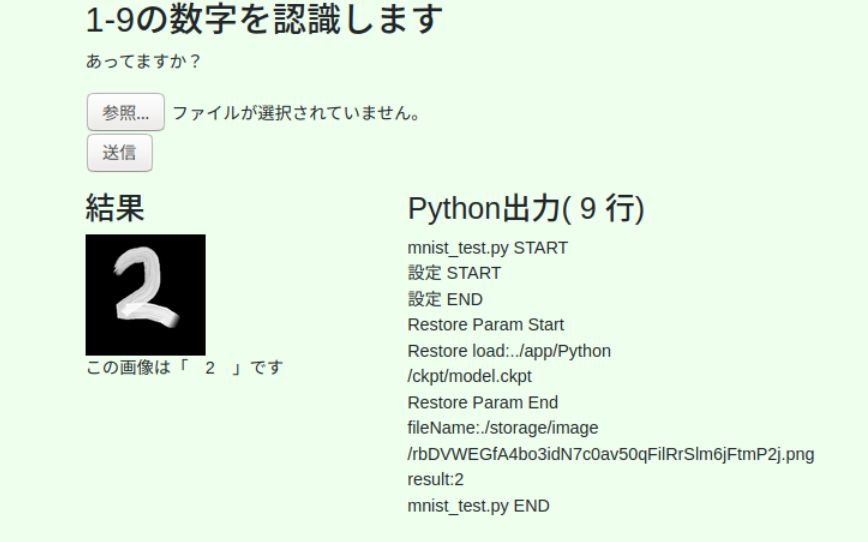
認識できました!
終わりに
VueとTypeScriptを導入したものをゼロから作るPHPとPythonの連携 on Laravel + Vue + TypeScriptに記載しています。
補足
ファイル保存で例外: The "" file does not exist or is not readable.
別件でコードをいじっているときに、ファイル保存の$image->store()で上記例外に行き当たったので捕捉を。
Symfony\Component\Mime\Exception\InvalidArgumentException
The "" file does not exist or is not readable.
例外メッセージやコールスタックからは分かり辛いですが、アップロードしたファイルサイズの制限にひっかかっていることが原因です。
対策
php.iniファイルにファイルサイズが定義されているので修正します。
(ネットで調べると.htaccessを修正する方法も記載されていましたが、public/.htaccessを修正しても改善しませんでした。)
# php.iniの場所を確認
$ php -i | grep php.ini
Configuration File (php.ini) Path => /etc/php/7.2/cli
Loaded Configuration File => /etc/php/7.2/cli/php.ini

$ sudo vi  /etc/php/7.2/cli/php.ini
以下の2行を必要に応じて修正します。PHP7.2では、デフォルトで2MB、8MBになっています。
; POSTでアップロードする全ファイルの合計の最大サイズ
post_max_size=2M
; 1ファイル当たりの最大サイズ
upload_max_filesize=8M
変更後はサーバを再起動させてください。
$ php artisan serve