Background
画像修復(inpaint)を使ってオブジェクト消去したった(OpenCV:Python)のつづきでC++のみに存在するinpaint関数を紹介します。
Introduction
表にざっくりとまとめてみました。
| inpaint type | year | python | include | library | thesis | note |
|---|---|---|---|---|---|---|
| ナビエ・ストークス(Navier-Stokes)法 | 2001 | ○ | #include <opencv2/photo.hpp> |
opencv_photo |
Navier-stokes, fluid dynamics, and image and video inpainting | 流体力学に基づくアルゴリズム |
| Alexandru Teleaによる手法 | 2004 | ○ | #include <opencv2/photo.hpp> |
opencv_photo |
An image inpainting technique based on the fast marching method. | 領域の境界から内側に向かって徐々に傷を修復するFast Marching Methodを基にしたアルゴリズム |
| Patch Offsetによる手法 | 2012 | × | #include <opencv2/xphoto.hpp> |
opencv_xphoto |
Statistics of Patch Offsets for Image Completion | 画像内の類似した画像を推測して修復するアルゴリズム |
| ファジィフーリエ変換による手法 | 2014 | × | #include <opencv2/fuzzy.hpp> |
opencv_fuzzy |
Image reconstruction by means of F-transform | フーリエ変換を使った手法。 細かい傷用ONE_STEP、 大きな傷用MULTI_STEP、 細かい傷・大きな傷併用ITERATIVEの3パターンが用意されている |
Development
GNUmakefile
CXX = c++
CXXFLAGS =  -I/usr/local/Cellar/opencv/4.1.1_2/include/opencv4/
LDFLAGS = -L/usr/local/Cellar/opencv/4.1.1_2/lib/
LDLIBS =  -lopencv_core -lopencv_highgui -lopencv_imgcodecs -lopencv_imgproc -lopencv_fuzzy -lopencv_photo -lopencv_xphoto
CXXVERSION = -std=c++11

inpaint: inpaint.cpp
    $(CXX) $< -o $@ $(CXXFLAGS) $(CXXVERSION) $(LDFLAGS) $(LDLIBS)

clean :
    rm inpaint
inpaint.cpp
#include <opencv2/opencv.hpp>
#include <opencv2/highgui.hpp>
#include <opencv2/fuzzy.hpp>
#include <opencv2/photo.hpp>
#include <opencv2/xphoto.hpp>


int main(int argc, const char* argv[]) {
    cv::Mat src = cv::imread("./capture_2.png");


    cv::Mat resizeMat, dst, mergeMat;
    cv::resize(src, resizeMat, cv::Size(), 0.5, 0.5);

    //マスク画像 背景黒 - 補修区画白
    cv::Mat mask_img = cv::Mat::zeros(resizeMat.size(), CV_8UC3);
    cv::rectangle(mask_img, cv::Point(185,255), cv::Point(470,300), cv::Scalar(255,255,255), -1, cv::LINE_AA);
    cv::rectangle(mask_img, cv::Point(40,25), cv::Point(115,65), cv::Scalar(255,255,255), -1, cv::LINE_AA);
    cv::rectangle(mask_img, cv::Point(200,40), cv::Point(440,110), cv::Scalar(255,255,255), -1, cv::LINE_AA);

    cv::cvtColor(mask_img,mask_img,cv::COLOR_BGR2GRAY);

    cv::imwrite("mask.png", mask_img);

    // ns
    cv::inpaint(resizeMat, mask_img, dst, 3, cv::INPAINT_NS);
    cv::imwrite("output_ns.png", dst);
    dst.release();

    // telea
    cv::inpaint(resizeMat, mask_img, dst, 3, cv::INPAINT_TELEA);
    cv::imwrite("output_telea.png", dst);
    dst.release();

    cv::Mat mask_inv = ~mask_img;
    resizeMat.copyTo(mergeMat, mask_inv);

    // xphoto
    cv::xphoto::inpaint(mergeMat, mask_inv, dst, cv::xphoto::INPAINT_SHIFTMAP);
    cv::imwrite("output_xphoto_shiftmap.png", dst);
    dst.release();

    // fuzzy
    cv::ft::inpaint(mergeMat, mask_inv, dst, 3, cv::ft::LINEAR, cv::ft::ONE_STEP);
    cv::imwrite("output_fuzzy_linear_one_step.png", dst);
    dst.release();

    cv::ft::inpaint(mergeMat, mask_inv, dst, 3, cv::ft::LINEAR, cv::ft::MULTI_STEP);
    cv::imwrite("output_fuzzy_linear_multi.png", dst);
    dst.release();

    cv::ft::inpaint(mergeMat, mask_inv, dst, 3, cv::ft::LINEAR, cv::ft::ITERATIVE);
    cv::imwrite("output_fuzzy_linear_iterative.png", dst);
    dst.release();

    src.release();
    mergeMat.release();
    resizeMat.release();
    mask_img.release();
    mask_inv.release();

   return 0;
}
実行
make
./inpaint
補足
マスク画像の読み込ませ方がそれぞれの関数で異なっています。
cv::inpaintでは修復する区画を白にしますが、cv::xphoto::inpaint cv::ft::inpaintは黒にする。そのため、cv::Mat mask_inv = ~mask_img;で反転させています。
Result
| library | parameter | image | odds |
|---|---|---|---|
| photo | INPAINT_NS | 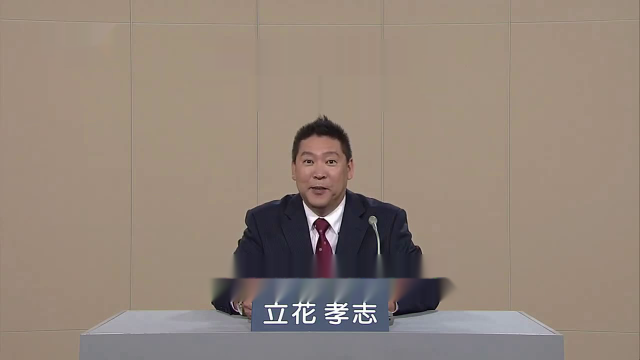 |
|
| photo | INPAINT_TELEA | 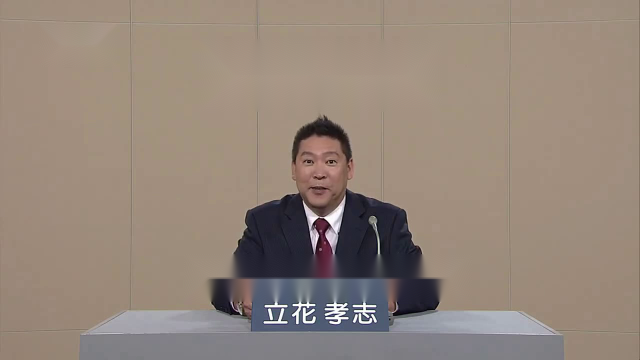 |
|
| xphoto | INPAINT_SHIFTMAP | 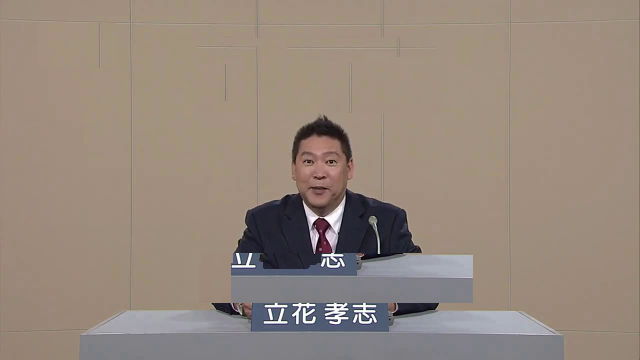 |
|
| fuzzy | ONE_STEP | 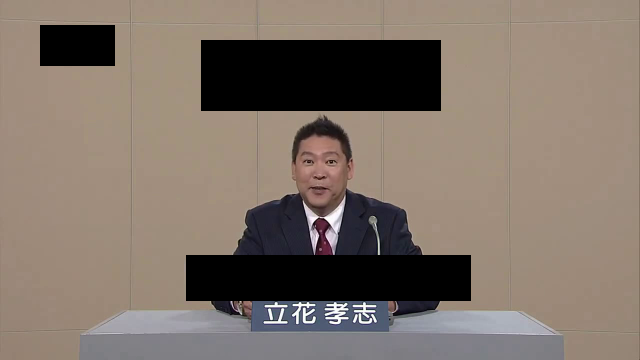 |
× |
| fuzzy | MULTI_STEP | 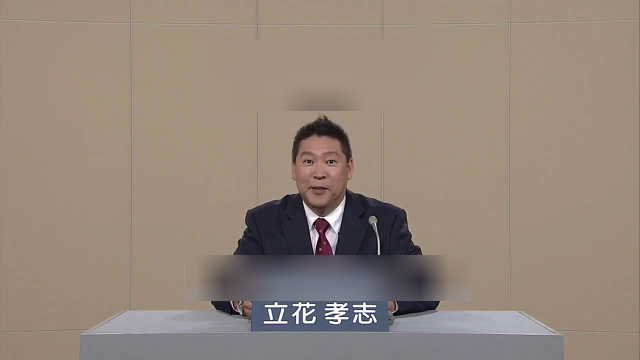 |
◎ |
| fuzzy | ITERATIVE | 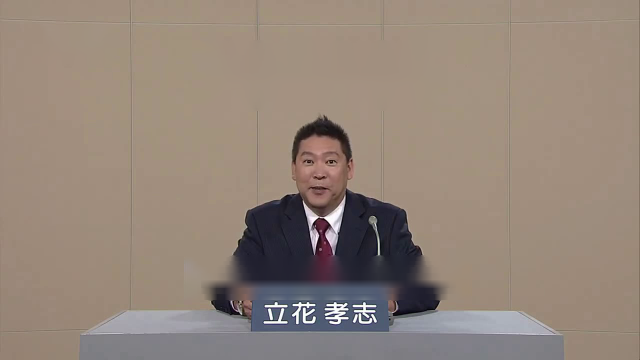 |
○ |
上の時刻を消す処理をする場合は背景画像を元に修復をするためcv::inpaintでも問題はないです。下の字幕ですがcv::inpaintを使うと真ん中で折り目がくっきりとついてしまいますが、cv::ft::inpaintの方が少し緩和されているっぽい印象です。他の箇所よりぼやけていますがMULTI_STEPが全体的に自然に仕上がっています。
cv::xphoto::inpaint INPAINT_SHIFTMAPは画像内の区画を元にペーストしていて、背景画像がビル街や森林など同一のオブジェクトがたくさんあるときに威力が発揮できそうです。
cv::ft::inpaint ONE_STEPは、細かい傷用のパラメータなので対応できていないことがわかります。
Future
次回は動画で字幕を消去できるかをtryしてみます![]()
