Kotlinは良いみたいな話をよく聞くので、手始めにKotlinを弄るための環境として、
SpringとGradleで実行環境を作ったときのメモです。
今回のゴール
シンプルに文字列だけを返す、GETのAPIを作ってみる。
雛形作成
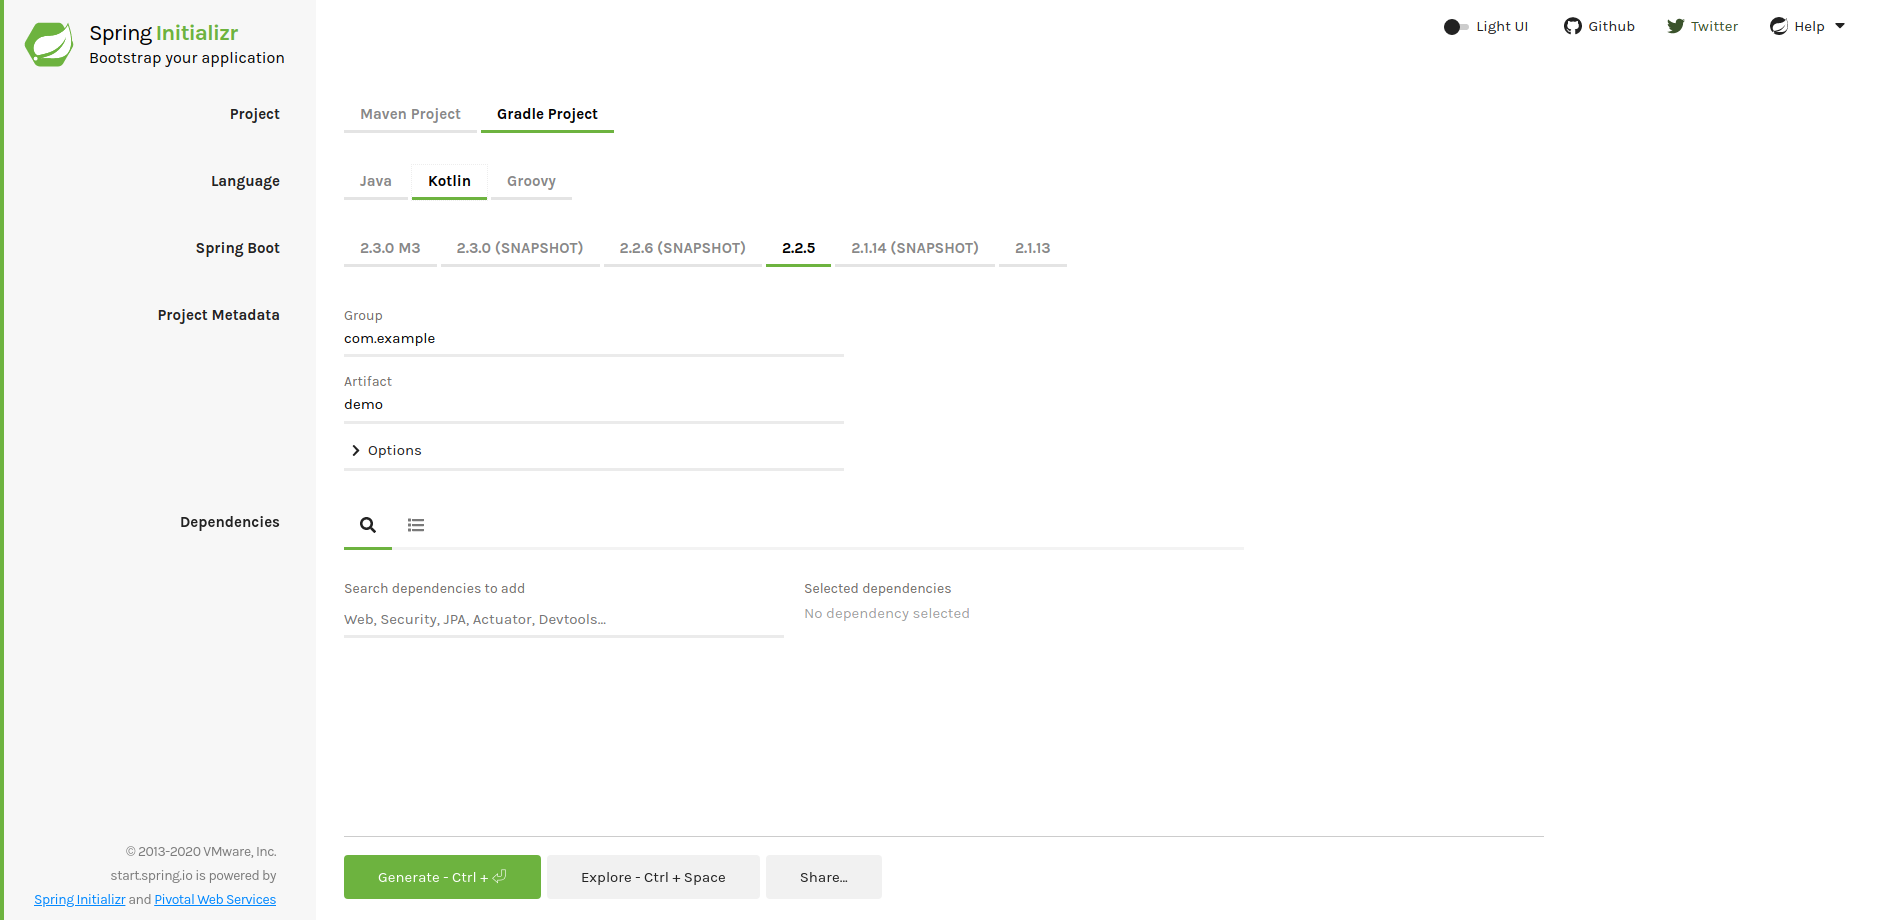
まずは、プロジェクトの雛形を作ります。
SpringInitializerでさくっと作りましょう
設定は下記の画像を見てください。
↑で生成されたプロジェクトの時点でメインファイルがすでにKotlinに状態で作られています。
package com.example.demo

import org.springframework.boot.autoconfigure.SpringBootApplication
import org.springframework.boot.runApplication

@SpringBootApplication
class DemoApplication

fun main(args: Array<String>) {
    runApplication<DemoApplication>(*args)
}
Gradleの設定をする
プロジェクトのルートの直下にgradle.build.ktsというファイルがあり、これがgradleの設定ファイルとなります。
ファイル名を見ればわかりますが、kotlinでgradleの設定を書いていきます。
初期だとAPIの機能を提供していいないので、それを使用するためのパッケージを使えるようにします。
また、後々DBにも接続したいのでコネクターも追加しておきます。
なので dependencies に追加します。
import org.jetbrains.kotlin.gradle.tasks.KotlinCompile
import sun.security.pkcs.PKCS8Key.version

plugins {
    id("org.springframework.boot") version "2.2.5.RELEASE"
    id("io.spring.dependency-management") version "1.0.9.RELEASE"
    kotlin("jvm") version "1.3.61"
    kotlin("plugin.spring") version "1.3.61"
}

group = "com.example"
version = "0.0.1-SNAPSHOT"
java.sourceCompatibility = JavaVersion.VERSION_1_8

repositories {
    mavenCentral()
}

dependencies {
    implementation("org.springframework.boot:spring-boot-starter-jooq")
    implementation("org.jetbrains.kotlin:kotlin-reflect")
    implementation("org.jetbrains.kotlin:kotlin-stdlib-jdk8")
    implementation("mysql:mysql-connector-java") // 追加
    implementation("org.springframework.boot:spring-boot-starter-web") // 追加

    testImplementation("org.springframework.boot:spring-boot-starter-test") {
        exclude(group = "org.junit.vintage", module = "junit-vintage-engine")
    }
}

tasks.withType<Test> {
    useJUnitPlatform()
}

tasks.withType<KotlinCompile> {
    kotlinOptions {
        freeCompilerArgs = listOf("-Xjsr305=strict")
        jvmTarget = "1.8"
    }
}
ついでにDBの設定もしておきます。
src/main/redources/application.propertiesに以下を追記します。
spring.datasource.url=jdbc:mysql://localhost:3306/demo
spring.datasource.username=root
spring.datasource.password=root
APIを作成する
これでビルド周りの準備ができたのでKotlinのコードを実際に書いていきます。
単純な文字列を返すシンプルなAPIを作成するので、以下のような感じになります。
package com.example.demo.presentation.controller

import org.springframework.web.bind.annotation.RequestMapping
import org.springframework.web.bind.annotation.RequestMethod
import org.springframework.web.bind.annotation.RestController

@RestController
class HelloController {

    @RequestMapping(value = ["/hello"],method = [RequestMethod.GET])
    fun helloRouter(): String {
        return "hello";
    }
}
実際に書いて思ったのは、
RequestMappingのvalueとmethod が配列でしか受け取れなかったことです。
実行してみる
プロジェクトのルートに移動して以下のコマンドを実行
./gradlew bootRun
これで、常にサーバーが立ちっぱなしなるので、
成功すれば、
<==========---> 80% EXECUTING [7m 23s]
> IDLE
> :compileKotlin > Resolve files of :compileClasspath > jackson-datatype-jdk8-2.10.2.jar
> IDLE
> IDLE
> :bootRun
> IDLE
こんな感じでとまります。
↓にアクセスして、helloという文字がでたら成功です。
http://localhost:8080/hello
最後に
環境構築とシンプルなAPIだけでしたが、gradleがkotlinになっていたり、
アノテーションの引数の型が違っていたりといろいろ変わっているのだなと感じました。
ちょいちょい学んで行きたいと思います。