macOSでOAuthSwiftを使ってQiita APIにOAuth 2.0で認証する方法
1. Qiita側の準備
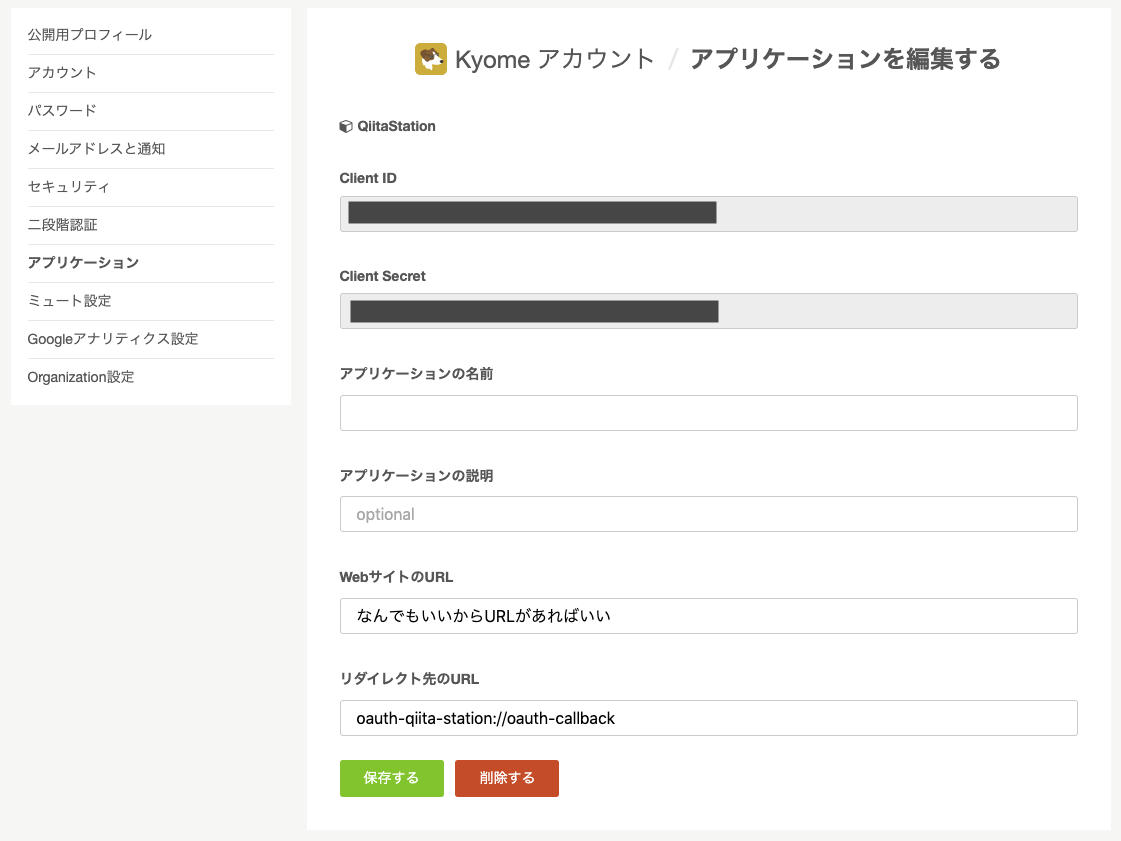
Qiitaの設定ページへ行き,新規にアプリケーションを登録して,Client IDとClient Secretを入手します.
リダイレクト先のURLは[任意の文字列] + ://oauth-callbackにして,メモしておきます.
2. プロジェクトの下準備
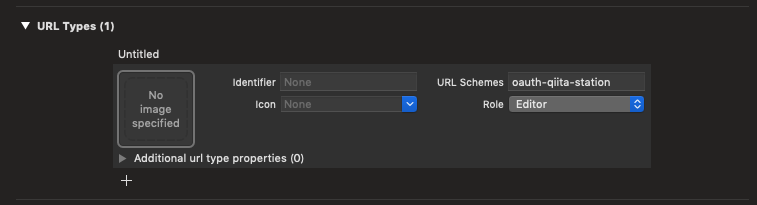
URL Typeを追加します.URL Schemesに先ほどのリダイレクト先の任意の文字列を入力します.
3. コーディング
OAuth認証をするためのWebViewController
OAuthWebVC.swift
import Foundation
import WebKit
import OAuthSwift

class OAuthWebVC: OAuthWebViewController, WKNavigationDelegate {

    var targetURL: URL?
    let webView = WKWebView()
    var cancelBtn: NSButton!

    override func viewDidLoad() {
        super.viewDidLoad()
        webView.navigationDelegate = self
        webView.translatesAutoresizingMaskIntoConstraints = false
        self.view.addSubview(webView)
        cancelBtn = NSButton(title: "Cancel", target: self, action: #selector(cancel))
        cancelBtn!.translatesAutoresizingMaskIntoConstraints = false
        self.view.addSubview(cancelBtn)

        webView.leadingAnchor.constraint(equalTo:  self.view.leadingAnchor).isActive = true
        webView.trailingAnchor.constraint(equalTo:  self.view.trailingAnchor).isActive = true
        webView.topAnchor.constraint(equalTo:  self.view.topAnchor).isActive = true
        webView.bottomAnchor.constraint(equalTo: self.view.bottomAnchor, constant: -40.0).isActive = true
        cancelBtn!.widthAnchor.constraint(equalToConstant: 82.0).isActive = true
        cancelBtn!.heightAnchor.constraint(equalToConstant: 32.0).isActive = true
        cancelBtn!.leadingAnchor.constraint(equalTo: self.view.leadingAnchor, constant: 20.0).isActive = true
        cancelBtn!.centerYAnchor.constraint(equalTo: self.view.bottomAnchor, constant: -20.0).isActive = true
    }

    override func handle(_ url: URL) {
        targetURL = url
        super.handle(url)
        self.loadAddressURL()
    }

    func loadAddressURL() {
        guard let url = targetURL else {
            return
        }
        let req = URLRequest(url: url)
        webView.load(req)
    }

    func webView(_ webView: WKWebView, decidePolicyFor navigationAction: WKNavigationAction, decisionHandler: @escaping (WKNavigationActionPolicy) -> Void) {
        if let url = navigationAction.request.url {
            if url.host == "oauth-callback" {
                OAuthSwift.handle(url: url)
                decisionHandler(WKNavigationActionPolicy.cancel)
                self.dismissWebViewController()
                return
            }
        }
        decisionHandler(WKNavigationActionPolicy.allow)
    }

    func webView(_ webView: WKWebView, didFail navigation: WKNavigation!, withError error: Error) {
        Swift.print(error.localizedDescription)
        self.dismissWebViewController()
    }

    @objc func cancel() {
        self.dismissWebViewController()
    }

}
認証とユーザ情報の取得を促すベースのViewController
ViewController.swift
import Cocoa
import OAuthSwift

class ViewController: NSViewController, OAuthWebViewControllerDelegate {

    var oauthswift: OAuth2Swift?
    var client: OAuthSwiftClient?
    lazy var webVC: OAuthWebVC = {
        let controller = OAuthWebVC()
        controller.view = NSView(frame: NSRect(x: 0, y: 0, width: 600, height: 400))
        controller.delegate = self
        controller.viewDidLoad()
        return controller
    }()

    override func viewDidLoad() {
        super.viewDidLoad()
    }

    @IBAction func register(_ sender: Any) {
        let _ = webVC.webView
        oauthswift = OAuth2Swift(consumerKey: "Client ID",
                                 consumerSecret: "Client Secret",
                                 authorizeUrl: "https://qiita.com/api/v2/oauth/authorize",
                                 accessTokenUrl: "https://qiita.com/api/v2/access_tokens",
                                 responseType: "code")
        oauthswift?.authorizeURLHandler = getURLHandler()
        oauthswift?.allowMissingStateCheck = true
        let _ = oauthswift?.authorize(
            withCallbackURL: URL(string: "oauth-qiita-station://oauth-callback")!,
            scope: "read_qiita write_qiita",
            state: "",
            headers: ["Content-Type" : "application/json"],
            completionHandler: { (result) in
                switch result {
                case .success(let (credential, _, _)):
                    Swift.print("token", credential.oauthToken)
                    self.client = OAuthSwiftClient(credential: credential)
                case .failure(let error):
                    Swift.print(error.description)
                }

        })
    }

    func getURLHandler() -> OAuthSwiftURLHandlerType {
        if webVC.parent == nil {
            self.presentAsSheet(webVC)
        }
        return webVC
    }

    @IBAction func getUserInfo(_ sender: Any) {
        let userID: String = "Kyome"
        client?.get(
            URL(string: "https://qiita.com/api/v2/users/\(userID)")!,
            completionHandler: { (result) in
                switch result {
                case .success(let response):
                    if let json = try? response.jsonObject(options: .allowFragments) as? [String : Any] {
                        Swift.print(json)
                    }
                case .failure(let error):
                    Swift.print(error.description)
                }
        })
    }

    func oauthWebViewControllerWillAppear() {
    }

    func oauthWebViewControllerDidAppear() {
    }

    func oauthWebViewControllerWillDisappear() {
    }

    func oauthWebViewControllerDidDisappear() {
        oauthswift?.cancel()
    }

}