はじめに
この記事は下記のような方を対象にしています。
・CentOSでapacheを導入したい
・他の記事を見たけど同じ結果にならない
→ 下記のケースが考えられます。
1.OSのバージョンが異なる:Cent OS Linux release 7.7.1908
2.記事が古い:記事の記載日を確認してください。(Qiitaの場合はトップに更新日が記載されます。)
概要
1.apache用ユーザーの作成
2.httpdパッケージのインストール
3.apacheの動作確認
4.firawallの設定
1.apache用ユーザーの作成
1.apache用のユーザーはシステムへのログインを想定していないため、利用できるシェルの指定は /sbin/nologin を設定します。
$ sudo useradd -s /sbin/nologin www
アカウントのセキュリティについてはこちらに別の方の記事があります。
LostEnryuさん:情報セキュリティの基本 ~セキュアなアカウント管理~
https://qiita.com/LostEnryu/items/9b0c363877581dc1171f
2.パスワードの設定を行います。
$ passwd www
ユーザー www のパスワードを変更。
新しいパスワード:***** ← ここはパスワードを入力
新しいパスワードを再入力してください:*****
passwd: すべての認証トークンが正しく更新できました。
3.作成したユーザーの確認を行います。
$ cat /etc/passwd | grep www
www:x:1002:1002::/home/www:/sbin/nologin
$ id www
uid=1002(www) gid=1002(www) groups=1002(www)
2.httpdパッケージのインストール
1.下記の4つをインストールします
(1)httpd:httpd Wdbサーバ
(2)httpd-tools:httpdに関連するツール群
(3)httpd-devel:httpd開発ツール
(4)httpd-manual:httpdマニュアル
$ sudo yum -y install httpd httpd-tools httpd-devel httpd-manual
2.下記のメッセージが出力されたらインストールは完了です。
完了しました!
3.インストールされたことを確認します。
下記のようにインストールされたパッケージが表示されます。
$ yum list installed | grep httpd
httpd.x86_64                              2.4.6-90.el7.centos        @base
httpd-devel.x86_64                        2.4.6-90.el7.centos        @base
httpd-manual.noarch                       2.4.6-90.el7.centos        @base
httpd-tools.x86_64                        2.4.6-90.el7.centos        @base
インストールパスも確認します。
$ which httpd
/usr/sbin/httpd
起動の確認をします。
$ sudo systemctl start httpd
起動確認を行うには下記を実施します。
$ systemctl status httpd
● httpd.service - The Apache HTTP Server
   Loaded: loaded (/usr/lib/systemd/system/httpd.service; disabled; vendor preset: disabled)
   Active: active (running) since 月 2020-01-13 13:52:14 JST; 15s ago
     Docs: man:httpd(8)
           man:apachectl(8)
 Main PID: 12513 (httpd)
   Status: "Total requests: 0; Current requests/sec: 0; Current traffic:   0 B/sec"
    Tasks: 6
   CGroup: /system.slice/httpd.service
           ├─12513 /usr/sbin/httpd -DFOREGROUND
           ├─12518 /usr/sbin/httpd -DFOREGROUND
           ├─12519 /usr/sbin/httpd -DFOREGROUND
           ├─12520 /usr/sbin/httpd -DFOREGROUND
           ├─12521 /usr/sbin/httpd -DFOREGROUND
           └─12522 /usr/sbin/httpd -DFOREGROUND
※正常に起動した場合、丸部分(●)は緑色で表示されます。
4.自動起動の設定
下記コマンドでhttpdが自動で起動するように設定します。
$sudo systemctl enable httpd
Created symlink from /etc/systemd/system/multi-user.target.wants/httpd.service to /usr/lib/systemd/system/httpd.service.
自動起動が設定されている事を確認します。
$ systemctl is-enabled httpd
enabled
3.apacheの動作確認
サーバに接続します。
http://localhost または http://サーバのIPアドレス
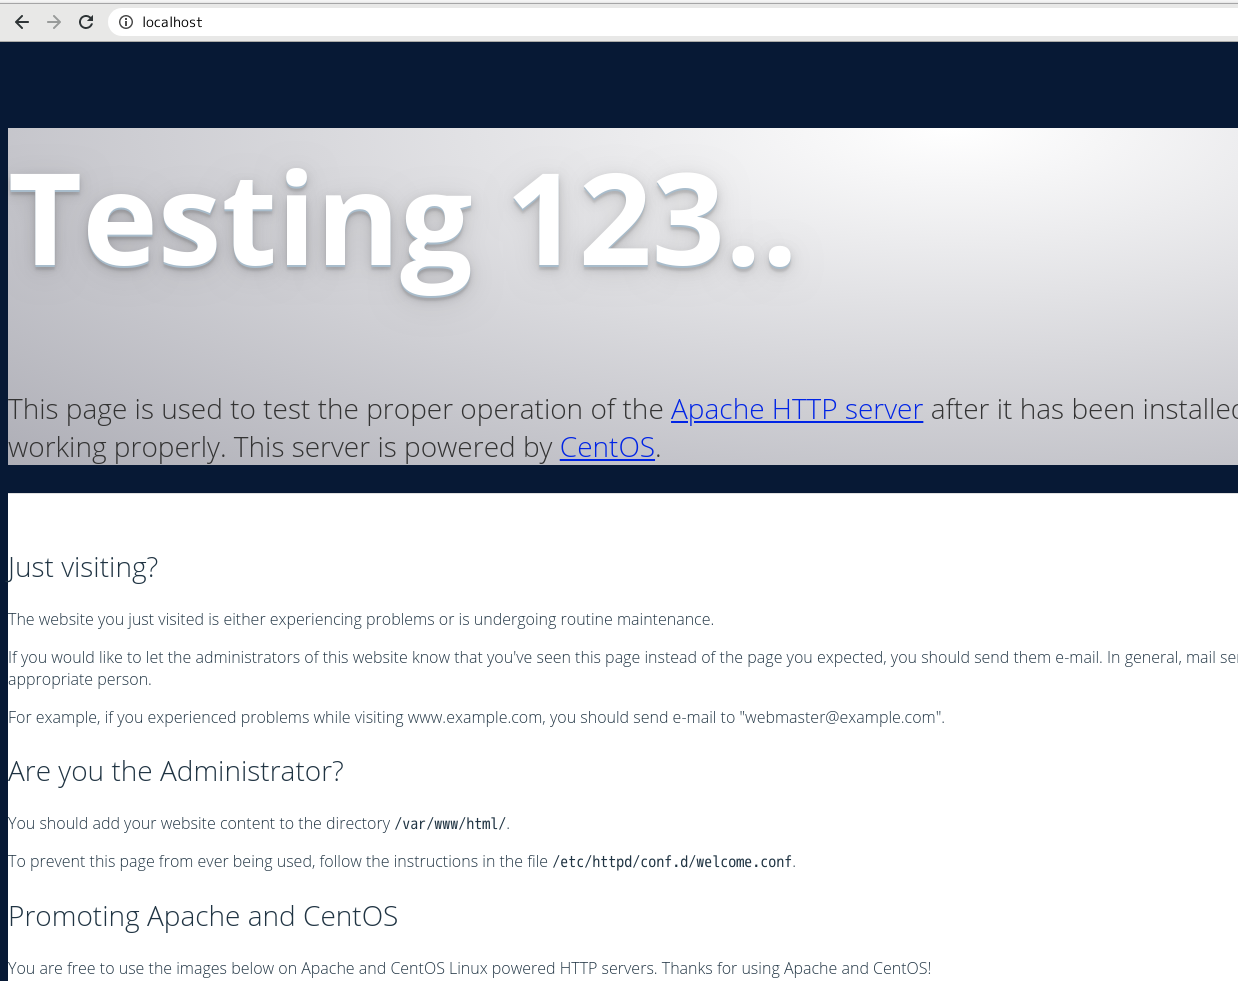 |
|---|
表示されればhttpdは動作しています。
これで完了です。
表示されない場合は 4.firewall の設定を試してください。
4.firawallの設定
firewall設定でhttpの接続ポートである80番をオープンしておらず、テスト用のページを表示できないことがあります。
その場合は下記の設定を実施します。
最初に変更前の状態を確認しておきます。
$ sudo iptables --list | grep tcp
ACCEPT     tcp  --  anywhere             anywhere             tcp dpt:domain
ACCEPT     tcp  --  anywhere             anywhere             tcp dpt:bootps
ACCEPT     tcp  --  anywhere             anywhere             tcp dpt:10022 ctstate NEW,UNTRACKED
ACCEPT     tcp  --  anywhere             anywhere             tcp dpt:ms-wbt-server ctstate NEW,UNTRACKED
80番ポートをオープンします。
$ sudo iptables -A INPUT -p tcp --dport 80 -j ACCEPT
ポートがオープンされていることを確認します。
$ sudo iptables --list | grep tcp
ACCEPT     tcp  --  anywhere             anywhere             tcp dpt:domain
ACCEPT     tcp  --  anywhere             anywhere             tcp dpt:bootps
ACCEPT     tcp  --  anywhere             anywhere             tcp dpt:http   ← この行が追加されています
ACCEPT     tcp  --  anywhere             anywhere             tcp dpt:10022 ctstate NEW,UNTRACKED
ACCEPT     tcp  --  anywhere             anywhere             tcp dpt:ms-wbt-server ctstate NEW,UNTRACKED
apacheの動作確認を再度行ってください。
参考サイト
関連記事
今後作成予定
・CentOSでのwordpress環境の構築
・CentOSでのphpのインストールと初期設定
・CentOSでのMySQLのインストールと初期設定