はじめに
こんにちは, @tbashiyy です. 普段はwebアプリケーションエンジニアをしています.
今回は,研究用途で手元に機械学習環境が欲しくなり,自宅PCにRTX2060を導入しました.
(GTX1660tiと悩みましたが,最終的にはtensor coreが搭載されているRTX2060にしました.)
そこで,tensorflowとCUDAを使って,Ubuntu上に機械学習環境を構築する手順を備忘録としてまとめておきます.
環境
- OS: Ubuntu 18.04.3 LTS
- Memory: 8GB
- CPU: Core i5-6500(3.2GHz x 4)
- GPU: GeForce RTX2060
- python: 3.7.5
- 仮想環境: pipnev
python仮想環境上にtensorflowをインストール
まず,tensorflowを使えるように,任意のディレクトリにpythonの仮想環境を作成していきます.
仮想環境は,pipenvを使います.
任意のディレクトリ上で
$ pipenv --python 3.7
$ pipenv shell
で,仮想環境に入ります.そして,
$ pipenv install tensorflow-gpu
仮想環境にGPUを利用するtensorflowのパッケージをインストールします.
$ pip freezeで下記のようにインストールが確認できれば成功です.
tensorboard==2.0.2
tensorflow-estimator==2.0.1
tensorflow-gpu==2.0.0
※後ほどjupyter notebookを利用します. もしインストールされていない場合は,
$ pipenv install jupyter
で,jupyterも入ります.
GPU周りに必要なソフトウェア群のインストール
(参考) https://www.tensorflow.org/install/gpu
上記URLのtensorflow公式通り,必要なソフトウェアをインストールしていきます.
1. 環境変数の設定
$ vi ~/.bashrcで.bashrcを開いて,下記を追加します.
export LD_LIBRARY_PATH=$LD_LIBRARY_PATH:/usr/local/cuda/extras/CUPTI/lib64
追加して保存したら,
$ source ~/.bashrc
します.
2. NVIDAのdriver,CUDA類のインストール
ここでは下記の5つをインストールしていきます.
- NVIDIA GPU drivers
- CUDA Toolkit
- CUPTI
- cuDNN SDK
- TensorRT 5.0
下記を実行.
$ wget https://developer.download.nvidia.com/compute/cuda/repos/ubuntu1804/x86_64/cuda-repo-ubuntu1804_10.0.130-1_amd64.deb
$ sudo dpkg -i cuda-repo-ubuntu1804_10.0.130-1_amd64.deb
$ sudo apt-key adv --fetch-keys https://developer.download.nvidia.com/compute/cuda/repos/ubuntu1804/x86_64/7fa2af80.pub
$ sudo apt-get update
$ wget http://developer.download.nvidia.com/compute/machine-learning/repos/ubuntu1804/x86_64/nvidia-machine-learning-repo-ubuntu1804_1.0.0-1_amd64.deb
$ sudo apt install ./nvidia-machine-learning-repo-ubuntu1804_1.0.0-1_amd64.deb
$ sudo apt-get update
$ sudo apt-get install --no-install-recommends nvidia-driver-418
ここまで終わった段階で,
$ sudo reboot
して再起動する.再起動後,
$ nvidia-smi
を実行して下記のような表示が出れば成功.
+-----------------------------------------------------------------------------+
| NVIDIA-SMI 440.33.01    Driver Version: 440.33.01    CUDA Version: 10.2     |
|-------------------------------+----------------------+----------------------+
| GPU  Name        Persistence-M| Bus-Id        Disp.A | Volatile Uncorr. ECC |
| Fan  Temp  Perf  Pwr:Usage/Cap|         Memory-Usage | GPU-Util  Compute M. |
|===============================+======================+======================|
|   0  GeForce RTX 2060    On   | 00000000:01:00.0  On |                  N/A |
| 47%   30C    P8    12W / 160W |    470MiB /  5933MiB |      3%      Default |
+-------------------------------+----------------------+----------------------+
そして,下記コマンドを実行する.
$ sudo apt-get install --no-install-recommends \
    cuda-10-0 \
    libcudnn7=7.6.2.24-1+cuda10.0  \
    libcudnn7-dev=7.6.2.24-1+cuda10.0

$ sudo apt-get install -y --no-install-recommends libnvinfer5=5.1.5-1+cuda10.0 \
    libnvinfer-dev=5.1.5-1+cuda10.0
ここまでで,インストールが完了です.(この段階で再度rebootすると良いかもしれません.)
tensorflowでGPUが使えているか確認する
(参考)https://thr3a.hatenablog.com/entry/20180113/1515820265
先程作ったpipenvの仮想環境に入り,
$ jupyter notebook
で,ブラウザが立ち上がり,下記のような画面が出てきます.
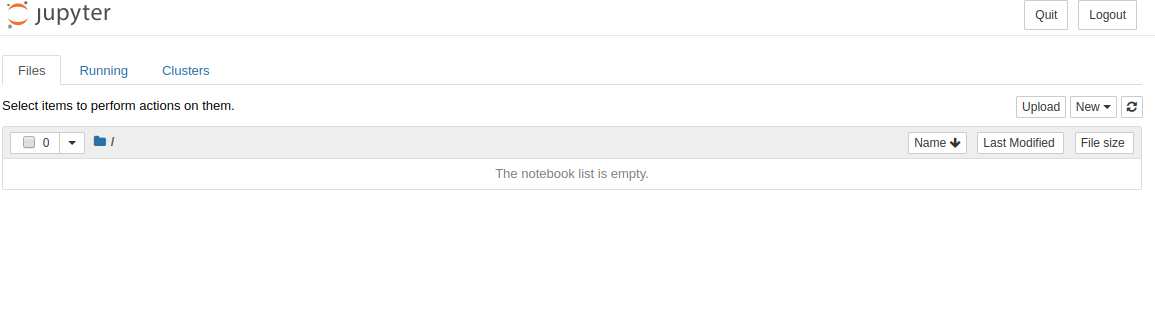
右上のNew -> Python3 で新規ファイルを作成します.
作成したファイルで,
from tensorflow.python.client import device_lib
device_lib.list_local_devices()
を実行して,下記のような結果の中に, device_type: "GPU"があればtensorflow上からGPUが認識できています.
[name: "/device:CPU:0"
 device_type: "CPU"
 memory_limit: 268435456
 locality {
 }
 incarnation: 7162619330375723357, name: "/device:XLA_CPU:0"
 device_type: "XLA_CPU"
 memory_limit: 17179869184
 locality {
 }
 incarnation: 9655519139365664409
 physical_device_desc: "device: XLA_CPU device", name: "/device:XLA_GPU:0"
 device_type: "XLA_GPU"
 memory_limit: 17179869184
 locality {
 }
 incarnation: 16357788976776791373
 physical_device_desc: "device: XLA_GPU device", name: "/device:GPU:0"
 device_type: "GPU"
 memory_limit: 5294129152
 locality {
   bus_id: 1
   links {
   }
 }
 incarnation: 3083761924213793354
 physical_device_desc: "device: 0, name: GeForce RTX 2060, pci bus id: 0000:01:00.0, compute capability: 7.5"]
実際にGPUを使っているかモニタリングしてみる
tensorflowにあるチュートリアルを実行してみます.
その際に,
$ nvidia-smi -l
をしておくと,リアルタイムでGPU使用率をモニタリングできます.
結果
ProcessesのPID6933で5233MiBのビデオメモリを利用していることが確認できますね.
+-----------------------------------------------------------------------------+
| NVIDIA-SMI 440.33.01    Driver Version: 440.33.01    CUDA Version: 10.2     |
|-------------------------------+----------------------+----------------------+
| GPU  Name        Persistence-M| Bus-Id        Disp.A | Volatile Uncorr. ECC |
| Fan  Temp  Perf  Pwr:Usage/Cap|         Memory-Usage | GPU-Util  Compute M. |
|===============================+======================+======================|
|   0  GeForce RTX 2060    On   | 00000000:01:00.0  On |                  N/A |
| 47%   34C    P2    33W / 160W |   5818MiB /  5933MiB |     21%      Default |
+-------------------------------+----------------------+----------------------+

+-----------------------------------------------------------------------------+
| Processes:                                                       GPU Memory |
|  GPU       PID   Type   Process name                             Usage      |
|=============================================================================|
|    0      6660      C   ...rew/.linuxbrew/opt/python/bin/python3.7    83MiB |
|    0      6933      C   ...rew/.linuxbrew/opt/python/bin/python3.7  5233MiB |
+-----------------------------------------------------------------------------+
最後に
- 実はかなり試行錯誤して,何度もやり直しをしました.最終的には公式ドキュメントにたどり着きました. 公式ドキュメントをはじめからちゃんと読みましょう.(自戒)
- 公式にはCUDA10.0が推奨,調べていると10.2で動作しないなどの報告をちらほら見つけましたが,公式のとおりにインストールするとなぜかCUDA10.2になってしまいました. 動いているっぽいのでいいのか...?(詳しい方教えていただけると嬉しいです.)