やる度に何回も調べているのでいい加減書き残しておきます。
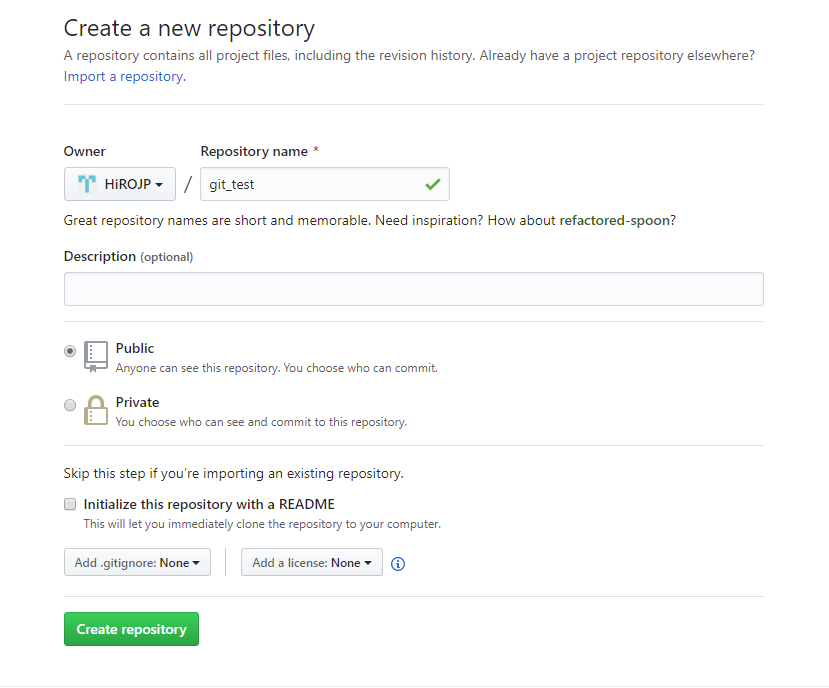
1. GitHubにリポジトリを作成する
今回はサンプルとしてファイル名をgit_testとしますので、以下の画像の通り作成しました。

リポジトリのURL(このサンプルの場合は" https://github.com/HiROJP/git_test.git ")をコピーしておきます。
2. GitHubに公開したいファイルを作る
好きな階層のフォルダにファイルを作成してください。
次にVisual Studio Codeでそのファイルを開き、エディター内のコンソールからファイルの階層へ移動します。
3. ローカルリポジトリを作る
ローカルリポジトリを作成する為、そのコンソールにて下記のコードを入力
$ git init
念の為 $ git status で確認をするとこのような文が現れると思います。
On branch master

No commits yet

Untracked files:
  (use "git add <file>..." to include in what will be committed)

        git_test.txt

nothing added to commit but untracked files present (use "git add" to track)
4. ファイルを追加する
$ git add 作成したファイル
次に上記のコード(このサンプルではgit add git_test.txt)を入力します。 また $ git statusで確認してみると
On branch master

No commits yet

Changes to be committed:
  (use "git rm --cached <file>..." to unstage)

        new file:   git_test.txt
git_test.txtが追加されているのがわかると思います。
5. コミットする
$ git commit -m "new commit"
確認が終わったら、コミットを行う為のコードを入力します。
6. リモートリポジトリを追加
$ git remote add origin リモートリポジトリのURL
(このサンプルでは" git remote add origin https://github.com/HiROJP/git_test.git ")を入力してください。
7. リモートリポジトリからローカルへ
$ git push origin master
これを入力する事で、Visual Studio Codeのソース管理タブからコミットやプルを行えるようになると思います。 また、もしソース管理タブに変化がない時は一度ファイルを閉じて、再度開くとGitHubと連携するようになることがあります。
