[Xcode 10.3、Swift 5で書かれています]
前回
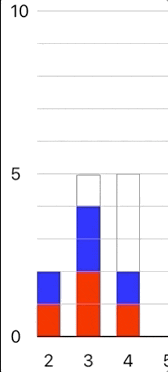
前回は、UIViewを棒グラフの“棒”のベースとして使用し、そこにCALayerを複数sublayerとして加えることでグラフの値を表すところまでやりました。今回はこれをアニメーションさせます。
Core Animation
アニメーションは以下の3種類を連続して描画しています。
- ブルブルと震える
- 値が増加する
- 増える色のレイヤーが伸びる(
boundsのアップデート) - 伸びるレイヤーの上位のレイヤーが、同じ値分上方にずれる(
positionのアップデート)
- 増える色のレイヤーが伸びる(
このうち1は単独で、その後2-3は同時に描画されます。
つまり2-3の発動は、1のアニメーションの終了を待ってから行わなければばならない、ということです。
アニメーションをチェインするにはいくつか方法があるらしいんですが、タイミングやコールバックをつかったものはうまくいかず、最終的にCATransactionのcompletionBlockを使ったものに落ち着きました。
CATransaction
/// Start the CATransaction here
CATransaction.begin()
まずはCATransactionを開始します。
/// bar and it's label are shaking before stretching
let shakeDuration = 0.4
let shakeAnimation = CAKeyframeAnimation(keyPath: "position.x")
shakeAnimation.values = [0, 10, -10, 10, -5, 5, -5, 0]
shakeAnimation.keyTimes = [0, 0.125, 0.25, 0.375, 0.5, 0.625, 0.75, 0.875, 1]
shakeAnimation.duration = shakeDuration
shakeAnimation.isAdditive = true
1のブルブルから。ここはhackingwithswift.comのコードほぼそのままです。横(x)だけの移動なので、position.xのキーパスを指定し、いい具合に揺れるように値を渡します。
連続アニメーション
問題はここから。アニメーションをチェインするには、先ほどのCATransaction内(begin()以降commit()以前)でcompletionBlockを使って、繋げたいアニメーションをネストする必要があります。
/// Setting completionBlock which includes other animations
CATransaction.setCompletionBlock { [unowned self] in
    /// Begin another transaction explicitly
    CATransaction.begin()

    let duration = 1.0

    for sublayer in sublayers {
        guard let colorStackLayer = sublayer as? ColorStackLayer else { continue }

        let singleUnit = self.bounds.height/CGFloat(unit*10)

        if colorStackLayer.tag == playerIndex {
            let fromValue = colorStackLayer.bounds.size.height
            let toValue = fromValue + singleUnit

            colorStackLayer.bounds.size.height = toValue

            let stretchAnimation = CABasicAnimation(keyPath: "bounds.size.height")
            stretchAnimation.duration = duration
            stretchAnimation.fromValue = fromValue
            /// DON'T NEED TO SET THE toValue BECAUSE THE LAYER IS ALREADY THERE
            /* stretchAnimation.toValue = toValue */

            colorStackLayer.add(stretchAnimation, forKey: "strechAnimation")
        }
            /// if layer's tag is larger than current subject layer,
            /// that means it should be moved up its position with same value as a height.
        else if colorStackLayer.tag > playerIndex {
            let fromValue = colorStackLayer.position
            let toValue = CGPoint(x: colorStackLayer.position.x, y: colorStackLayer.position.y-singleUnit)

            colorStackLayer.position = toValue

            let slideAnimation = CABasicAnimation(keyPath: "position")
            slideAnimation.duration = duration
            slideAnimation.fromValue = fromValue

            colorStackLayer.add(slideAnimation, forKey: "slideAnimation")
        }
    }
    CATransaction.setCompletionBlock {
        /// Execute the completio closure if it was there
        if let handler = completion { handler() }
    }
    /// Commit the 2nd transaction
    CATransaction.commit()
}
self.layer.add(shakeAnimation, forKey: "shakeBarAnimation")
/// Commit the first transaction
CATransaction.commit()
ひとつめのCATransactionが終了すると次のpositionとbounds.size.heightというふたつのCore Animation準拠のキーパスを使ったアニメーションが同時に、同じ時間(duration)をかけて発動します。そのおかげでバー全体が値に合わせて調整されているように見える、というわけです。
注意点
toValueとfromValue
注意点としては、コメントにも書きましたが
colorStackLayer.bounds.size.height = toValue
colorStackLayer.position = toValue

let stretchAnimation = CABasicAnimation(keyPath: "bounds.size.height")
stretchAnimation.duration = duration
stretchAnimation.fromValue = fromValue

colorStackLayer.add(stretchAnimation, forKey: "strechAnimation")
この2種類のアニメーションはどちらも値の変更を維持するタイプのアニメーションです。たとえばpositionの移動であれば、そもそもの目的はpositionを変えてlayerを移動させること(位置の更新)が主目的として先にあって、その過程のアニメーションはあくまで副次的なデコレーションにすぎません。
それをスムースに実現するためには、レイヤーツリーにアニメーションを加える前に、アニメーション後の値(=主目的の値)を目的のオブジェクトに渡してやる必要があります。
いまあるlayerのboundsを大きくするんだから、CABasicAnimationのfromValueとtoValueにそれぞれ適切な値を渡してから、最後にcompletionBlockでframeをアップデートすればいいんじゃないかと直感的には考えてしまいそうですが、これをするとアニメーション終了後に一度もとあった値の状態にlayerが瞬間的に戻ってしまい、その後ようやく本来のアップデートされた状態になるという、せっかくの苦労が台無しの事態に陥ってしまいます。
僕なんかはアニメーションをする前にpositionなりboundsを変えのには抵抗があったんですが、たしかにこれでうまくいっているので、「レイヤーツリーというのはアニメーションのコミット後にハンドルされるものなのだ」と今回学びました。
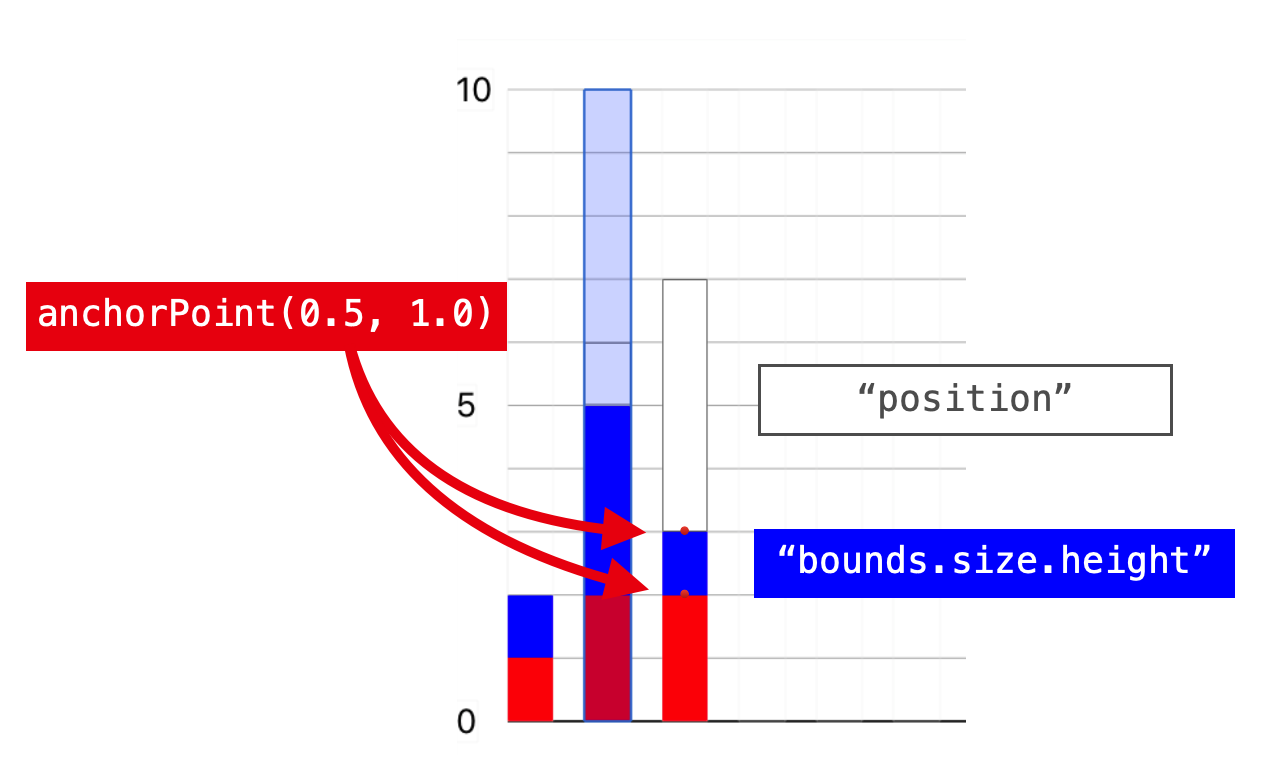
anchorPoint
あとは前回barをコンフィギュアした際にanchorPointを(0.5, 1.0)に変更しましたが、boundsのheightを変える際にこれがデフォルトの値(0.5, 0.5)だと、中心からストレッチしようとするので、上下に伸びることになります。上記のようにy値が底に位置するように変えていたので、そこを支点にして意図通り一方向にアニメーションさせることができた、というわけです。
さてこれでアニメーションまでできました。
次はこの棒グラフをアクセシブルにします!