今回仕事で任されたタスクをもう一度最初から作っていきます。
Project
同僚がFrontendチームで使うというVerdaccioを何の前知識もなくDockerizeして使えるようにしていく。元々同僚の頭の中では形があったようだが詳細は全く説明されず、最後あたりで説明された。。。
最終的に設定するもの
- docker-compose (Verdaccio, Verdaccio s3 plugin, https-portal)
- Bitbucket pipeline
- git hooks - post-receive
Usage
Verdaccioアクセスはhttps://<サイト>
A. Publish a package
1. チームの誰かがパッケージをパブリッシュする。
2. このパッケージはS3 bucketへ。
3. BitBucket Pipelineを通してプロダクションにデプロイ。
B. Add a new user
1. 新規ユーザーを追加>conf/htpasswdに追加される。
2. BitBucket Pipelineを通してプロダクションにデプロイ。
今回はその3の設定
- Verdaccio (Dockerfile, config.yaml)+s3 plugin
- EC2 (docker+https-portal, docker-compose, npm)
HTTPS-PORTALとは
- fully automated HTTPS server powered by Nginx, Let's Encrypt and Docker
- you can run any existing web application over HTTPS, with only one extra line of configuration.
- The SSL certificates are obtained, and renewed from Let's Encrypt automatically.
こんな便利なもの前から知ってたら自分のサイトにも使えた。。。
Spec and Software
- Amazon Ubuntu Server 18.04
- Verdaccio+s3 plugin
- Docker+https-portal
Path
s3と同じ。
verdaccio/conf/config.yaml
s3と同じ。
verdaccio/package.json
v2.0.0に変えた。
docker-compose.yml
version: '3.1'

services:
  verdaccio:
    build:
      context: ""
      dockerfile: Dockerfile
    container_name: "verdaccio"
    networks:
      - node-network
    environment:
      - VERDACCIO_PORT=4873
    ports:
      - "4873:4873"
    volumes:
      - "/home/ubuntu/verdaccio-https/storage:/verdaccio/storage"
      - "/home/ubuntu/verdaccio-https/conf:/verdaccio/conf"
      - "/home/ubuntu/verdaccio-https/plugins:/verdaccio/plugins"
  https-portal:
    image: steveltn/https-portal:1
    ports:
      - '80:80'
      - '443:443'
    environment:
      DOMAINS: 'example.com -> http://verdaccio:4873'
      STAGE: local
      FORCE_RENEW: 'true'
    networks:
      - node-network
    volumes:
      - /data/ssl_certs:/var/lib/https-portal
networks:
  node-network:
    driver: bridge
Dockerfile
s3と同じ。
References
- https://verdaccio.org/docs/en/docker
- https://verdaccio.org/docs/en/configuration
- https://github.com/remitly/verdaccio-s3-storage
- https://github.com/SteveLTN/https-portal
Tips
1) STAGE: local # <-- テスト用、本番はproduction
2) FORCE_RENEW: 'true' # <-- 以下と組み合わせて使わないとrate limitsに引っかかります。
3) volumes:
- /data/ssl_certs:/var/lib/https-portal
Error Messages
- rate limitsのエラー
-
FORCE_RENEW: 'true'これに引っかかった。 - https://letsencrypt.org/docs/rate-limits/
- 5 duplicated certificate per week (for renewal)
-
Useful commands
docker-compose up --force-recreate
docker exec -it --user=root verdaccio /bin/sh
Testing STAGE: local
1. docker起動
docker-compose up
expected logging
Attaching to verdaccio, verdacciohttps_https-portal_1
...
https-portal_1  | ========================================
https-portal_1  | HTTPS-PORTAL v1.7.2
https-portal_1  | ========================================
...
https-portal_1  | Generating DH parameters, 2048 bit long safe prime, generator 2
https-portal_1  | This is going to take a long time
verdaccio       |  warn --- config file  - /verdaccio/conf/config.yaml
verdaccio       |  warn --- Plugin successfully loaded: verdaccio-s3-storage
verdaccio       |  warn --- Plugin successfully loaded: verdaccio-htpasswd
verdaccio       |  warn --- http address - http://0.0.0.0:4873/ - verdaccio/4.2.1
https-portal_1  | .................................
...
https-portal_1  | Generating RSA private key, 4096 bit long modulus
https-portal_1  | .......................................................++++
https-portal_1  | ........................................................................++++
https-portal_1  | Generating RSA private key, 2048 bit long modulus
...
https-portal_1  | Self-signing test certificate for example.com
https-portal_1  | RSA key ok
https-portal_1  | Signature ok
https-portal_1  | subject=CN = example.com
https-portal_1  | Getting Private key
...
https-portal_1  | Signed key for example.com
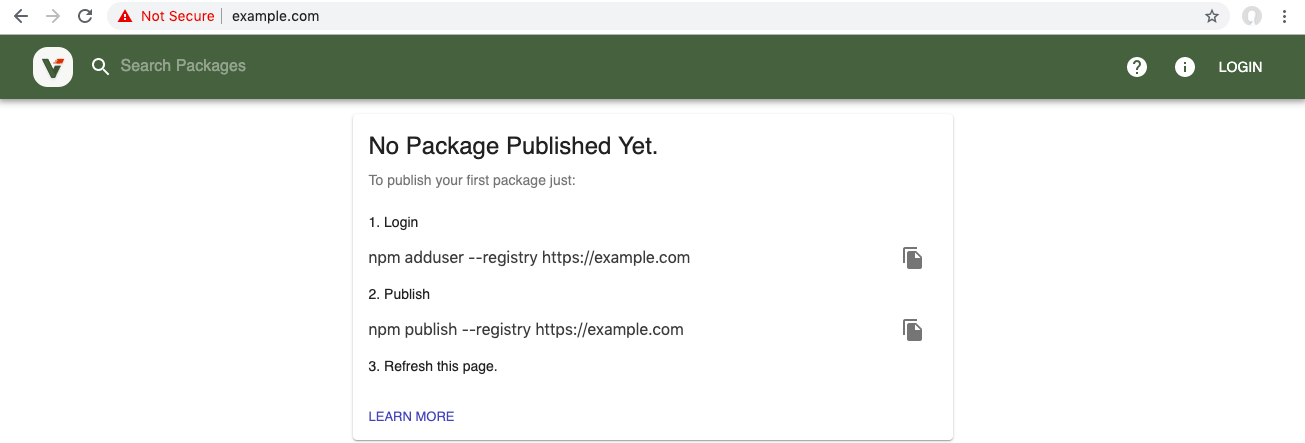
2. URLにアクセス
ローカルPC内の/etc/hostsを変更します。
<IP> example.com
この後chromeでexample.comで確認。
もしローカルPCでDockerを走らせている場合は以下でテスト。
127.0.0.1 example.com
3. npm adduser --publish http://IP:4873
テストはEC2のIPを使う。
logging
verdaccio | http <-- 201, user: qqq(<IP>), req: 'PUT /-/user/org.couchdb.user:qqq', bytes: 141/72
4. GUI login
logging
verdaccio | http <-- 200, user: qqq(<IP> via <IP>), req: 'POST /-/verdaccio/login', bytes: 35/339
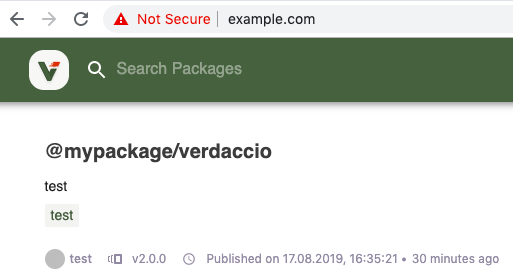
5. npm publish --registry http://IP:4873
logging
+ @mypackage/verdaccio@2.0.0

+

verdaccio       |  http <-- 201, user: qqq(<IP>), req: 'PUT /@mypackage%2fverdaccio', bytes: 2867/53
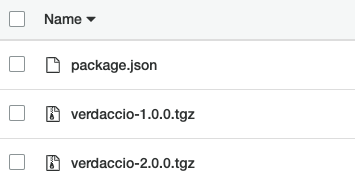
6. s3で確認
6. GUIで確認
ドメインを取得後
以下に変える
STAGE: production
学んだこと
1) /etc/hostsを使ってローカルPCからテストする方法
2) https-portalの使い方、Rate Limitsに気をつける