In this post, we feature a comprehensive Selenium Name Locator Example in Automation Scripts.
1. Introduction
Selenium is used to automate browsers. Selenium WebDriver has found its place in test automation for web applications. It is used to create robust, browser-based regression automation suites and tests. It can be used for end to end testing of an application. This ensures that the application works as designed. Selenium supports various programming languages such as C#, Haskell, Java, Javascript, Python and Ruby through Selenium drivers. Selenium supports various browsers such as chrome, firefox, safari, opera and internet explorer.
The crux of Selenium is the element locator. Selenium supports the following locators:
- id
- name
- link text
- partial link text
- tag name
- class name
- CSS
- XPath
Out of these, predominantly XPath and CSS are powerful enough to cover a variety of scenarios and is the most widely used. It is preferable to use CSS selector while leveraging XPath for advanced selection.
2. Selenium Name Locator
Let us start with a simple HTML page which we will use to cover our testing scenario.
Index.html
<!DOCTYPE html>
<html lang="en">

<head>
    <meta charset="UTF-8">
    <title>Index</title>
    <style type="text/css">
        #index {
            margin: 30vh;
        }
    </style>
</head>

<body>
    <div id="index">
        Enter your name:<input name="username" type="text" />
        <br />
        Enter your sex:
        <input name="sex" value="Male" type="radio"> Male
        <input name="sex" value="Female" type="radio"> Female
        <input name="sex" value="Non Binary" type="radio"> Non Binary
        <pre id="display"></pre>
    </div>
    <script type="text/javascript">
        function radioElement(elementName, targetFunction) {
            var radioElements = document.getElementsByName("sex");
            for (var i = 0; i < radioElements.length; i++) {
                targetFunction(radioElements[i]);
            }
        }

        document.getElementsByName("username")[0].addEventListener("change", function (event) {
            var result = "";
            radioElement("sex", function (element) {
                if (element.checked) {
                    result = element.value;
                }
            });
            document.getElementById("display").innerHTML = "Hi " + event.target.value + "(" + result + ")";
        });

        radioElement("sex", function (element) {
            element.addEventListener("change", function (event) {
                document.getElementById("display").innerHTML = "Hi " + document.getElementsByName(
                        "username")[0]
                    .value + "(" + event.target.value + ")";
            })
        });
    </script>
</body>

</html>
- The HTML page contains two elements – a text box and radio button
- Textbox collects the name of the person filling the form
- The radio button collects the gender
- JavaScript does some lightweight dynamic behavior. As soon as the username is filled or appropriate sex is selected, the selected information is displayed on the webpage.
In this post, We will validate the dynamic behavior using selenium tests. Next step is creating the Selenium java project. We will use Ṁaven to create the project
pom.xml
<?xml version="1.0" encoding="UTF-8"?>
<project xmlns="http://maven.apache.org/POM/4.0.0"
         xmlns:xsi="http://www.w3.org/2001/XMLSchema-instance"
         xsi:schemaLocation="http://maven.apache.org/POM/4.0.0 http://maven.apache.org/xsd/maven-4.0.0.xsd">
    <modelVersion>4.0.0</modelVersion>

    <groupId>com.jcg</groupId>
    <artifactId>seleniumNameLocator</artifactId>
    <version>1.0-SNAPSHOT</version>
    <dependencies>
        <dependency>
            <groupId>junit</groupId>
            <artifactId>junit</artifactId>
            <version>4.12</version>
            <scope>test</scope>
        </dependency>
        <dependency>
            <groupId>org.seleniumhq.selenium</groupId>
            <artifactId>selenium-java</artifactId>
            <version>3.13.0</version>
            <scope>test</scope>
        </dependency>
    </dependencies>
</project>
- In this maven project, we specify selenium as the dependency which is used to automate web testing.
- Junit is specified as the test framework for executing the test cases.
The next step is creating a test class to execute the test cases
NameLocatorTests.java
package com.jcg.selenium;

import org.junit.*;
import org.openqa.selenium.By;
import org.openqa.selenium.Keys;
import org.openqa.selenium.WebDriver;
import org.openqa.selenium.WebElement;
import org.openqa.selenium.chrome.ChromeDriver;
import org.openqa.selenium.chrome.ChromeOptions;

public class NameLocatorTests {

    WebDriver webDriver;

    public static final String file = "file:///index.html";

    @BeforeClass
    public static void setUp() {
        System.setProperty("webdriver.chrome.driver", "chromedriver");
    }

    @Before
    public void initializeDriver() {
        ChromeOptions options = new ChromeOptions();
        webDriver = new ChromeDriver(options);
    }

    @After
    public void closeDriver() {
        webDriver.quit();
    }
}
- The Webdriver is initialized by specifying the path to the chrome web driver and providing default options.
- Using the
@Afterannotation indicates the method will be executed after each test case. In thecloseDrivermethod, webDriver is closed to release the resource and also close the browser.
2.1 Find Element
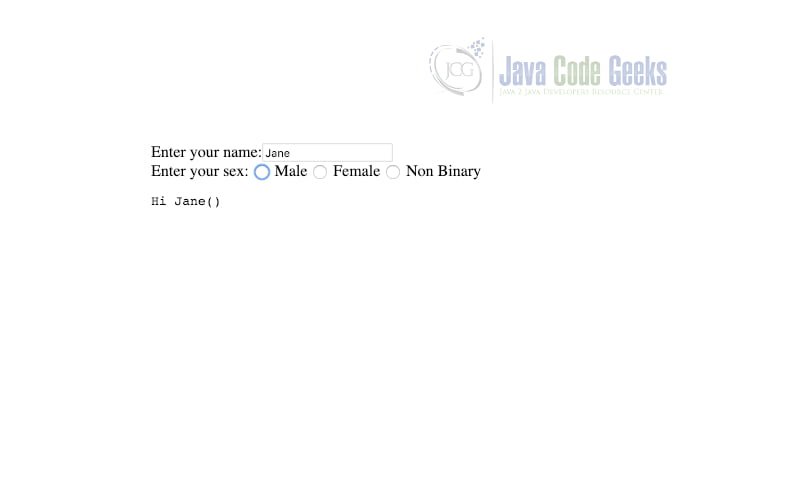
Considering the above HTML page, We need to validate the entered username in the displayed section. For this purpose, we will use the name locator of Selenium to verify the value entered.

NameLocatorTests.java(findElement)
 @Test
    public void findElement() {
        String name = "Jane";
        enterUserName(name);
        Assert.assertEquals("Hi " + name + "()",
                webDriver.findElement(By.id("display")).getText());
    }

    private WebElement enterUserName(String name) {
        webDriver.navigate().to(file);
        WebElement webElement = webDriver.findElement(By.name("username"));
        webElement.sendKeys(name);
        webElement.sendKeys(Keys.TAB);
        return webElement;
    }
findElementis the test case being executed.enterUsernametakes care of navigating to the URL provided. In this case, it is the local file.- Once there, we fill in the name of the user by locating the Username textbox. To locate the Username textbox, We use the name locator
(By.name) - Once the element is located, we provide the text Jane to the element
- After which we press the TAB key to ensure the text is displayed in the HTML page.
- We assert the value of display finally in the test case to verify the entered output.
The output of the webpage is provided here to understand the test case execution.
2.2 Find Elements
We identified the username element and provided the name in the previous section. This section covers finding multiple elements with a name and selecting the appropriate element.
NameLocatorTests.java(findElements)
 @Test
    public void findElements(){
        String name = "Jane";
        enterUserName(name);
        WebElement webElement = webDriver.findElements(By.name("sex")).get(1);
        webElement.click();
        webElement.sendKeys(Keys.TAB);
        Assert.assertEquals("Hi " + name + "(Female)",
                webDriver.findElement(By.id("display")).getText());
    }
- Entering the username part is extended from the previous test case.
- We use the name locator to find all radio buttons for sex.
- The array index position is used to select the female button.
- Assertion logic is similar to the previous case but here the full text is validated. A sample screenshot is provided below

3. Summary
In this post, we looked at the locators available in Selenium. We looked at the name locator in a detailed manner with examples.
4. Download the Source Code
You can download the full source code of this example here: Selenium Name Locator Example
