Hello there. Thank you for showing interest in Spring WebSockets Example. In this example we will learn how to send and receive messages between a browser and a server over a WebSocket. A WebSocket is used to build an interactive web application. WebSocket is a lightweight layer above TCP.
We will be creating a football live commentary web application to demonstrate Spring WebSockets. We will use STOMP messaging with Spring to create this interactive web application.
1. Assumptions
This article assumes that you know your way around Eclipse. You are familiar with Maven and Spring. This project has been created using Eclipse Oxygen so all instructions are based on this IDE. Basically, this article assumes that you have done some coding.
2. Tools
3. Project Setup
To start, we create our project. This can be done in Eclipse by going to File -> New -> Maven Project and fill up what is required.
Our pom.xml should look like the one below:
pom.xml
<project xmlns="http://maven.apache.org/POM/4.0.0" xmlns:xsi="http://www.w3.org/2001/XMLSchema-instance" xsi:schemaLocation="http://maven.apache.org/POM/4.0.0 http://maven.apache.org/xsd/maven-4.0.0.xsd">
  <modelVersion>4.0.0</modelVersion>
  <groupId>com.javacodegeeks.example</groupId>
  <artifactId>spring-websockets-example</artifactId>
  <version>0.0.1-SNAPSHOT</version>

  <parent>
    <groupId>org.springframework.boot</groupId>
    <artifactId>spring-boot-starter-parent</artifactId>
    <version>2.1.6.RELEASE</version>
  </parent>

  <dependencies>
    <dependency>
      <groupId>org.springframework.boot</groupId>
      <artifactId>spring-boot-starter-websocket</artifactId>
    </dependency>
    <dependency>
      <groupId>org.webjars</groupId>
      <artifactId>webjars-locator-core</artifactId>
    </dependency>
    <dependency>
      <groupId>org.webjars</groupId>
      <artifactId>sockjs-client</artifactId>
      <version>1.0.2</version>
    </dependency>
    <dependency>
      <groupId>org.webjars</groupId>
      <artifactId>stomp-websocket</artifactId>
      <version>2.3.3</version>
    </dependency>
    <dependency>
      <groupId>org.webjars</groupId>
      <artifactId>bootstrap</artifactId>
      <version>3.3.7</version>
    </dependency>
    <dependency>
      <groupId>org.webjars</groupId>
      <artifactId>jquery</artifactId>
      <version>3.1.0</version>
    </dependency>
  </dependencies>
    <properties>
      <java.version>1.8</java.version>
    </properties>

    <build>
      <plugins>
        <plugin>
          <groupId>org.springframework.boot</groupId>
          <artifactId>spring-boot-maven-plugin</artifactId>
        </plugin>
      </plugins>
    </build>
</project>
As shown above, our project has 6 dependencies. We are using spring-boot-starter-websocket which means that we can use all the Spring modules included in it. For example, the Spring Core, Spring Messaging and Spring WebSocket modules will be available for us to use plus many more (e.g. Jackson dependencies for JSON processing). The next dependency is the WebJars. WebJars are client side dependencies packaged into JAR archive files. Lastly, the Spring Boot Maven plugin enables us to package the project as an executable jar.
4. STOMP Message Service
Our web application, the football live commentary service will receive messages containing a commentary. This is contained in a STOMP message whose body is a JSON object. The POJO below models the message carrying the commentary.
Commentary.java
package example;

public class Commentary {

	private String commentary;

    public Commentary() {
    }

    public Commentary(String commentary) {
        this.commentary = commentary;
    }

    public String getCommentary() {
        return commentary;
    }

    public void setCommentary(String commentary) {
        this.commentary = commentary;
    }
}
The Jackson JSON library automatically marshalls object creation based on the JSON object received. For example, if this is received, { "commentary": "referee whistles to start the game"}, Jackson automatically creates a Commentary object and the value of the commentary field is “referee whistles to start the game”.
The POJO below models the message carrying the comment. This comment is published to all the subscribers of the live commentary (/topic/commentary).
Comment.java
package example;

public class Comment {
	private String comment;

    public Comment() {}

    public Comment(String comment) {
        this.comment = comment;
    }

    public String getComment() {
        return comment;
    }
}
The Comment object is also automatically converted into a JSON object by the Jackson JSON library. So the above example will become { "comment": "referee whistles to start the game"}.
5. Controller
Below is our message handling controller. STOMP messages are routed to this class.
CommentaryController.java
package example;

import org.springframework.messaging.handler.annotation.MessageMapping;
import org.springframework.messaging.handler.annotation.SendTo;
import org.springframework.stereotype.Controller;
import org.springframework.web.util.HtmlUtils;

@Controller
public class CommentaryController {

	@MessageMapping("/live-comment")
    @SendTo("/topic/commentary")
    public Comment liveComment(Commentary message) throws Exception {
        return new Comment(HtmlUtils.htmlEscape(message.getCommentary()));
    }
}
All messages sent to /live-comment are handled by this method. As mentioned above, JSON objects are automatically marshalled into Commentary and Comment Java objects. The processing of the message is asynchronous so the client may continue with working without waiting for a response. Once processing has finished, Comment is sanitized and is broadcasted to all subscribers of /topic/commentary.
6. Spring WebSockets Configuration
The code below configures Spring to enable WebSockets.
WebSocketConfig.java
package example;

import org.springframework.context.annotation.Configuration;
import org.springframework.messaging.simp.config.MessageBrokerRegistry;
import org.springframework.web.socket.config.annotation.EnableWebSocketMessageBroker;
import org.springframework.web.socket.config.annotation.StompEndpointRegistry;
import org.springframework.web.socket.config.annotation.WebSocketMessageBrokerConfigurer;

@Configuration
@EnableWebSocketMessageBroker
public class WebSocketConfig implements WebSocketMessageBrokerConfigurer {

    @Override
    public void configureMessageBroker(MessageBrokerRegistry config) {
        config.enableSimpleBroker("/topic");
        config.setApplicationDestinationPrefixes("/app");
    }

    @Override
    public void registerStompEndpoints(StompEndpointRegistry registry) {
        registry.addEndpoint("/football-live-commentary").withSockJS();
    }

}
@Configuration tells Spring that this is a configuration class. @EnableWebSocketMessageBroker enables WebSocket message handling that is backed by a messge broker. WebSocketMessageBrokerConfigurer defines methods for configuring message handling with STOMP.
In the configureMessageBroker, we enable a simple memory-based message broker with the prefix “/topic”. This broker carries the messages back to the client. In our case, the message is sent to “/topic/commentary”. The setApplicationDestinationPrefixes method prefixes “/app” to the messages bound for @MessageMapping annotated methods. In our case, “/app/live-comment” is the endpoint that the CommentaryController.liveComment() method is mapped to handle.
Lastly, we register the “/football-live-commentary” endpoint. The SocksJS client will connect to this endpoint and use the best transport available.
7. Browser Client Code
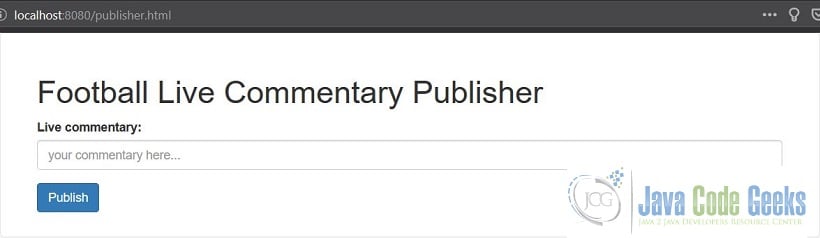
The HTML code below is responsible for publishing the live football comments.
publisher.html
<!DOCTYPE html>
<html>
<head>
    ...snipped...

    <script src="/app.js"></script>
</head>
<body onload="connect()" onunload="disconnect()">
<div id="main-page" class="container">
    ...snipped...
            <form>
                <div class="form-group">
                    <label for="name">Live commentary: </label>
                    <input type="text" id="commentary" class="form-control" placeholder="your commentary here...">
                </div>
                <button id="publish" class="btn btn-primary" type="submit">Publish</button>
            </form>
     ...snipped...
</div>
</body>
</html>
Some lines have been snipped. When this page is loaded, it connects to live football commentary endpoint and subscribes to the commentary. It disconnects from the endpoint when it is unloaded. When the publish button is clicked, the commentary is sent to the “/app/live-comment” endpoint. More details are explained below in the “app.js” section.
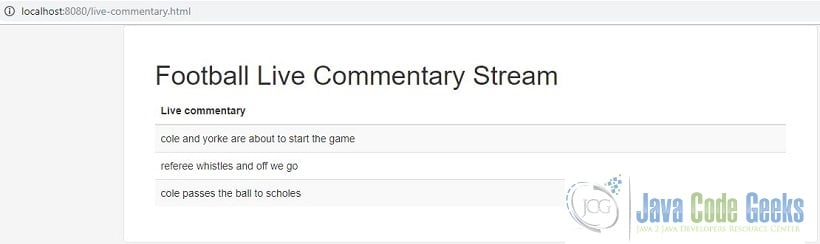
The HTML code below is responsible for displaying the football live commentary stream.
live-commentary.html
<!DOCTYPE html>
<html>
<head>
    ...snipped...

    <script src="/app.js"></script>
</head>
<body onload="connect()" onunload="disconnect()">
<div id="main-page" class="container">
    ...snipped...
			<table id="commentary" class="table table-striped">
                <thead>
                <tr>
                    <th>Live commentary</th>
                </tr>
                </thead>
                <tbody id="comment">
                </tbody>
            </table>
     ...snipped...
</div>
</body>
</html>
The same as publisher.html, some lines have been snipped and when this page is loaded, it connects to live football commentary endpoint and subscribes to the commentary. When this page is unloaded, it disconnects from the from the endpoint. When a new commentary is received a new row is added to the table displaying the comment. More details are explained below in the “app.js” section.
app.js
var stompClient = null;

function connect() {
	var socket = new SockJS('/football-live-commentary');
    stompClient = Stomp.over(socket);
    stompClient.connect({}, function (frame) {
        console.log('Connected: ' + frame);
        stompClient.subscribe('/topic/commentary', function (comment) {
            showComment(JSON.parse(comment.body).comment);
        });
    });
}

function disconnect() {
    if (stompClient !== null) {
        stompClient.disconnect();
    }
    console.log("Disconnected");
}


function sendCommentary() {
    stompClient.send("/app/live-comment", {}, JSON.stringify({'commentary': $("#commentary").val()}));
    $("#commentary").val('');
}

function showComment(comment) {
    $("#comment").append("" + comment + "");
}

$(function () {
    $("form").on('submit', function (e) {
        e.preventDefault();
    });

    $("#publish").click(function() { sendCommentary(); });
});
I bet that based on the function names, you’ll now what it is supposed to do. The connect() function connects to “/football-live-commentary” then subscribes to “/topic/commentary”. Whenever there is a message, it is then displayed by appending a row in the table (showComment() handles this operation). The disconnect() function disconnects the STOMP client. The sendCommentary() function sends a message to the “/app/live-comment” endpoint. The anonymous function cancels the event when a form is submitted. The sendCommentary function is triggered when the publish button is clicked.
8. Running the Spring WebSockets Example
The code below makes this application executable. We don’t need to deploy this as a WAR file to an application server. Everything is packaged in a single, executable JAR file, driven by the main() method. The tomcat servlet container is embedded as the HTTP runtime.
Application.java
package example;

import org.springframework.boot.SpringApplication;
import org.springframework.boot.autoconfigure.SpringBootApplication;

@SpringBootApplication
public class Application {

    public static void main(String[] args) {
        SpringApplication.run(Application.class, args);
    }
}
We can execute mvn spring-boot:run in the command-line to run this application. We could also right click on Application.java -> Run As -> Java Application to run this application. We will see the familiar Spring log ouput after executing the command to run the application like so:
Console Output
  .   ____          _            __ _ _
 /\\ / ___'_ __ _ _(_)_ __  __ _ \ \ \ \
( ( )\___ | '_ | '_| | '_ \/ _` | \ \ \ \
 \\/  ___)| |_)| | | | | || (_| |  ) ) ) )
  '  |____| .__|_| |_|_| |_\__, | / / / /
 =========|_|==============|___/=/_/_/_/
 :: Spring Boot ::        (v2.1.6.RELEASE)

...snipped...

2019-08-01 17:49:30.957  INFO 7136 --- [           main] o.s.b.a.w.s.WelcomePageHandlerMapping    : Adding welcome page: class path resource [static/index.html]
2019-08-01 17:49:31.031  INFO 7136 --- [           main] o.s.m.s.b.SimpleBrokerMessageHandler     : Starting...
2019-08-01 17:49:31.032  INFO 7136 --- [           main] o.s.m.s.b.SimpleBrokerMessageHandler     : BrokerAvailabilityEvent[available=true, SimpleBrokerMessageHandler [DefaultSubscriptionRegistry[cache[0 destination(s)], registry[0 sessions]]]]
2019-08-01 17:49:31.032  INFO 7136 --- [           main] o.s.m.s.b.SimpleBrokerMessageHandler     : Started.
2019-08-01 17:49:31.070  INFO 7136 --- [           main] o.s.b.w.embedded.tomcat.TomcatWebServer  : Tomcat started on port(s): 8080 (http) with context path ''
2019-08-01 17:49:31.073  INFO 7136 --- [           main] example.Application                      : Started Application in 3.065 seconds (JVM running for 3.544)
2019-08-01 17:50:30.649  INFO 7136 --- [MessageBroker-1] o.s.w.s.c.WebSocketMessageBrokerStats    : WebSocketSession[0 current WS(0)-HttpStream(0)-HttpPoll(0), 0 total, 0 closed abnormally (0 connect failure, 0 send limit, 0 transport error)], stompSubProtocol[processed CONNECT(0)-CONNECTED(0)-DISCONNECT(0)], stompBrokerRelay[null], inboundChannel[pool size = 0, active threads = 0, queued tasks = 0, completed tasks = 0], outboundChannel[pool size = 0, active threads = 0, queued tasks = 0, completed tasks = 0], sockJsScheduler[pool size = 1, active threads = 1, queued tasks = 0, completed tasks = 0]
Go to http://localhost:8080/live-commentary.html to see the live commentary. Go to http://localhost:8080/publisher.html to publish the comments. Whatever is published will automatically be displayed in the live commentary page.
9. Spring WebSockets Example Summary
We start with adding the necessary dependencies in the project object model to create our example application. Next, we create the Java classes that model our message. After that, we created the controller that will handle the messages. And then we configured Spring to enable WebSocket and STOMP messaging. We then made the JavsScript client code that connects to our message broker. Lastly, we made the application executable. That is all there is to it. Have a happy Spring WebSocket day!
10. Download the Source Code
This is an example about Spring WebSockets.
You can download the source code of this example here: Spring WebSockets Example
