2019年5月に公開された、Visual Studio Code でリモートマシン、コンテナ、Windows Subsystem for Linux (WSL) 上のワークスペースを開くことができるようになる拡張機能群「Remote Development Extension Pack」を使ってみました。
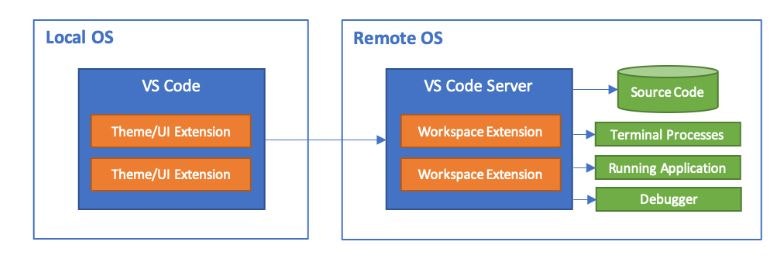
この拡張パックを導入すると、手元の「Visual Studio Code」からリモート環境へ接続し、そこでアプリ開発等を行うことが可能になります。
今回は、Microsoftのレポジトリ VSCode Remote Try Nodeを元に、Node.jsからRedisを扱うDockerコンテナに接続する設定をやってみます。
1 Visual Studio Codeのバージョン確認
Stable 版では (version 1.35) リリース以降で Remote Development 拡張が利用可能です。
バージョンが古い場合は、Visual Studio Code の [ヘルプ]->[更新の確認] または https://code.visualstudio.com/updates 等から最新版にアップデートしてください。
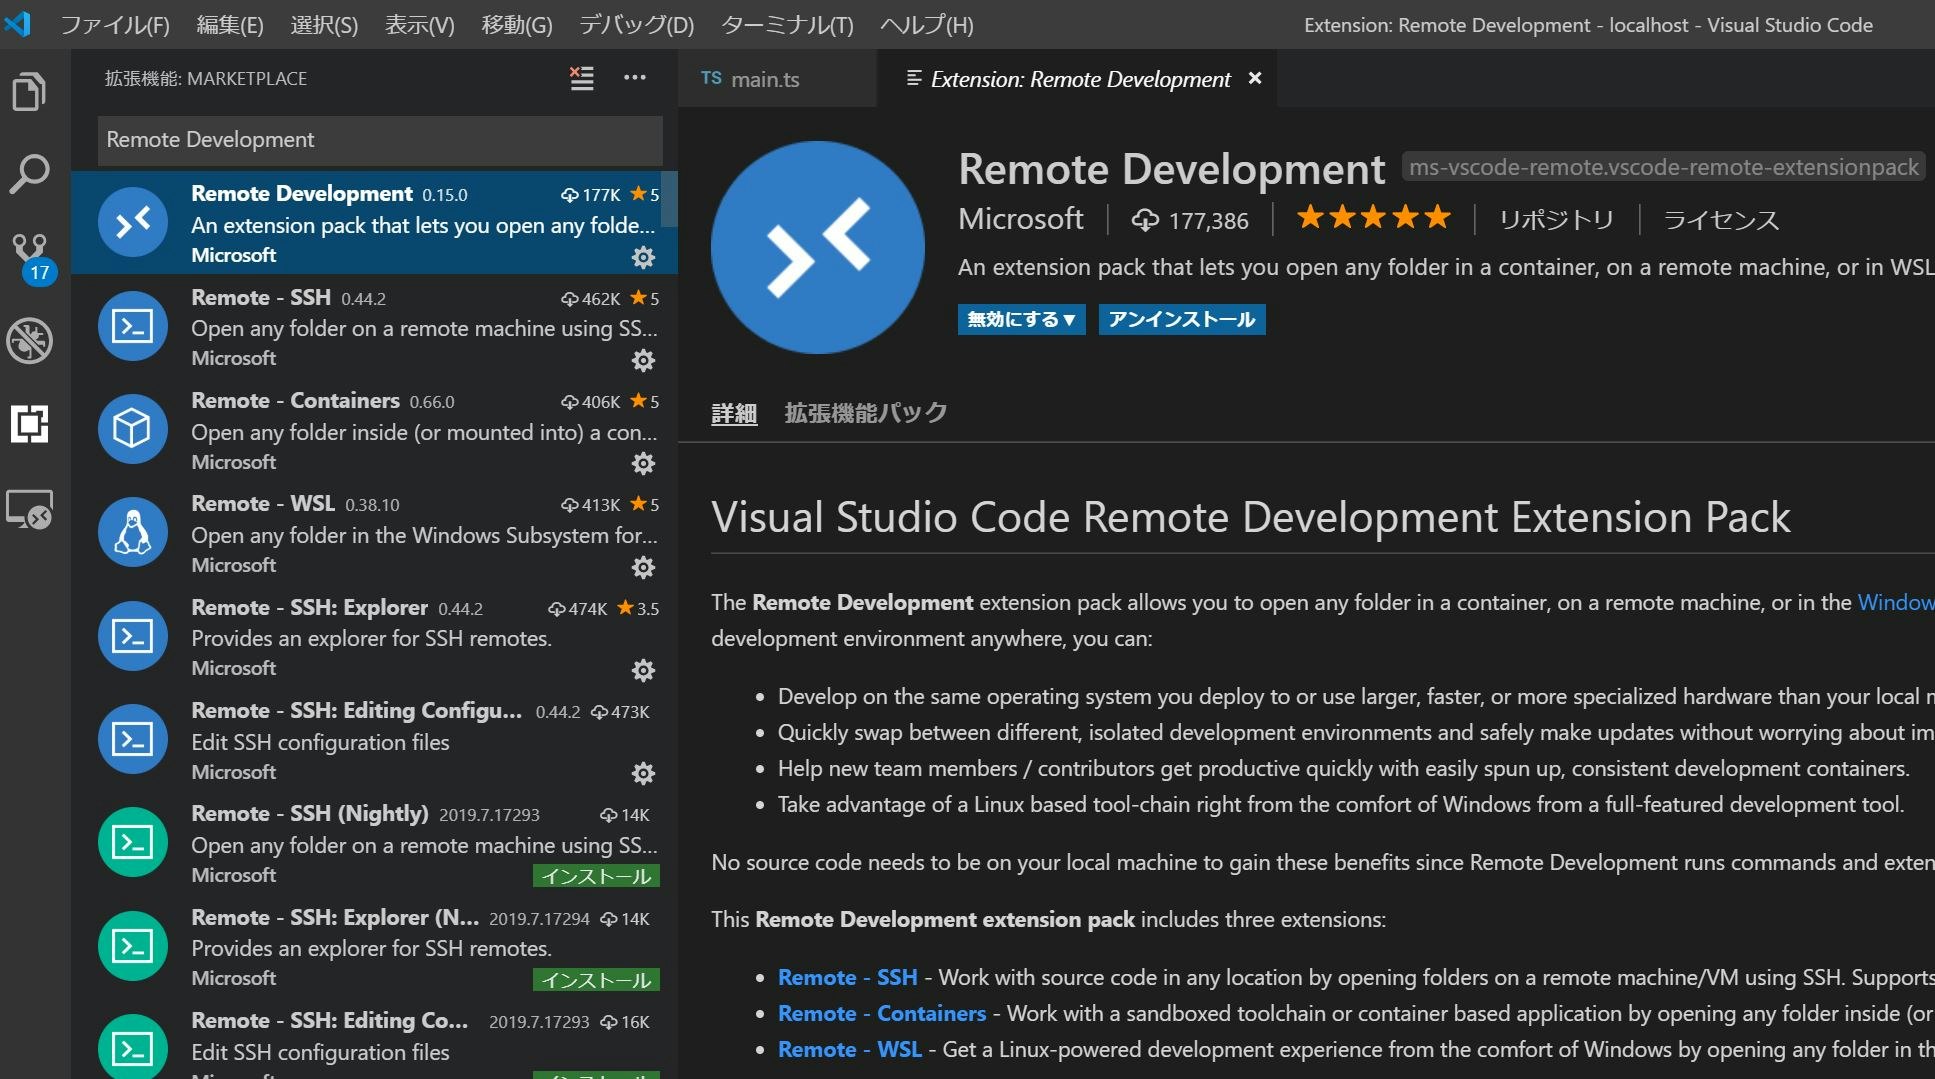
2 拡張機能Remote Developmentのインストール
Visual Studio Codeで拡張機能"Remote Development"を検索し、インストールしてください。
3 プロジェクトの構成
Microsoftのレポジトリ VSCode Remote Try Nodeをクローンし、最低限のディレクトリ構成を揃えた後、必要なファイルを加除していきます。
[Project Home]
|_ .devcontainer
|    |_  devcontainer.json
|    |_ ubuntu-bionic-core-cloudimg-amd64-root.tar.gz
|
|_ .vscode
|    |_  launch.json
|
|_  build
|    |_  server.js
|_  src
|    |_  server
|         |_  main.ts
|_  store
|    |_  redis
|         |_  .gitkeep
|
|_  Dockerfile
|_  docker-compose.yml
|_  package.json
|_ tsconfig.json
|_ tslint.json
|_  webpack.config.js
公式ではDockerfileを .devcontainer 以下に配置していますが、 ホームディレクトリ上のローカルフォルダ store/redis とDockerコンテナ上のディレクトリを同期してデータ永続化したいので、ホームディレクトリ直下に配置しています。
また、公式では、node:10イメージをベースを使っていますが、 今回は、Linuxイメージ上に npm, node.jsをインストールしたコンテナを作成し、redis コンテナとリンクする構成をやってみたいと思います。
当初、軽量Linuxの代表格alpineをベースにしようとしましたが、どうやら Stable版のVSCode上で動くRemote Developmentではalpineをサポートしていないようなので、やむなくMinimum Ubuntuを使うことにしました。
MInimum Ubuntuのイメージファイルは以下のレポジトリからダウンロードし、.devcontainer以下に配置しました。
4 Remote Development の設定
devcontainer.json
{
    "name": "node.js and redis sample ",
    "dockerComposeFile": [
        "../docker-compose.yml"
    ],
    "service": "node",
    "appPort": 3000,
    "extensions": [
        "VisualStudioExptTeam.vscodeintellicode",
        "dbaeumer.vscode-eslint",
        "eg2.tslint"
    ],
    "settings": {
        "terminal.integrated.shell.linux": "/bin/bash"
    },
    "shutdownAction": "none"
}
主要な設定項目としては、
- service で node.jsを稼働するコンテナのサービス名を指定
- appPort で node.js上でlistenするportを指定
- dockerComposeFileでdocker-compose.ymlの相対パスを指定
- extensions でリモート上のVSCodeで使う拡張機能を追加
ちなみに、普段使っているVSCodeの拡張機能一覧は
code --list-extensions | xargs -L 1 echo code --install-extension
で取得できます。
5 Docker の設定
Dockerfile
FROM scratch
ADD .devcontainer/ubuntu-bionic-core-cloudimg-amd64-root.tar.gz /
RUN set -xe \
    \
    && echo '#!/bin/sh' > /usr/sbin/policy-rc.d \
    && echo 'exit 101' >> /usr/sbin/policy-rc.d \
    && chmod +x /usr/sbin/policy-rc.d \
    \
    && dpkg-divert --local --rename --add /sbin/initctl \
    && cp -a /usr/sbin/policy-rc.d /sbin/initctl \
    && sed -i 's/^exit.*/exit 0/' /sbin/initctl \
    \
    && echo 'force-unsafe-io' > /etc/dpkg/dpkg.cfg.d/docker-apt-speedup \
    \
    && echo 'DPkg::Post-Invoke { "rm -f /var/cache/apt/archives/*.deb /var/cache/apt/archives/partial/*.deb /var/cache/apt/*.bin || true"; };' > /etc/apt/apt.conf.d/docker-clean \
    && echo 'APT::Update::Post-Invoke { "rm -f /var/cache/apt/archives/*.deb /var/cache/apt/archives/partial/*.deb /var/cache/apt/*.bin || true"; };' >> /etc/apt/apt.conf.d/docker-clean \
    && echo 'Dir::Cache::pkgcache ""; Dir::Cache::srcpkgcache "";' >> /etc/apt/apt.conf.d/docker-clean \
    \
    && echo 'Acquire::Languages "none";' > /etc/apt/apt.conf.d/docker-no-languages \
    \
    && echo 'Acquire::GzipIndexes "true"; Acquire::CompressionTypes::Order:: "gz";' > /etc/apt/apt.conf.d/docker-gzip-indexes \
    \
    && echo 'Apt::AutoRemove::SuggestsImportant "false";' > /etc/apt/apt.conf.d/docker-autoremove-suggests

RUN rm -rf /var/lib/apt/lists/*

RUN sed -i 's/^#\s*\(deb.*universe\)$/\1/g' /etc/apt/sources.list

RUN mkdir -p /run/systemd && echo 'docker' > /run/systemd/container

# Configure apt and install packages
RUN apt-get update && \
    yes | apt-get install \
    curl \
    git \
    npm \
    nodejs
WORKDIR /home
SHELL ["/bin/bash", "-c"]
基本的に、https://github.com/tianon/docker-brew-ubuntu-core/blob/59aa7dfef17153ecc812adbf26516675ce67e8aa/bionic/Dockerfile のままです。追加項目として、#Configure apt and install packages以下で、必要なモジュールをインストールするようにします。
docker-compose.yml
version: '3'
services:
  node:
    build:
       context: .
       dockerfile: Dockerfile
    container_name: node-container
    volumes:
      - .:/home
    ports:
       - 3000:3000
    command: sh -c 'npm install & node build/server.js'
    links:
      - "redis"
  redis:
    restart: always
    container_name: redis-container
    image: redis:latest
    volumes:
        - ./store/redis:/data
    ports:
        - "6379:6379"
    command: redis-server --appendonly yes
上記のDockerfileを走らせて作成するnodeイメージと、Official Imageのredis:latestイメージをリンクします。
特記事項として、redis側でローカルのstore/redisとコンテナ側のdataフォルダを同期し、データの永続化を行っています。
6 package.jsonの設定
今回は、Webpackを使ってTypeScriptをトランスパイルする例です。
2019年7月現在の、webpackの最新バージョン 4.29.0 では Maximum Call Stackのエラーが出てしまうため、旧バージョンを指定しています。
{
  "name": "node.js and redis sample",
  "version": "1.0.0",
  "devDependencies": {
    "@types/app-root-path": "",
    "@types/express": "",
    "@types/node": "",
    "@types/redis": "",
    "path": "",
    "ts-loader": "",
    "tslint": "",
    "tslint-loader": "",
    "typescript": "",
    "webpack": "4.17.1",
    "webpack-cli": "",
    "webpack-node-externals": ""
  },
  "dependencies": {
    "app-root-path": "",
    "express": "",
    "redis": ""
  },
  "private": true
}
7 Node.jsによるサーバ設定
expressでWebサーバを立ち上げ、redisでPOSTの回数をカウントするという例です。
'use strict';
import * as root from 'app-root-path';
import * as express from 'express';
import * as redis from 'redis';

/**
 * Configure Redis
 */
const client: redis.RedisClient = redis.createClient(6379, 'redis');
client.on('connect', () => console.log('Connected to Redis'));
client.set('visit', '0');

/**
 * Configure Web Server
 */
const app: express.Application = express();
app.use(express.static('.'));
app.post('/api',  (_req: express.Request, res: express.Response) => {
    client.get('visit', (_err: Error|null , visit: string) => {
      res.send('POST request received. Number of Visits:' + visit);
      client.set('visit', String(parseInt(visit, 10) + 1));
  });
});

// tslint:disable-next-line:typedef
const port = process.env.PORT || 3000;
app.listen(port, () => console.log(`Server running on ${port}`));
8 実行
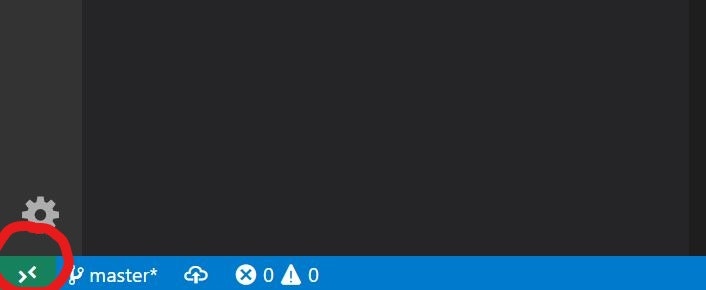
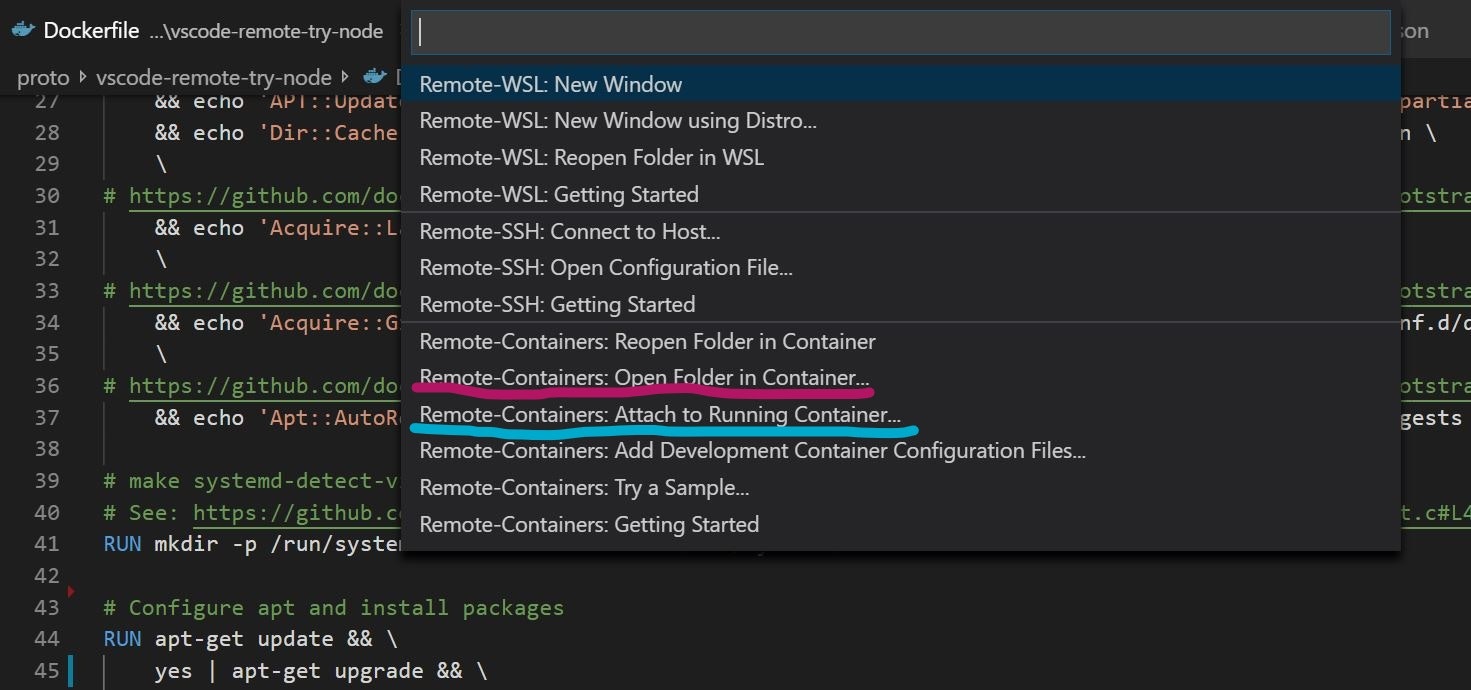
F1で拡張機能の一覧を表示するか、Visual Studioコードの左下の緑色のブラケットマークからRemoteデスクトップの機能一覧を表示します。
docker-compose up --build を既に一度走らせている場合は、「Attach to Running Container(水色)」を選択し、まだの場合は「Open Folder in Container(赤色)」で現在のホームディレクトリを指定すればdocker-compose up --build が自動的に走ります。ビルドに成功すると、Remote Development用のVSCodeのウィンドウが起動します。
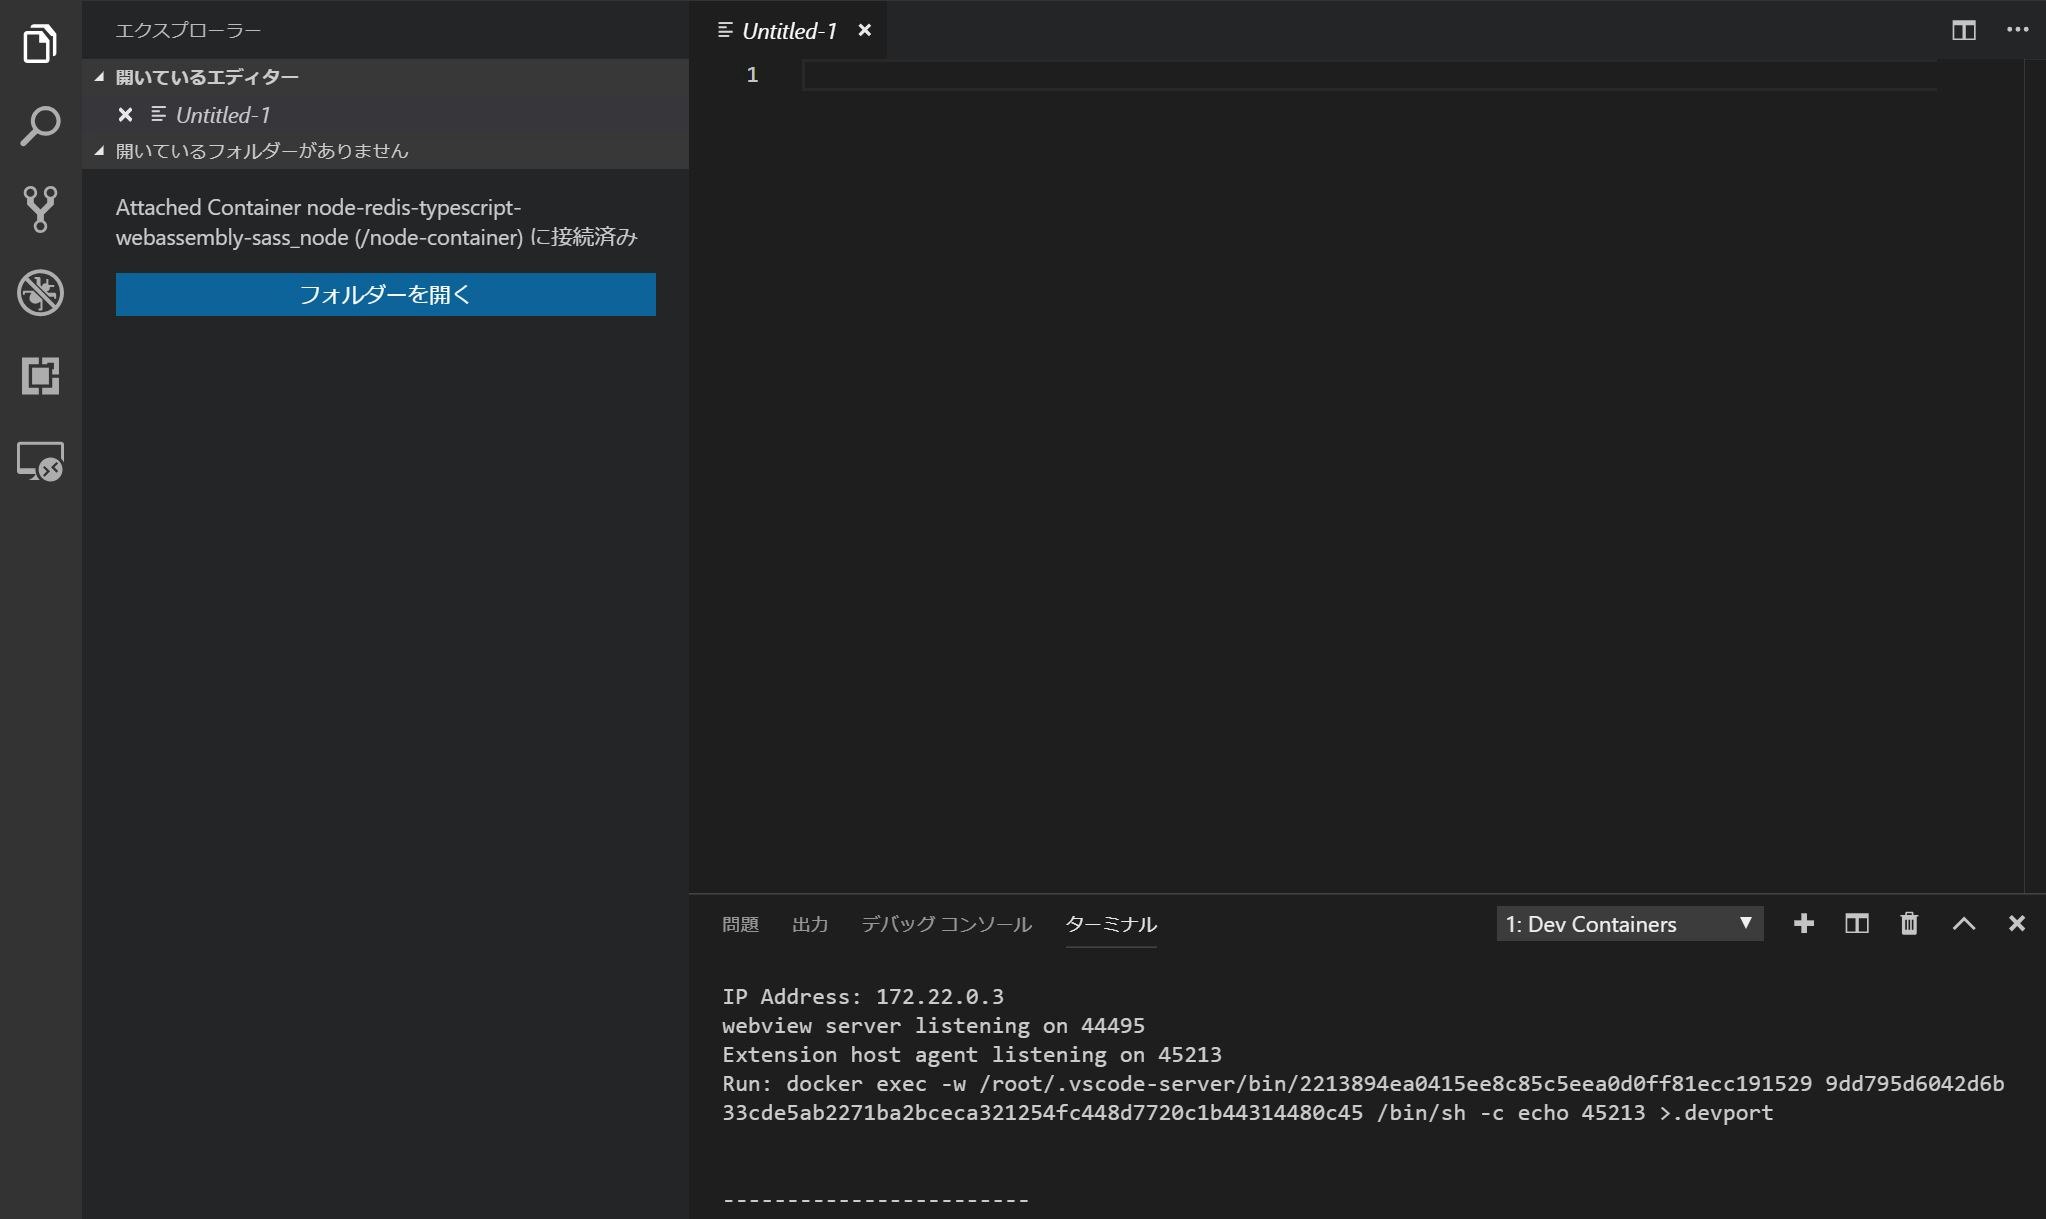
後は開いたウィンドウ上で「フォルダを開く」から任意のフォルダを開くと、コンテナ上のファイルをVS Codeで編集することができます。
9 Redisの動作確認
Remote Developmentとは直接関係ありませんが、Redisがきちんと動作しているか確認するには、curl -X POST(ローカル、コンテナ側のどちらからでも結構です) で以下のAPIを叩き、
curl -X POST http://localhost:3000/api
以下のようにPOSTの通算回数が返ってくれば成功です。
POST request received. Number of Visits:[POSTの回数]
10 参考にさせていただいたサイト
下記のページを参考にさせていただきました。
https://code.visualstudio.com/updates/v1_35
https://qiita.com/yoskeoka/items/01c52c069123e0298660
https://qiita.com/mizuhof/items/7bc20538c9fe1edcba40
https://katsu-tech.hatenablog.com/entry/2017/10/11/233024
https://blog.manabusakai.com/2018/08/minimal-ubuntu-dockerfile/
なお、今回の構成はGithubで公開していますので、ご指摘などあればよろしくお願いいたします![]()
https://github.com/snst-lab/vscode-remote-try-node-typescript-redis