いよいよtensorflowの画像認識をAzure App Serviceで動かす事にトライしました。
demo→1
※タイムアウトした場合もう一度画面更新してみて下さい。(FREE版なので都度起動しているので重たいようです。)
手順
もはや定型処理になりつつありますが、python拡張モジュールを入れて、ライブラリを追加します。
1.Google Colaboratoryだとtensorflowはライブラリとして用意されているので、今回はそちらを利用しました。こちらの記事を参考にcifar10h5の画像識別モデルを作成しました。これを一旦ローカルにダウンロードしてからAzure App Serviceにftpでアップロードして利用します。
2.AzureのWebappsはPythonサーバを作成。
3.webappsダッシュボードの「開発ツール」→「拡張機能」→「追加」でPython 3.6.4 x64を追加。
4.webappsダッシュボードの「高度なツール」→「移動」→「Debugconsole」→「CMD」→「フォルダ選択ができるのでPython364x64」を選んで、コンソール画面でライブラリを追加。
python -m pip install --upgrade pip
pip install Flask
pip install tensorflow
pip install Pillow
5.ファイル転送とjpegファイルをtensorflowが処理できる形式に変更する処理を加えてWebAppsアプリを作成します。
ソース
tensorUpload.html
{% extends "base.html" %}
{% block body %}

<form action="/upload" method="post" enctype="multipart/form-data">
<h2>アップロード</h2>

<table>
        <tr>
            <td><input type="file" name="uploadFile"/></td>
        </tr>

        <tr>
            <td><img src="{{ url_for('static', filename=file_url) }}"></td>
            <td>result = {{ result }}</td>
            <td><input type="submit" value="submit"/></td>
        </tr>
</table>
</form>

{% endblock %}
main.py
# -*- coding: utf-8 -*-
from common import *

import tensorflow as tf

application = Flask(__name__)
application.config.from_object(__name__)

##################################################################
# 初期メニュー
##################################################################
@application.route('/')
def index():
    return render_template('index.html')

#各画面からの戻りの時はこちら(/でうまく戻れないので) ※indexとIndexをわざと変えている
@application.route('/Index',methods=['POST'])
def Index():
    return render_template('index.html')


#**************************************
# アップロード
#**************************************
#アップロード画面初期表示
@application.route('/tensorUpload',methods=['POST'])
def tensorUpload():
    return render_template('Upload.html')


#***********************************************************************************
#  アップロードデータ作成  https://qiita.com/5zm/items/ac8c9d1d74d012e682b4
#***********************************************************************************

UPLOAD_DIR = "./static/result/"
label_names = ["airplane", "automobile", "bird", "cat",
               "deer", "dog", "frog", "horse", "ship", "truck"]

@application.route('/upload', methods=['POST'])
def upload():

    #アップロードファイルの読込
    if 'uploadFile' not in request.files:
        return render_template('Upload.html', file_url='', result = 'uploadFile is required')

    file = request.files['uploadFile']
    fileName = file.filename

    if '' == fileName:
        return render_template('Upload.html', file_url='', result = 'uploadFile is required')

    #アップロードファイルを保存
    try:
        #saveFileName = datetime.datetime.now().strftime("%Y%m%d_%H%M%S_") + fileName
        saveFileName = fileName
        os_saveFileName = os.path.join(UPLOAD_DIR, saveFileName)
        file.save(os_saveFileName)
        file_url = "result/" + saveFileName
    except:
        return render_template('Upload.html', file_url='', result = 'save  error')

    try:
        #モデルの読込
        model_loaded=tf.keras.models.load_model("./static/cifar10.h5")
        #画像の読込とtensorflowが処理できるように変換
        img_path = os_saveFileName
        img = tf.keras.preprocessing.image.load_img(img_path, target_size=(32, 32))
        x = tf.keras.preprocessing.image.array_to_img(img)
        x = np.expand_dims(x, axis=0)

    except:
        return render_template('Upload.html', file_url=file_url, result = 'model_load error')

    #アップロードファイルを識別
    try:
        pred = model_loaded.predict_classes(x)
        result = label_names[pred[0]]
    except:
        return render_template('Upload.html', file_url='', result = 'pred error')

    return render_template('Upload.html', file_url=file_url, status='ok',result = result)


#リクエストエンティティが大きすぎます
@application.errorhandler(werkzeug.exceptions.RequestEntityTooLarge)
def handle_over_max_file_size(error):
    print("werkzeug.exceptions.RequestEntityTooLarge")
    return 'result : file size is overed.'
#**************************************
#  サーバ起動  マルチスレッド指定 デフォルトはTrueの動きをするようだが。 https://qiita.com/5zm/items/251be97d2800bf67b1c6
#**************************************
if __name__ == '__main__':
    application.debug = True # デバッグ
    application.run(host='0.0.0.0', port=8000, threaded=True)
その他
【index.html】
{% extends "base.html" %}
{% block body %}

<div class="container">
  <table class="table table-striped table-condensed">
    <thead>

      <tr>
        <th>NO</th>
        <th>プログラム名</th>
        <th>リンク</th>
        <th>備考</th>
      </tr>
    </thead>
    <tbody>

      <tr>
          <th scope="row">1</th>
          <td>tensorflow画像識別</td>
          <td>
                  <form action="{{ url_for('upload') }}" style="display: inline" method="post">
                      <button type="submit" class="btn btn-default" style="width: 120px; padding: 5px;">Upload</button>
                  </form >
              </td>
          <td></td>
      </tr>

      <tr>
          <th scope="row">1</th>
          <td>ssd画像識別</td>
          <td>
                  <form action="{{ url_for('ssdUp') }}" style="display: inline" method="post">
                      <button type="submit" class="btn btn-default" style="width: 120px; padding: 5px;">SSD</button>
                  </form >
              </td>
          <td></td>
      </tr>
      </tbody>
  </table>
</div>

{% endblock %}
web.config、base.html、common.pyはこちらをご覧ください。
入力は適当なjpegファイルを選んでアップするとそれなりに判別してくれます。
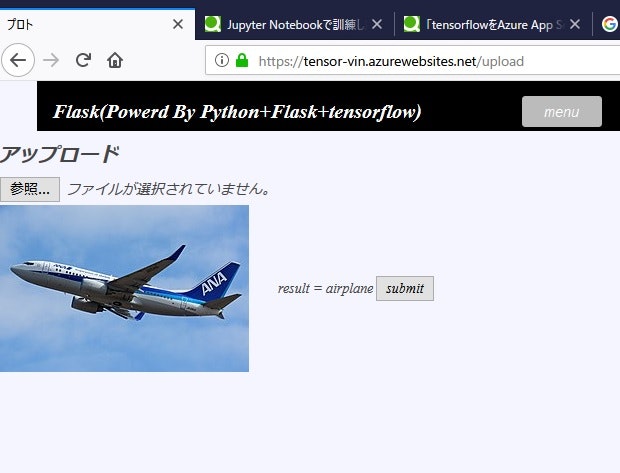
だいぶ機械学習らしいアプリになってきました。