概要
UITabBarControllerからUIViewControllerへの画面遷移をしたあと、もとのUITabBarControllerに戻る。StoryBoardを使わず、コードベースでの実装。
使用用途としては、UITabBarControllerをメインで使い、「ここから先はユーザ登録してね」みたいなときにUIViewControllerを表示する感じ。
結論
画面遷移はpresentを使えばできる。
self.present(<#T##遷移先のUIViewController##UIViewController#>, animated: true, completion: nil)
戻るときは、もう一回UITabBarControllerを作り直す。「戻る」とは言わない気がするけどご愛嬌。最初にUITabBarControllerからUIViewControllerへ画面遷移した時にUITabBarControllerのメモリが解放されるので、作り直すしかなさそう。
追記 2019/7/22
dismiss()で戻れるらしい。
環境
Swift4.2
Xcode10.1
準備
Xcodeを開くと「Welcome to Xcode」の画面が開く。「Create a new Xcode project」 --> 「Single View App」 とクリックしていく。プロジェクト名は何でもいいが、僕はSeniにした。プロジェクトを置く場所を適当に指定してプロジェクトを立ち上げる。
StoryBoardは使わないので、Main.storyboardは削除してよい。Seniプロジェクトの設定で、Deployment Info --> Main Interfaceを空欄にする。
実装
まず、AppDelegate.swiftのapplication関数内にコードを追加する。
import UIKit

@UIApplicationMain
class AppDelegate: UIResponder, UIApplicationDelegate {

    var window: UIWindow?

    func application(_ application: UIApplication, didFinishLaunchingWithOptions launchOptions: [UIApplication.LaunchOptionsKey: Any]?) -> Bool {

        // 最初にTabBarControllerを表示する。
        let tabBarController: UITabBarController = TabBarController() // 追加
        self.window = UIWindow(frame: UIScreen.main.bounds) // 追加
        self.window?.rootViewController = tabBarController // 追加
        self.window?.makeKeyAndVisible() // 追加

        return true
    }

    func applicationWillResignActive(_ application: UIApplication) {}
    func applicationDidEnterBackground(_ application: UIApplication) {}
    func applicationWillEnterForeground(_ application: UIApplication) {}
    func applicationDidBecomeActive(_ application: UIApplication) {}
    func applicationWillTerminate(_ application: UIApplication) {}
}
次に、ViewController.swiftにコードを追加する。
mport UIKit

class ViewController: UIViewController {

    override func viewDidLoad() {
        super.viewDidLoad()

        self.view.backgroundColor = UIColor.green

        // 戻るボタン
        let button = UIButton(frame: CGRect(x:30, y:30, width:100, height:100))
        button.setTitle("戻る", for: .normal)
        button.addTarget(self, action: #selector(tapped), for: .touchUpInside)
        self.view.addSubview(button)
    }

    @objc func tapped(){
        // ボタンが押されたら呼ばれる。
        let nextViewController = TabBarController()
        self.present(nextViewController, animated: true, completion: nil) // 画面遷移
    }

}
最後に、TabBarControllerのファイルを作る。ViewControllerからTabBarControllerに戻る時にも呼ぶ必要があるため、ファイルを作っておく。
「Seniディレクトリを右クリック」 --> 「New File」 --> 「Cocoa Touch Class」 --> 「Next」 --> 「Class: TabBarController, Subclass of: UITabBarController」 --> 「Create」とやればTabBarController.swiftファイルが作れる。以下のようにコードを追加する。
import UIKit
class TabBarController: UITabBarController {
override func viewDidLoad() {
super.viewDidLoad()
// 遷移ボタン
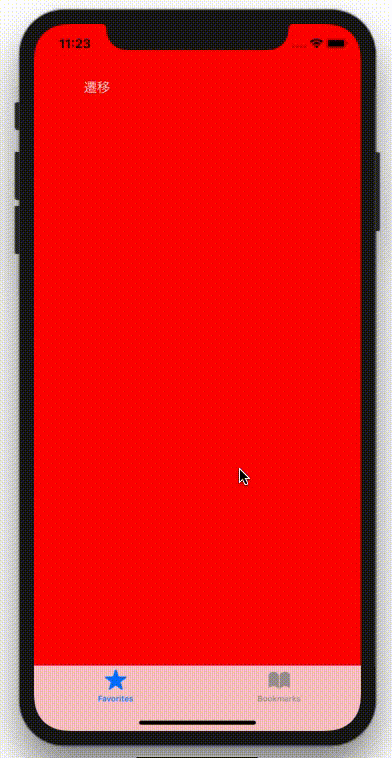
let button = UIButton(frame: CGRect(x:30, y:30, width:100, height:100))
button.setTitle("遷移", for: .normal)
button.addTarget(self, action: #selector(tapped), for: .touchUpInside)
// TabBarController
let vc1 = UIViewController()
vc1.view.backgroundColor = UIColor.red
vc1.view.addSubview(button)
vc1.tabBarItem = UITabBarItem(tabBarSystemItem: .favorites, tag: 1)
let vc2 = UIViewController()
vc2.view.backgroundColor = UIColor.blue
vc2.tabBarItem = UITabBarItem(tabBarSystemItem: .bookmarks, tag: 2)
let vcs: [UIViewController] = [vc1, vc2]
self.setViewControllers(vcs, animated: true)
}
@objc func tapped(){
// ボタンが押されたら呼ばれる。
let nextViewController = ViewController()
self.present(nextViewController, animated: true, completion: nil) // 画面遷移
}
}
おわりに
かなり強引なやり方だけど、とりあえず欲しい挙動になった。もっとスマートな方法を知ってる方がいたら教えていただきたい。
参考
[1]プログラム側からUITabBarControllerを切り替えて、さらに画面遷移させたい時
https://mako-wis.hatenablog.com/entry/2014/02/28/005459
[2]コードでUITabBarControllerを実装
https://qiita.com/marcy731/items/4a1e5c6f5cdcc28cdfe3
[3]TabBarControllerの画面遷移をソースから実行する方法
https://rara-world.com/swift-tab-bar-controller-segue/