.NET開発する事になったので、チュートリアルでもやってみるかなーと思ったら、
思いの外やりたい事が出来てなくて、
追加でいろいろやってみた時の話。
🙁前置き
.NET開発が初めて。
C#も触った事ないし、もちろんXAMLもない。
SQLServerも触った事なければ、VisualStudioすら初めて。
.NET童貞。
🏃チュートリアル開始
.NET開発の中でもデスクトップアプリケーション(WPF)をする事になったので、これの公式のチュートリアルを進めた。筆おろし。
チュートリアル:初めての WPF デスクトップ アプリケーション - Microsoft
進めていきながら「なるほど、こうすればいいのか」という感触はあったけど、終わってから気付いたのが2点。
- 🤔「WPFアプリってMVVMモデルだよね?ディレクトリ構成これでいいの?」
アプリやサービスを作る上で、ディレクトリ構成は重要な構成要素の一つ。
チュートリアルだから仕方ないのかもしれないけど、適当に作ってしまっては、後からリファクタリングするのが大変だ。
- 🤔「データベース使ってないじゃん。どうやって使うの?」
データソースはXAML内にべた書きしてそれを読み込んでるけど、実際の業務でそんな事しない。
チュートリアルだから仕方ないのかもしれないけど、データベースと接続して、それを表示させなきゃ意味がない。
という事で、ディレクトリ構成とデータ周りを改変した。
🤔ディレクトリ構成をMVVMモデルに
参考にしたのはこちら。
重要なのはここ。
具体的には次のような作業となります。
・MainWindow.xaml(およびMainWindow.xaml.cs)を削除
・"Views"、"ViewModels"、"Models"という名前のフォルダをツリーに追加
・"Views"フォルダに"MainView.xaml"をウィンドウとして追加
・"ViewModels"フォルダに"MainViewModel.cs"をクラスとして追加
・App.xaml内で定義されているStartupUri属性を削除
・App.xaml.cs内でOnStartup()メソッドをオーバーライド、編集
これはまっさらな状態からMVVMモデル形式でディレクトリ構成を作る場合なので、構築済みの場合は以下のようにするといい。
- ファイルの移動先を用意
- 同名ファイルを作成
- ファイルの内容をコピー・ファイルを移動
- 原本を削除
- ファイルパスの修正
ファイルの移動先を用意
プロジェクト直下にフォルダ「Models」「Views」「ViewModels」「Resources」を作成。
(mkdirコマンドで作ったら、何故かVisual Studioに反映されず「クソが」ってなったので、Visual Studioから作るのがベター)
同名ファイルを作成
「Models」「Resources」 はここでは使用しない。
「Views」 に以下を作成。(Visual Studioから作成すると*.xaml.csも作成されるが、これは削除しておく。邪魔。)
-
MainWindows.xaml(Window) -
ExpenseItHome.xaml(Page) -
ExpenseReportPage.xaml(Page)
「ViewModels」 に以下を作成。(*.xaml.csでなく*.csでよい)
MainWindows.csExpenseItHome.csExpenseReportPage.cs
ファイルの中身をコピー
「Models」「Resources」 はここでは使用しない。
「Views」「ViewModels」 配下のファイルに対して、以下のコマンドを実行する。(Visual Studioでコピペしてもいいけどしんどいし、こっちの方が早い)
# Views
$ cat ./MainWindow.xaml > Views/MainWindows.xaml
$ cat ./ExpenseItHome.xaml > Views/ExpenseItHome.xaml
$ cat ./ExpenseReportPage.xaml > Views/ExpenseReportPage.xaml
# ViewModels
$ cat ./MainWindow.xaml.cs > ViewModels/MainWindows.cs
$ cat ./ExpenseItHome.xaml.cs > ViewModels/ExpenseItHome.cs
$ cat ./ExpenseReportPage.xaml.cs > ViewModels/ExpenseReportPage.cs
ファイルを移動
「Models」「Views」「ViewModels」 はここでは使用しない。
「Resources」 に画像ファイルを移動する。(Visual Studio上でドラッグ&ドロップでOK)
原本の削除
プロジェクト直下にある以下のファイルを削除する。(Visual Studio上で右クリック→削除でOK)
MainWindow.xamlMainWindow.xaml.csExpenseItHome.xamlExpenseItHome.xaml.csExpenseReportPage.xamlExpenseReportPage.xaml.cs
ファイルパスの修正
修正前: <ImageBrush ImageSource="watermark.png"  />
修正後: <ImageBrush ImageSource="../Resources/watermark.png"></ImageBrush>
修正前: <ImageBrush ImageSource="watermark.png"  />
修正後: <ImageBrush ImageSource="../Resources/watermark.png"></ImageBrush>
修正前: StartupUri="MainWindows.xaml"
修正後: StartupUri="Views/MainWindows.xaml"
実行確認
これで、 MVVMモデル に沿ったディレクトリ構成に変更完了。
ビルドが通って実行できればOK。
ちなみにこの時点のディレクトリ構成はこんな感じ。

🤔データソースをXMLからDBへ
やる事は以下の通り。
- O/Rマッパーの選定
- SQLServerのインストール
- SQLServerのサーバ接続
- DBにテーブル作成
- DBとの接続設定
- Modelクラスの作成
- データバインディング
O/Rマッパーの選定
C#で使えるO/Rマッパーは調べたら色々あったけど、「Entity Framework」 を採用した。
(Microsoft謹製だし、検索したらQAも結構転がってたので)
NuGetからパッケージをインストールする。(以下はVisual StudioでNuGetパッケージマネージャーコンソールを開いた時に入力するコマンド)
PM> Install-Package EntityFramework
SQLServerのインストール
公式サイトからインストーラーをダウンロードし、インストーラーの指示通りにデフォルトのまま進めればOK。
管理ツールである「SQLServer Management Studio」もインストールしておく。
SQLServerのデータベースエンジンに接続
SQLServerをインストールしただけでは使えない。データベースエンジンに接続する必要がある。
手順としては、公式ドキュメントを参照する。(「レッスン 1:データベース エンジンへの接続」)
DBにテーブル作成
「テーブルを作成する」とは言ったものの、そもそもどんなテーブルを作るべきなのかが決まっていない。
という事で、現状のデータソース( ./Views/ExpenseItHomeView.xaml )を見てみる。
...
<Grid.Resources>
    <XmlDataProvider x:Key="ExpenseDataSource" XPath="Expenses">
        <x:XData>
            <Expenses xmlns="">
                <Person Name="Mike" Department="Legal">
                    <Expense ExpenseType="Lunch" ExpenseAmount="50" />
                    <Expense ExpenseType="Transportation" ExpenseAmount="50" />
                </Person>
                <Person Name="Lisa" Department="Marketing">
                    <Expense ExpenseType="Document printing" ExpenseAmount="50"/>
                    <Expense ExpenseType="Gift" ExpenseAmount="125" />
                </Person>
                <Person Name="John" Department="Engineering">
                    <Expense ExpenseType="Magazine subscription" ExpenseAmount="50"/>
                    <Expense ExpenseType="New machine" ExpenseAmount="600" />
                    <Expense ExpenseType="Software" ExpenseAmount="500" />
                </Person>
                <Person Name="Mary" Department="Finance">
                    <Expense ExpenseType="Dinner" ExpenseAmount="100" />
                </Person>
            </Expenses>
        </x:XData>
    </XmlDataProvider>

    <DataTemplate x:Key="nameItemTemplate">
        <Label Content="{Binding XPath=@Name}"/>
    </DataTemplate>
</Grid.Resources>
...
つまり、以下のような感じだろうか。
- table name:Users (何でPersonsじゃなくてUsersなのかは後で説明する)
| Name | Type |
|---|---|
| Id | int |
| Name | varchar(255) |
| Department | varchar(255) |
- table name:Expenses
| name | type |
|---|---|
| PersonId | int |
| ExpenseType | varcar(255) |
| ExpenseAmount | int |
これでテーブル定義はできたので、作っていく。
この時点だとデータベースも作成されていないので、データベースも作成する。
データも投入していく。
-- データベース作成
CREATE DATABASE ExpenseIt;
USE ExpenseIt;

-- テーブル定義
CREATE TABLE Users (
  Id int identity(1, 1),
  Name varchar(255),
  Department varchar(255)
);

CREATE TABLE Expenses (
  Id int identity(1, 1),
  UserId int not null,
  ExpenseType varchar(255),
  ExpenseAmount int
);

-- 挿入(Users)
INSERT INTO Users (Name, Department) VALUES ('Mike', 'Legal');
INSERT INTO Users (Name, Department) VALUES ('Lisa', 'Marketing');
INSERT INTO Users (Name, Department) VALUES ('John', 'Engineering');
INSERT INTO Users (Name, Department) VALUES ('Mary', 'Finance');

-- 挿入(Expenses)
INSERT INTO Expenses (UserId, ExpenseType, ExpenseAmount) VALUES (1, 'Lunch', 50);
INSERT INTO Expenses (UserId, ExpenseType, ExpenseAmount) VALUES (1, 'Transportation', 50);
INSERT INTO Expenses (UserId, ExpenseType, ExpenseAmount) VALUES (2, 'Document printing', 50);
INSERT INTO Expenses (UserId, ExpenseType, ExpenseAmount) VALUES (2, 'Gift', 125);
INSERT INTO Expenses (UserId, ExpenseType, ExpenseAmount) VALUES (3, 'Magazine subscription', 50);
INSERT INTO Expenses (UserId, ExpenseType, ExpenseAmount) VALUES (3, 'New machine', 600);
INSERT INTO Expenses (UserId, ExpenseType, ExpenseAmount) VALUES (3, 'Software', 500);
INSERT INTO Expenses (UserId, ExpenseType, ExpenseAmount) VALUES (4, 'Dinner', 100);
DBとの接続設定
以下を参考にした。
Entity Frameworkコードファーストで開発してみよう - CodeZine
上記のSQLに沿った接続設定にする必要があるため、以下のようにする。
...
  <!-- Server=PracticeComputer; ... 「SQLServerのデータベースエンジンに接続」の章のチュートリアルに出てきたコンピュータ名。自身の環境に応じて変更する。 -->
  <!-- Database=ExpenseIt;      ...  上記の`CREATE DATABASE`で作成したデータベース名。 -->
  <connectionStrings>
    <add name="MyContext"
         providerName="System.Data.SqlClient"
         connectionString="Server=PracticeComputer;Database=ExpenseIt;Trusted_Connection=true;" />
  </connectionStrings>
...
Modelクラスの作成
以下を参考にした。
Entity Frameworkコードファーストで開発してみよう - CodeZine
ModelフォルダにMyContext.cs、User.cs、Expense.csを作成。
ついでにDaoクラスも作っておく。(Data Access Object)
それぞれの内容を以下に示す。
using System.Data.Entity;
namespace ExpenseIt.Models
{
    class MyContext : DbContext
    {
        public DbSet<User> Users { get; set; }
        public DbSet<Expense> Expenses { get; set; }
    }
}
using System.Collections.Generic;
using System.ComponentModel.DataAnnotations;
using System.Linq;
namespace ExpenseIt.Models
{
    // Entity
    public class User
    {
        [Key]
        public int Id { get; set; }
        public string Name { get; set; }
        public string Department { get; set; }
    }

    // Dao
    public class UserDao
    {
        public static List<User> selectAll()
        {
            using (MyContext context = new MyContext())
            {
                var results = from p in context.Users select p;
                return results.ToList();
            }
        }
    }
}
using System.Collections.Generic;
using System.ComponentModel.DataAnnotations;
using System.Linq;
namespace ExpenseIt.Models
{
    // Entity
    public class Expense
    {
        [Key]
        public int Id { get; set; }
        public int UserId { get; set; }
        public string ExpenseType { get; set; }
        public int ExpenseAmount { get; set; }
    }

    // Dao
    public class ExpenseDao
    {
        public static List<Expense> selectByUser(User user)
        {
            using (var context = new MyContext())
            {
                var results = from e in context.Expenses where e.UserId == user.Id select e;
                return results.ToList();
            }
        }
    }
}
データバインディング
さて、ここからが本題。データバインディング。僕の苦手な部分。
まずはViews側から片付けていく。
...
<!-- 元のデータソースである<Grid.Resources>...</Grid.Resources>は不要なので削除 -->
<!--
        <Grid.Resources>
            <XmlDataProvider x:Key="ExpenseDataSource" XPath="Expenses">
                <x:XData>
                    <Expenses xmlns="">
                        <Person Name="Mike" Department="Legal">
                            <Expense ExpenseType="Lunch" ExpenseAmount="50" />
                            <Expense ExpenseType="Transportation" ExpenseAmount="50" />
                        </Person>
                        <Person Name="Lisa" Department="Marketing">
                            <Expense ExpenseType="Document printing" ExpenseAmount="50"/>
                            <Expense ExpenseType="Gift" ExpenseAmount="125" />
                        </Person>
                        <Person Name="John" Department="Engineering">
                            <Expense ExpenseType="Magazine subscription" ExpenseAmount="50"/>
                            <Expense ExpenseType="New machine" ExpenseAmount="600" />
                            <Expense ExpenseType="Software" ExpenseAmount="500" />
                        </Person>
                        <Person Name="Mary" Department="Finance">
                            <Expense ExpenseType="Dinner" ExpenseAmount="100" />
                        </Person>
                    </Expenses>
                </x:XData>
            </XmlDataProvider>

            <DataTemplate x:Key="nameItemTemplate">
                <Label Content="{Binding XPath=@Name}"/>
            </DataTemplate>
        </Grid.Resources>
-->
...
<!-- 元はXPathを使ってXMLから読み込んでたが、XMLからは読み込まないため、取得方法・表示方法を変更 -->
<!--
        <ListBox Name="peopleListBox" Grid.Column="1" Grid.Row="2"
                 ItemsSource="{Binding Source={StaticResource ExpenseDataSource}, XPath=Person}"
                 ItemTemplate="{StaticResource nameItemTemplate}">
        </ListBox>
-->
        <ListView Name="userListBox" Grid.Column="1" Grid.Row="2" ItemsSource="{Binding Mode=OneWay}">
            <ListView.View>
                <GridView>
                    <GridViewColumn Header="Name" DisplayMemberBinding="{Binding Name}"></GridViewColumn>
                </GridView>
            </ListView.View>
        </ListView>
...
<!-- 元のデータソースである<Grid.Resources>...</Grid.Resources>は不要なので削除 -->
<!--
        <Grid.Resources>
            <DataTemplate x:Key="typeItemTemplate">
                <Label Content="{Binding XPath=@ExpenseType}"/>
            </DataTemplate>
            <DataTemplate x:Key="amountItemTemplate">
                <Label Content="{Binding XPath=@ExpenseAmount}"/>
            </DataTemplate>
        </Grid.Resources>
-->
...
<!-- 元はXPathを使ってXMLから読み込んでたが、XMLからは読み込まないため、取得方法を変更 -->
<!--
            <StackPanel Grid.Column="0" Grid.ColumnSpan="2" Grid.Row="0" Orientation="Horizontal">
                <Label Style="{StaticResource labelStyle}">Name:</Label>
                <Label Style="{StaticResource labelStyle}" Content="{Binding XPath=@Name}"></Label>
            </StackPanel>
            <StackPanel Grid.Column="0" Grid.ColumnSpan="2" Grid.Row="1" Orientation="Horizontal">
                <Label Style="{StaticResource labelStyle}">Department:</Label>
                <Label Style="{StaticResource labelStyle}" Content="{Binding XPath=@Department}"></Label>
            </StackPanel>
-->
            <StackPanel Grid.Column="0" Grid.ColumnSpan="2" Grid.Row="0" Orientation="Horizontal">
                <Label Style="{StaticResource labelStyle}">Name:</Label>
                <Label Style="{StaticResource labelStyle}" Content="{Binding Name}"></Label>
            </StackPanel>
            <StackPanel Grid.Column="0" Grid.ColumnSpan="2" Grid.Row="1" Orientation="Horizontal">
                <Label Style="{StaticResource labelStyle}">Department:</Label>
                <Label Style="{StaticResource labelStyle}" Content="{Binding Department}"></Label>
            </StackPanel>
...
<!-- 元はXPathを使ってXMLから読み込んでたが、XMLからは読み込まないため、取得方法・表示方法を変更 -->
<!--
            <DataGrid ItemsSource="{Binding XPath=Expense}" ColumnHeaderStyle="{StaticResource columnHeaderStyle}" AutoGenerateColumns="False" RowHeaderWidth="0" >
                <DataGrid.Columns>
                    <DataGridTemplateColumn Header="ExpenseType" CellTemplate="{StaticResource typeItemTemplate}" />
                    <DataGridTemplateColumn Header="Amount" CellTemplate="{StaticResource amountItemTemplate}" />
                </DataGrid.Columns>
            </DataGrid>
-->
            <ListView Name="expenseItems" ItemsSource="{Binding Mode=OneWay}" Grid.Column="0" Grid.ColumnSpan="2" Grid.Row="2" VerticalAlignment="Top" HorizontalAlignment="Left">
                <ListView.View>
                    <GridView>
                        <GridViewColumn Header="ExpenseType" DisplayMemberBinding="{Binding ExpenseType}"></GridViewColumn>
                        <GridViewColumn Header="Amount" DisplayMemberBinding="{Binding ExpenseAmount}"></GridViewColumn>
                    </GridView>
                </ListView.View>
            </ListView>
...
次にViewModels。
...
        public ExpenseItHome()
        {
            InitializeComponent();
            this.userListBox.DataContext = UserDao.selectAll();  // 追加
        }
...
        private void Button_Click(object sender, RoutedEventArgs e)
        {
            // ExpenseReportPage expenseReportPage = new ExpenseReportPage(this.peopleListBox.SelectedItem);  // peopleではなくuserに変更
            ExpenseReportPage expenseReportPage = new ExpenseReportPage(this.userListBox.SelectedItem);       // よく分からないけど、Personsテーブルを作成して、Personクラスを使っていると、複数形がPeopleになってしまうせいで処理が上手くいかない。なので、PersonではなくUserにした。
            this.NavigationService.Navigate(expenseReportPage);
        }
...
...
using ExpenseIt.Models;  // 追加
...
        public ExpenseReportPage(object data) : this()
        {
            this.DataContext = data;
            this.expenseItems.DataContext = ExpenseDao.selectByUser(data as User);  // 追加
        }
...
実行して確認
元々のソースコードでの実行結果と見た目が異なるのは許して、ごめん。(疲れた)
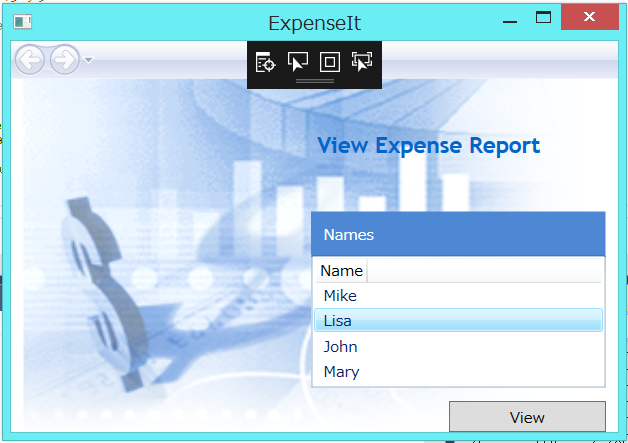
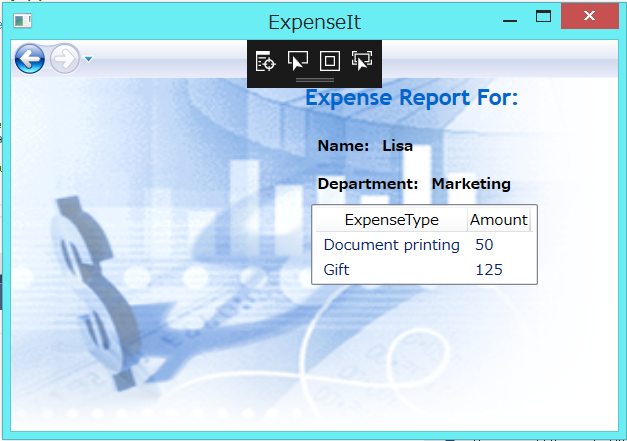
ただ、これでデータソースをXMLからデータベースに切り替える事ができた。
🙂まとめ
新しい言語やフレームワークに触れる時はチュートリアル使う事が多いけど、痒いところに手が届かない事も多くて辛い。
その辺に転がってる一般人が取り上げてる記事だと「それでは早速パッケージをインストールします」とか言い始めるし。
それはある程度できる人の応用編であって、基本編ではない( '-' )
チュートリアルだから仕方ない部分もあるだろうし、パッケージ使って開発する方が早いのかもしれないけど、基本部分を包括的に取り扱ってくれるものがあるといいなぁ。