Unityのナビゲーション機能を使用してキャラクターを走らせる
環境メモ
⭐️Mac OS Mojave バージョン10.14
⭐️Unity 2018.2.15f1
⭐️Xcode10.1
実際に動かした動画はこちら↓↓
https://twitter.com/nonnonkapibara/status/1074337280469327872
Unityの✨ナビゲーション✨機能を使用してキャラクターを走らせてみました。
— non (@nonnonkapibara) 2018年12月16日
動いてるキャラクターを撃つのは、難しいなぁ。。。
(。>0<。)#Unity #unity3d #VR pic.twitter.com/XEwiduJ2Kh
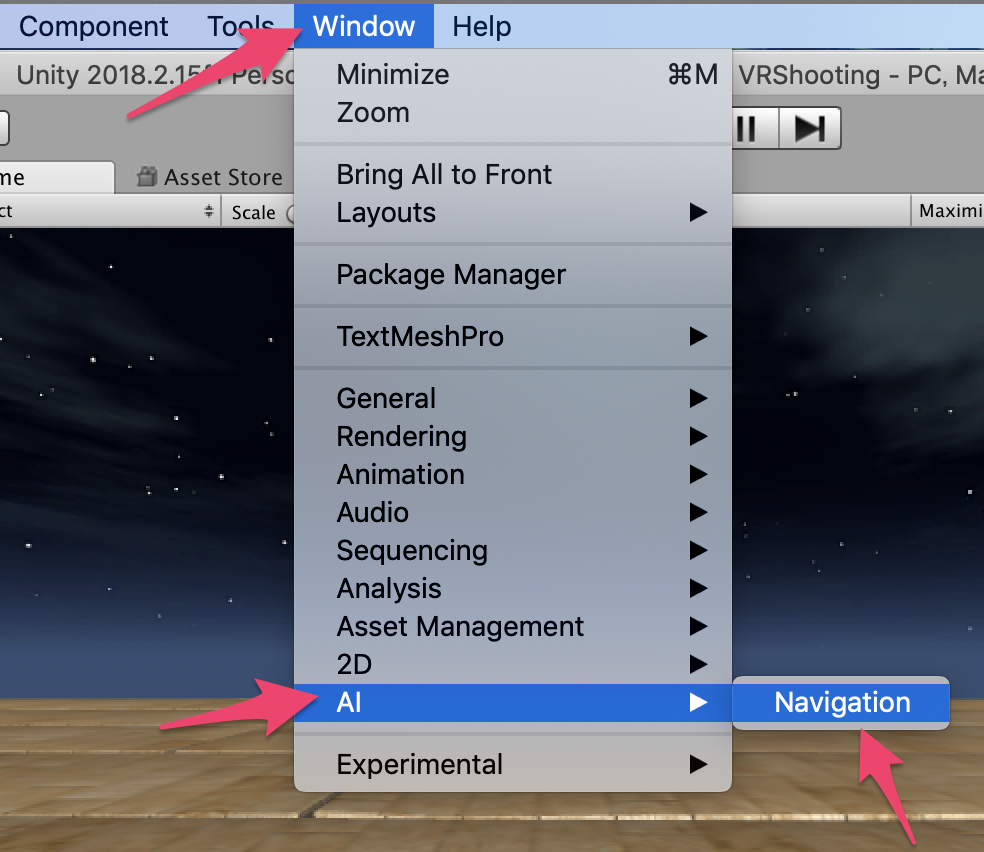
1.「Window」-「AI」ー「Navigation」を選択する
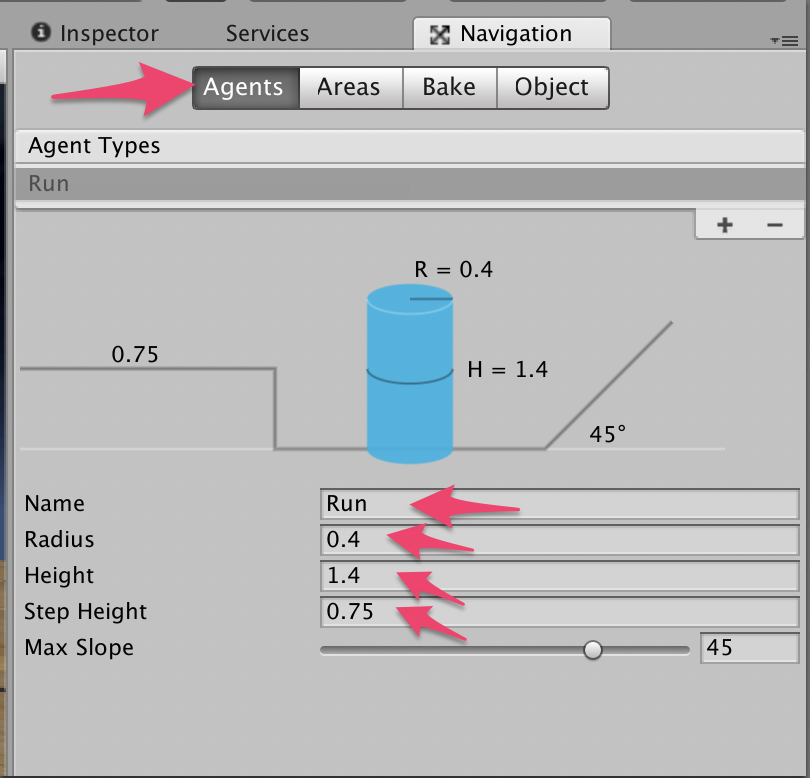
2.「Agents」を選択して、名前を「Run」にする
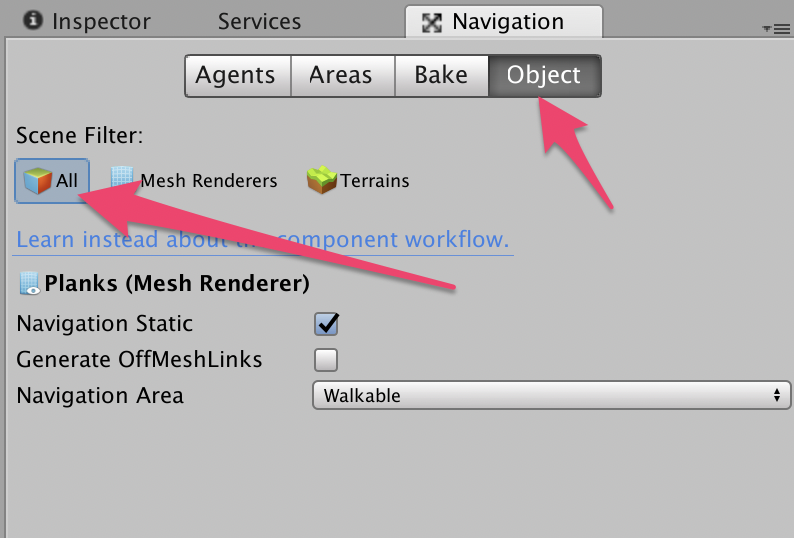
3.「Object」を選択して「Mesh Renderes」を選択する。
ヒエラルキーの「Planks」を選択し「Navigation Static」チェックONにする。

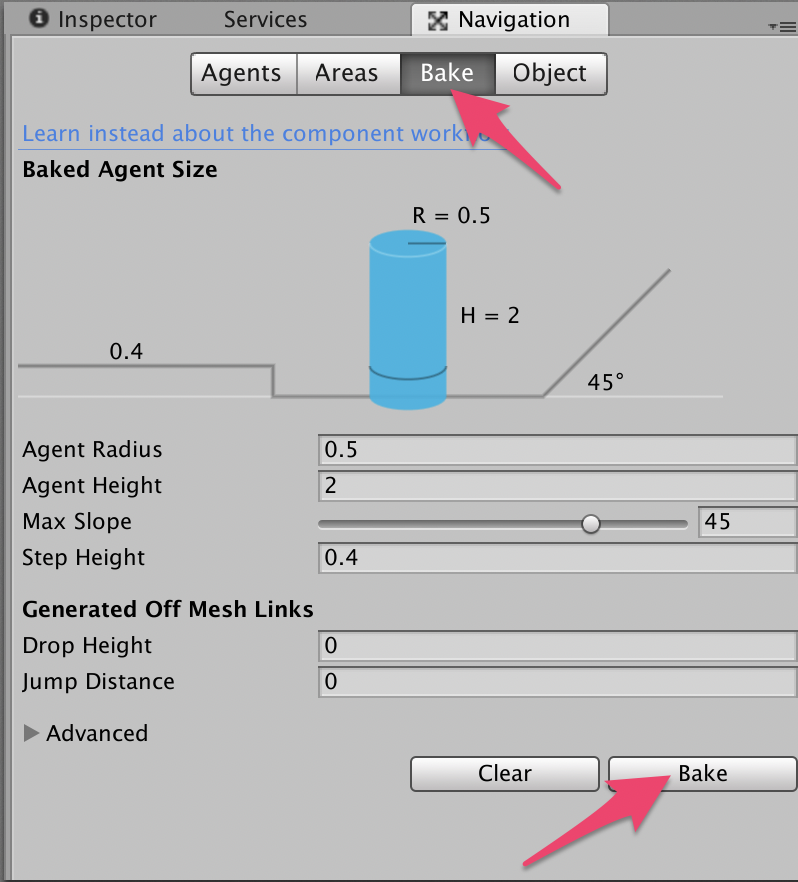
4.「Bake」を選択し、「Bake」ボタンを押す。
5.「Object」を選択して「All」を選択する
6.キャラクターのプレハブに「Nav Mesh Agent」コンポーネントを追加する
「Agent Type」を「Run」を選択する。
キャラクターの走るスピードも設定する。
動作のスクリプト「Move Agent.cs」を設定する

MoveAgent
using System.Collections;
using System.Collections.Generic;
using UnityEngine;
using UnityEngine.AI;

[RequireComponent(typeof(NavMeshAgent))]
public class MoveAgent : MonoBehaviour {
    NavMeshAgent agent; //ナビメッシュエージェント

    // Use this for initialization
    void Start () {
        agent = GetComponent<NavMeshAgent>();
        // 次の地点へ移動
        GotoNextPoint();
    }

    // Update is called once per frame
    void Update () {
        // 目的地付近に到着したか?
        if (agent.remainingDistance < 0.5f)
        {
            // 次の地点へ移動
            GotoNextPoint();
        }
    }

    void GotoNextPoint(){
        // 床の移動地点をランダムで作成
        var nextPoint = new Vector3(Random.Range(-15.0f, 15.0f), 0.0f, Random.Range(-15.0f, 15.0f));
        // ナビメッシュエージェントへ目的地を設定
        agent.SetDestination(nextPoint);
    }
}