TOC
1.課題と目的
    ちょっとめんどくさいRecyclerView
    そんな課題を解決するEpoxy
2.導入
    インストール
3.基本的な使い方
    既存のRecyclerViewに導入する
        呼び出し側のコード
        EpoxyController
        EpoxyModel
4.おわりに
課題と目的
ちょっとめんどくさいRecyclerView
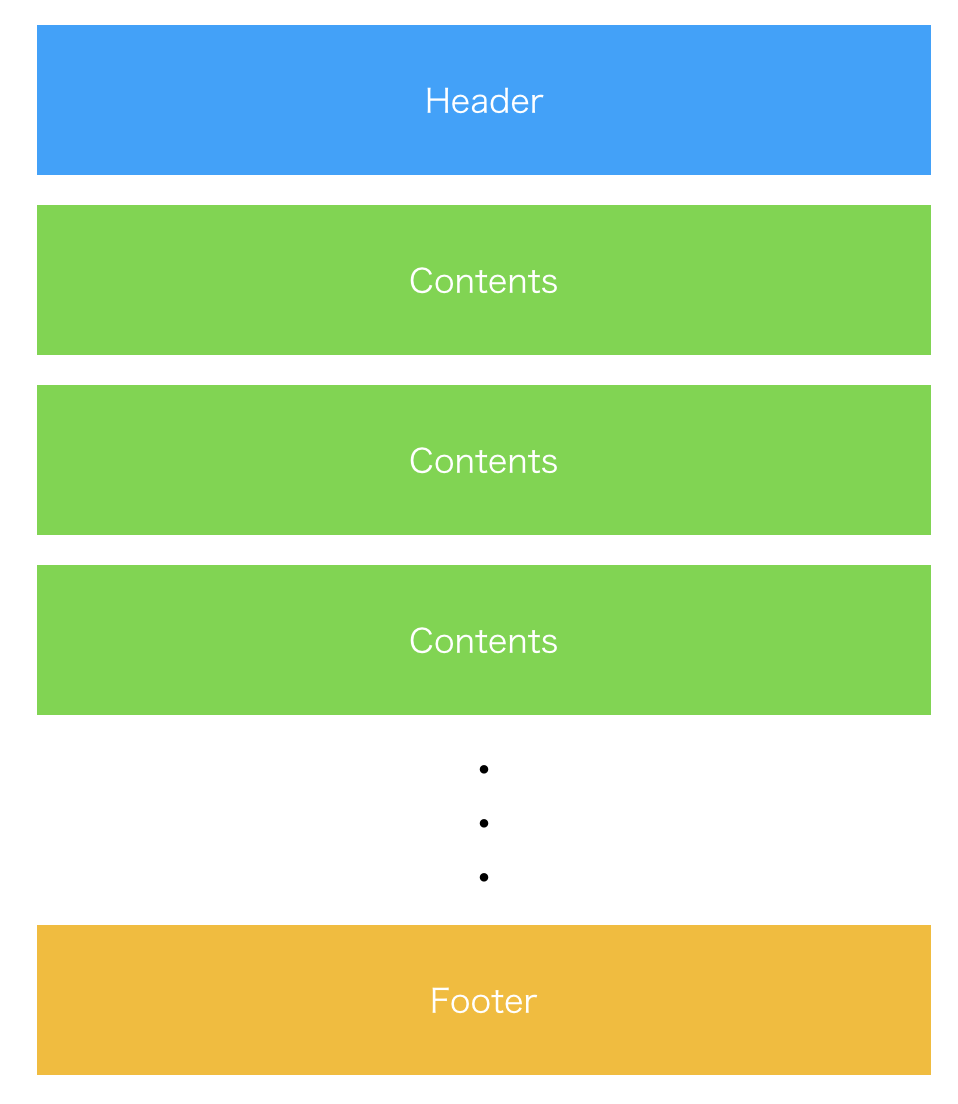
Androidのお仕事をしていると、単純に同じレイアウトだけを使ったRecyclerViewだけでなく、例えば、図1のような「Header+(連続的に表示したいレイアウト)+Footer」や「連続的に表示したいレイアウトを5つ生成した後、違うレイアウトを一つ挟んで表示」というものを作りたいという需要が発生することがあるかと思います。
そんな時に単純なRecyclerViewだけでもAdapter、ViewHolderと役者が多いのに、さらにif-elseで分岐させるなんてことをして結局読みにくいコードになってしまったなんてことはあるのではないでしょうか。
(図1)
そんな課題を解決するEpoxy
Epoxyはそんな課題を解決するairbnb製のライブラリです。
Epoxy is an Android library for building complex screens in a RecyclerView
GitHub - airbnb/epoxy: Epoxy is an Android library for building complex screens in a RecyclerView
前職のアプリに使っていてとても便利だったのを覚えていて、あと最近、新規のアプリに入れてみて導入も楽だなと感じたので、導入と簡単なレイアウトを組んでみるところまでを紹介したいと思います。この記事をきっかけに入れてみようかなと思っていただけたら幸いです。
導入
インストール
Kotlinを想定したインストールです。公式ドキュメント通りです。
(1) app/build.gradleにEpoxyの依存関係などを記述
…
dependencies {
    …
    implementation ‘com.airbnb.android:epoxy:3.0.0’
    kapt ‘com.airbnb.android:epoxy-processor:3.0.0’
    implementation ‘com.airbnb.android:epoxy-databinding:3.0.0’
}

kapt {
    correctErrorTypes = true
}
…
以上です。
Databindingを使ってEpoxyModelを生成する方法を使うので、implementation ‘com.airbnb.android:epoxy-databinding:3.0.0’も加えています。
基本的な使い方
使う主要なコンポーネントは EpoxyController と EpoxyModel 2つだけです。今回は既存のRecyclerViewをEpoxyに置き換えていくことを想定します。
呼び出し側のコード
既存のRecyclerViewのAdapterに、後述するEpoxyControllerを継承したクラスのインスタンスのAdapterをセットします。
Before
mainRecyclerView.layoutManager = LinearLayoutManager(this, LinearLayoutManager.HORIZONTAL, false)
mainRecyclerView.adapter = RecyclerViewAdapter(this)
After
mainRecyclerView.layoutManager = LinearLayoutManager(this, LinearLayoutManager.HORIZONTAL, false)

val controller = MyController();
mainRecyclerView.adapter = controller.adapter();

controller.requestModelBuild();
セットした後、requestModelBuild()によってEpoxyControllerのbuildModels() が実行されます。実際は、Listか配列かなどをデータリストを基に描画すると思いますが、省略しています。
EpoxyController
EpoxyController を継承したクラスで、オーバーライドしたbuildModels()内で後述するEpoxyModelを呼び出していきます。すると、EpoxyModelが呼び出された順に表示されます。以下の例だと、headerViewが先頭になります。
class MyController : EpoxyController() {

    var itemList = mutableListOf<Item>()

    override fun buildModels() {
            headerView{
                id("header")
            }

            for(item in itemList) {
                 ItemBindingModel_()
                     .id(item.i.toLong())
                     .addTo(this)
            }
    }

    internal fun addItems(items: MutableList<Item>) {
        itemList = items
    }
}
カスタムビューから生成したEpoxyModelとレイアウトファイルからDatabindingにより生成したEpoxyModel。2つの方法を使っています。
EpoxyModel
CustomViewから作る
Viewのクラスに@ModelViewというアノテーションを付与することでEpoxyModelとして利用することが可能になります。
@ModelView(autoLayout = ModelView.Size.WRAP_WIDTH_WRAP_HEIGHT)
class HeaderView : LinearLayout {

    constructor(context: Context): super(context) {
        init()
    }

    private fun init() {
        View.inflate(context, R.layout.header_view, this)
    }

}
レイアウトファイルからDatabindingにより作る
従来のDatabindingと同様、レイアウトファイルを<layout>で括って利用します。また、それとは別にpackage-info.javaを作り、以下のように配置します。
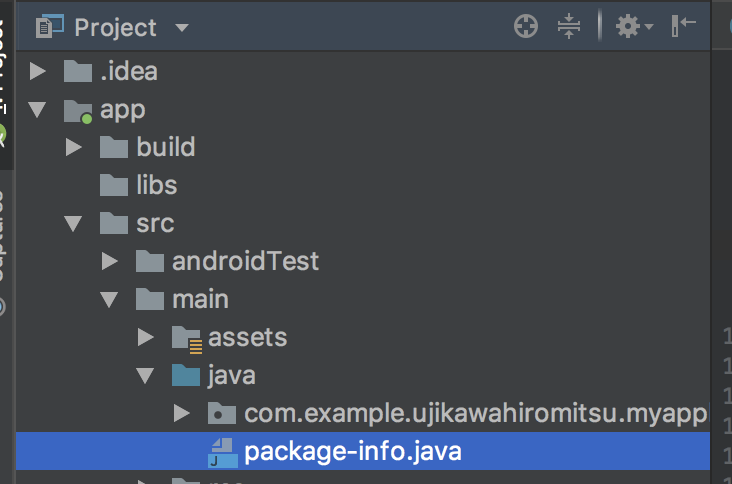
package-info.javaは以下のように記述していき、生成したいモデルがあれば増やしていきます。
@EpoxyDataBindingLayouts({R.layout.item})

package com.example.ujikawahiromitsu.myapplication;

import com.airbnb.epoxy.EpoxyDataBindingLayouts;
おわりに
ざっくりですが、以上の工程でheaderとデータ個数分表示するRecyclerViewができます。とても簡単に導入することが出来るので、ぜひ試してみてください。