こちらの記事を読んで、少しC#サーバーに興味が出てきたので試して見ようと思いました。
まずはASP.NET Core Webをdockerで動かすことからはじめようと思います。
開発環境
- os: macOSX Mojave
- macのdotnet: version 2.2.101
- docker: version 18.09.0
windowsではなくmacで開発を行います。
macでの開発に慣れているのでmacで開発します!
また、プロジェクトの作成などはmacで行います。
なので事前にmacに.NET Coreをインストールしています。
バージョンは上に示した通りです。
プロジェクトの用意
まずはこちらの「ASP.NET Core 空」を作成します。
この時macで作成しています。
$ dotnet new web
これで完成です。
dockerの準備
次にDockerfileを準備します。
microsoft/dotnetのコンテナを使用します。
FROM microsoft/dotnet

WORKDIR /app
COPY . /app
次にdocker-compose.ymlを作成します。
version: "3"
services:
  app:
    build: .
    container_name: "csharp-dotnet-server-docker"
    ports:
      - 5000:5000
    volumes:
      - .:/app
    command: ["dotnet", "watch", "run"]
特に特別なことはしていません。
commandを["dotnet", "watch", "run"]にしています。
こうすることでコードを編集した時に自動で変更を検知して、再ビルド・実行してくれます。
開発の際には便利なので、このようにしています。
次にProgram.csにUseUrls("http://*:5000")を追加します。
using System;
using System.Collections.Generic;
using System.IO;
using System.Linq;
using System.Threading.Tasks;
using Microsoft.AspNetCore;
using Microsoft.AspNetCore.Hosting;
using Microsoft.Extensions.Configuration;
using Microsoft.Extensions.Logging;

namespace csharp_dotnet_server_docker
{
    public class Program
    {
        public static void Main(string[] args)
        {
            CreateWebHostBuilder(args).Build().Run();
        }

        public static IWebHostBuilder CreateWebHostBuilder(string[] args) =>
            WebHost.CreateDefaultBuilder(args)
                .UseUrls("http://*:5000")  // <- ここの行を追加
                .UseStartup<Startup>();
    }
}
このようにすることで、localhost以外からのアクセスが可能になります。
ASP.NET Core の Web ホスト # サーバーの URL
これで準備完了です。
dockerを起動させる
ここからは普通にdocker composeを起動させます。
$ docker-compose build
# build を待つ
$ docker-compose up -d
# 起動を待つ
$ docker logs csharp-dotnet-server-docker
watch : Polling file watcher is enabled
watch : Started
Hosting environment: Development
Content root path: /app
Now listening on: http://[::]:5000
Application started. Press Ctrl+C to shut down.
起動したら、ブラウザからhttp://localhost:5000にアクセスします。
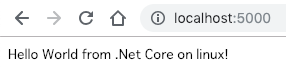
上のような感じで表示出来たら成功です。
完成したものは以下のリポジトリにおいてあります。
感想
かなり簡単にASP.NETのwebアプリケーションをdockerで動かことができました。
今後はwebフレームワークやDBを使った開発のサンプルを作ってみたいと思います。