Visual Studioでtesseract-ocrを利用したかったのですが、頑張ってもなかなかビルドが出来ませんでした。
ところがvcpkgを使用するとtesseractがあっさりビルドでき、簡単に導入できるようになりました。
以下を参考にさせていただきました。ありがとうございます。
https://qiita.com/jugemjugemu/items/fcb72bdca13dc06b0f37
http://whoopsidaisies.hatenablog.com/entry/2014/11/12/003100
https://qiita.com/RivaleDgg/items/1085e570f0662918b16c
http://tecsingularity.com/opencv/opencvcontrib/
とあえず、tesseractをOpenCVと一緒に64bitでビルドして使えるようにしてみます。
各種準備
Visual Studio 2017 (Visual Studio 2015 ではtesseractのビルドに失敗します)
vcpkg
OpenCV 4.0
opencv_contrib 4.0.0
上記4点が必要になります。
vcpkgからtesseract-ocrの導入
- Githubから落としてきたvcpkgを展開して、「bootstrap-vcpkg.bat」を実行。
- 以下の管理者権限でコマンドを入力し、tesseractをインストール。
- しばらく待つ(私の環境では30分程度・・・)
- エラーが出なければ完了。
vcpkg install tesseract:x64-windows
※私の環境ではシステムロケール(Windowsの表示言語)を変更しなくても問題は無かったです。
※x64-windows-staticではOpenCVのビルドで失敗するのでx64-windowsでインストール。
※Visual Studio 2015ではインストールに失敗します。(icuのインストールで失敗?)
OpenCVのビルド
「C:/tesse」フォルダへ各種ファイルを展開、「C:/tesse/tesse-ins」へビルドする設定。
OpenCVとopencv_contribを展開。
CMake-GUIを起動。
「Where is source code」にOpenCVを展開したさきの「/sources」を設定。ビルド先も設定
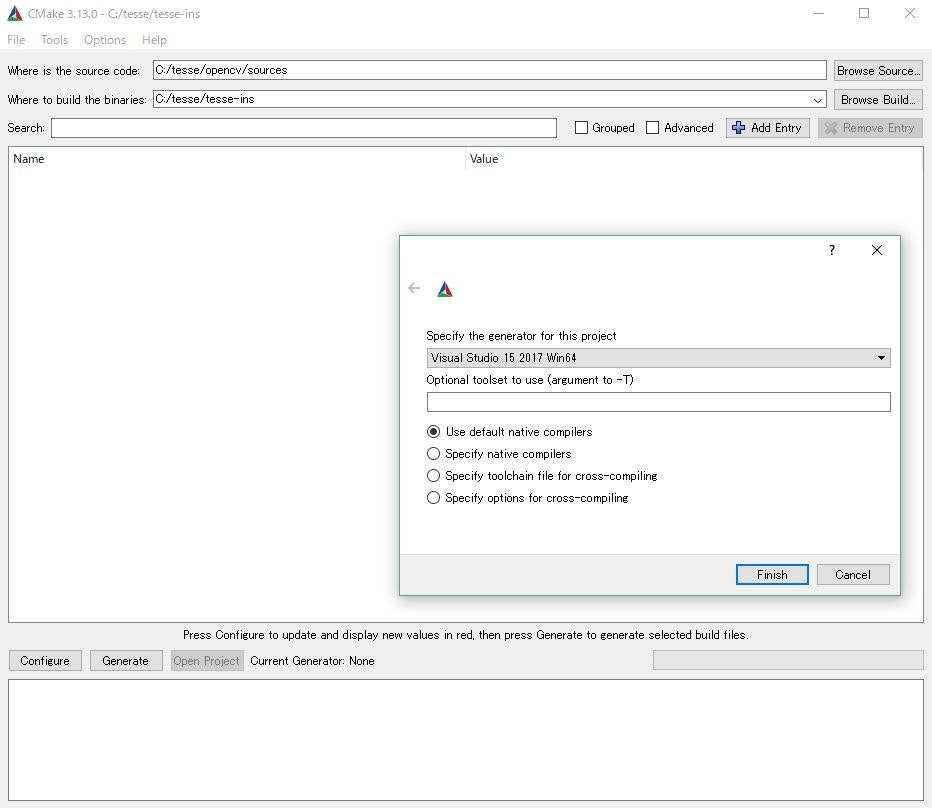
「Configure」をクリック。「Visual Studio 15 2017 Win64」を指定して「Finish」
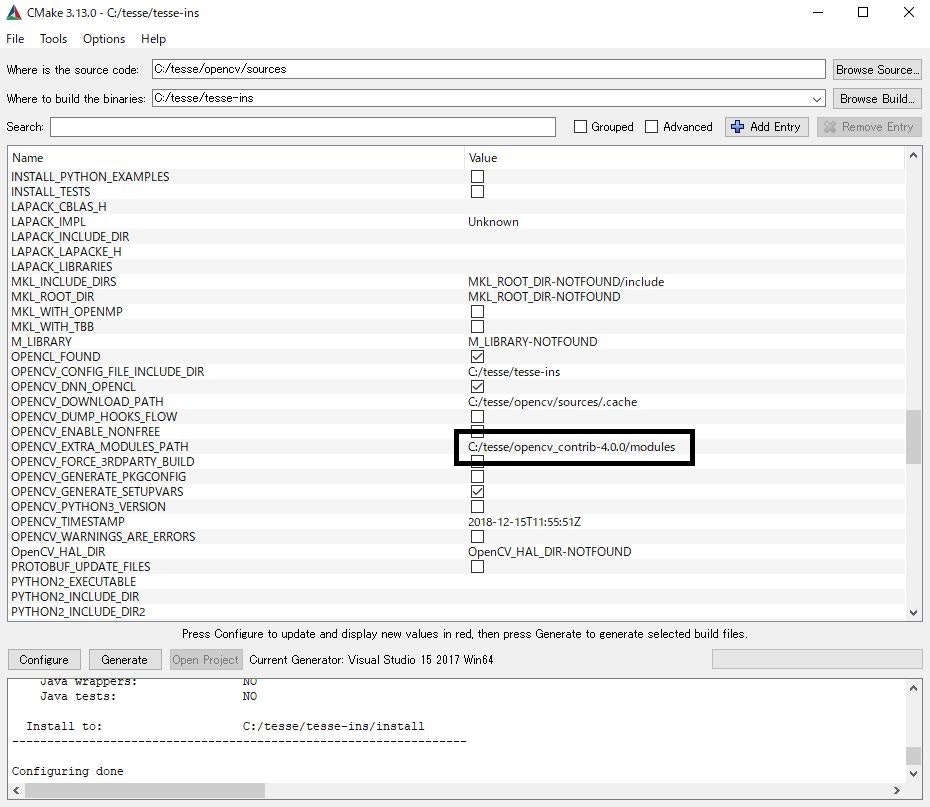
「OPENCV_EXTRA_MODULES_PATH」に「opencv_contrib」を展開した先の「/modules」を設定。「Configure」をクリック。
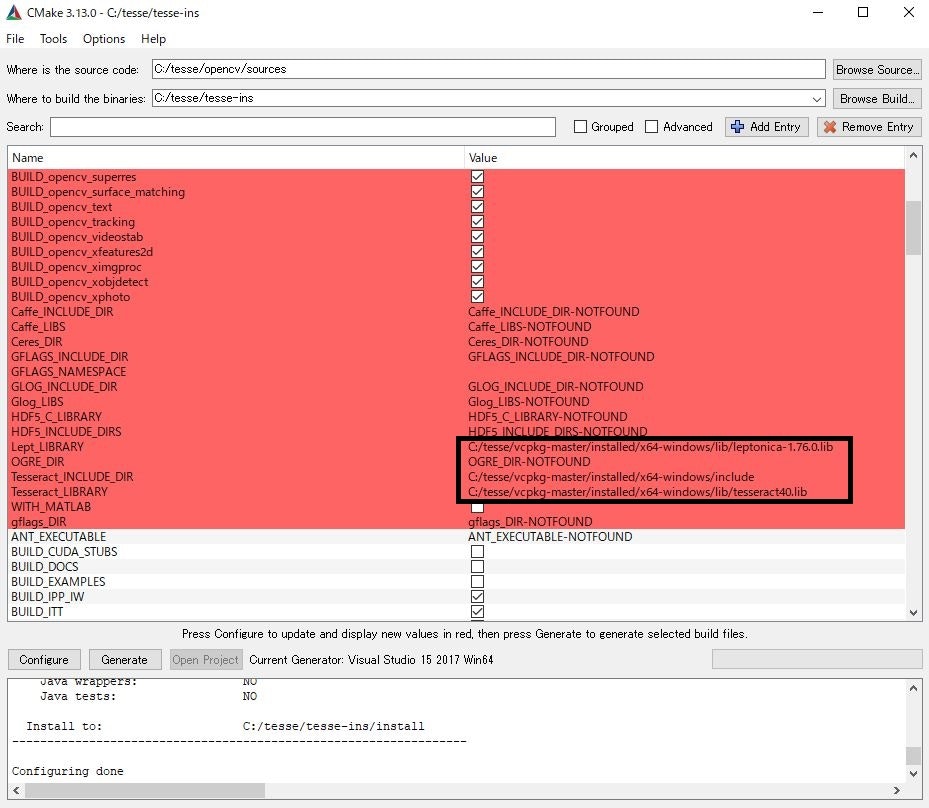
6.「Lept_LIBRARY」「Tesseract_INCLUDE_DIR」「Tesseract_LIBRARY」へvcpkgの「/installed」を指定。
※オプションは適当に指定してください。個人的には「BUILD_opencv_world」をONに。
※「Tesseract_INCLUDE_DIR」に「/tesseract」まで入力するとビルドに失敗します。
再度「Configure」して「Generate」。「Open Project」
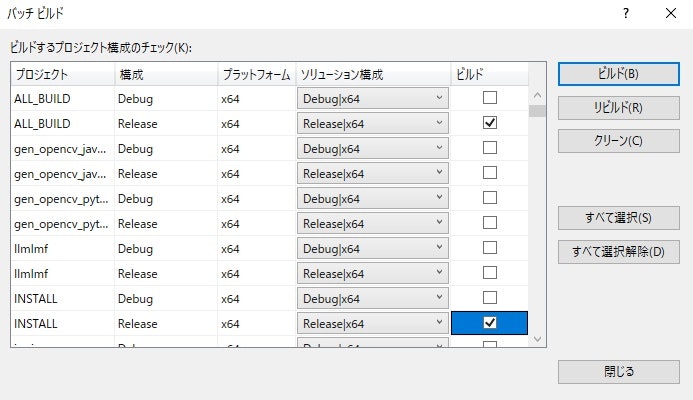
VS2017が起動するので、ビルド>バッチビルドからALL_BUILDとINSTALLを指定してビルド
9.気長に待つ(CUDAを入れたりすると一晩くらい?)。エラーが出なければ完了。
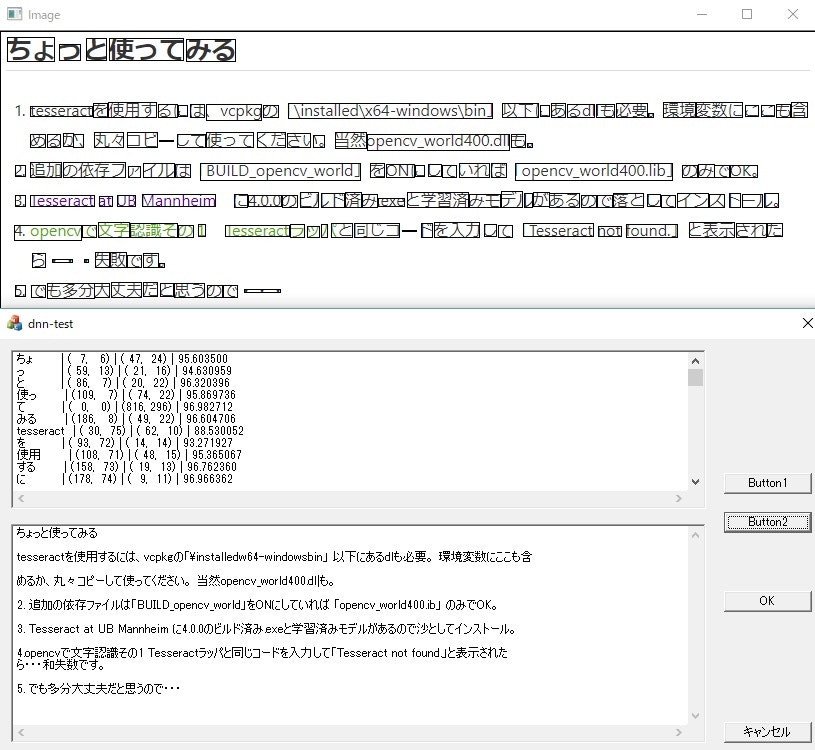
ちょっと使ってみる
- tesseractを使用するには、vcpkgの「\installed\x64-windows\bin」以下にあるdllも必要。環境変数にここも含めるか、丸々コピーして使ってください。当然opencv_world400.dllも。
- 追加の依存ファイルは「BUILD_opencv_world」をONにしていれば「opencv_world400.lib」のみでOK。
- Tesseract at UB Mannheim に4.0.0のビルド済み.exeと学習済みモデルがあるので落としてインストール。
- whoopsidaisies's diaryさんの2014-11-12の記事を参考に以下のコードでこんな認識率でした。
#include <opencv2/dnn.hpp>
#include <opencv2/imgproc.hpp>
#include <opencv2/highgui.hpp>
#include <opencv2/core/utils/trace.hpp>
#include <opencv2/text.hpp>
#include <fstream>
#include <iostream>
#include <cstdlib>
#include <string>
using namespace cv;
using namespace cv::dnn;
using namespace std;

CString Utf8ToCString(const std::string& utf8)
{

    INT bufsize = ::MultiByteToWideChar(CP_UTF8, 0, utf8.c_str(), -1, NULL, 0);
    WCHAR* utf16 = new WCHAR[bufsize];

    ::MultiByteToWideChar(CP_UTF8, 0, utf8.c_str(), -1, utf16, bufsize);

    CString ret(utf16, ::wcslen(utf16));
    delete[] utf16;

    return ret;
}

void CdnntestDlg::OnBnClickedButton2()
{
    // TODO: ここにコントロール通知ハンドラー コードを追加します。
    CString         filter("JPEG Files (*.jpg;*.jpeg)|*.jpg; *.jpeg||");
    CString filepath;
    CFileDialog     selDlg(TRUE, NULL, NULL, OFN_HIDEREADONLY, NULL);
    if (selDlg.DoModal() == IDOK)
    {
        filepath = selDlg.GetPathName();
        UpdateData(FALSE);
    }

    CStringA stra;
    stra = filepath;

    std::string filep = stra.GetBuffer(0);


    // 画像読み込み
    auto image = cv::imread(filep);
    // グレースケール化
    cv::Mat gray;
    cv::cvtColor(image, gray, COLOR_RGB2GRAY);
    // 文字認識クラスのインスタンス生成
    auto ocr = cv::text::OCRTesseract::create("C:\\opencv-tesse\\tessedata", "jpn");

    std::string text;
    std::vector<cv::Rect> boxes;
    std::vector<std::string> words;
    vector<float> confidences;
    // 文字認識の実行
    ocr->run(image, text, &boxes, &words, &confidences);

    CString strres,res;
    std::vector<cv::Point> p1;
    std::vector<cv::Point> p2;

    for (int i = 0; i < boxes.size(); i++)
    {
        strres.Format("%-10s | (%3d, %3d) | (%3d, %3d) | %f\n", Utf8ToCString(words[i].c_str()),boxes[i].x, boxes[i].y,boxes[i].width, boxes[i].height,confidences[i]);
        res += strres;
        res += _T("\r\n");

        cv::Point first = { boxes[i].x, boxes[i].y };
        cv::Point second = { boxes[i].x + boxes[i].width, boxes[i].y + boxes[i].height };
        p1.push_back(first);
        p2.push_back(second);
    }

    for (int i = 0;i < p1.size();i++)
    {
        cv::rectangle(image, p1[i], p2[i], Scalar(0, 0, 0), 1, 8);
    }

    imshow("Image", image);
    edit1.SetWindowText(res);

    CString showtext;
    showtext = Utf8ToCString(text);
    showtext.Replace(_T("\n"), _T("\r\n"));

    edit2.SetWindowText(showtext);
}
最後に
VS2017さえ導入すれば鬼門のtesseractのビルドがvcpkgで簡単にできるので、ものすごく楽です。
Githubから落としたtesseractをビルドしようとすると・・・私には一週間かけても出来ませんでしたorz
CPPANとか何故か失敗しまくりでLeptnicaすらちゃんとビルド出来なかったよ・・・