背景
Microsoft Bot Framework V4が2018年9月末にGAしました。Bot Framework V3で元々ボット開発をしていましたが、GAされたからには最新バージョンで作らねば...ということで手を出しましたが、結構躓きましたorz(V3とV4はもはや別フレームワークw)
まだGAされてから時間があまり経っていないということもあって世の中に情報も少ないので、記事を書かせていただきました。誰かのお役に立てれば幸いです。
目的
Bot Framework V4で編集しやすいベースとなるボットを作成してAzureにデプロイ
(タイトル通りですが...)
既に投稿されている記事の多くは下記二つの方法が多いです。(2018/12時点)
1. Azure PortalでWeb App Botを作成⇒ソースコードダウンロード⇒ローカルで修正⇒Azureに再デプロイ
2. Visual Studioテンプレートを利用⇒ローカルで修正⇒Azureにデプロイ⇒Azure PortalでBot Channel Registration作成
確かにどちらの方法でもボット作成が可能ですが、
1.の方法ではVSプロジェクトやアプリ名が固定されてしまう。
2.の方法ではテンプレート自体を理解することが初心者には厳しい。
(ミドルウェア、アクセサーなどの各単語を理解しておく必要あり)
などちょっと扱いづらい部分が多々あり、これをベースにして自分用にカスタマイズするのはちょっと辛いかなと感じています。
そこで、ボットは単なるWeb APIアプリケーションのことであるというところを考えて作成していきます。
(この記事ではカスタマイズしやすいボットを作成してデプロイすることが目的なので、ボット自体は簡単なユーザが入力した文字とその文字数を返すボットを作成します。)
開発に必要な環境
Visual Studio 2017
dotnet core 2.1
Bot Framework Emulator
Microsoft Azure
WebAPIプロジェクト作成(Visual Studio 2017)
まず下記の手順でWeb APIプロジェクトを作成します。
- Visual Studio 2017を起動
- 「ファイル」>「新規作成」>「プロジェクト」を選択
- 「ASP.NET Core Webアプリケーション」プロジェクトテンプレートを選択し、[名前]を適当に入力し「OK」を選択(この記事では名前をStrCountBotとします)
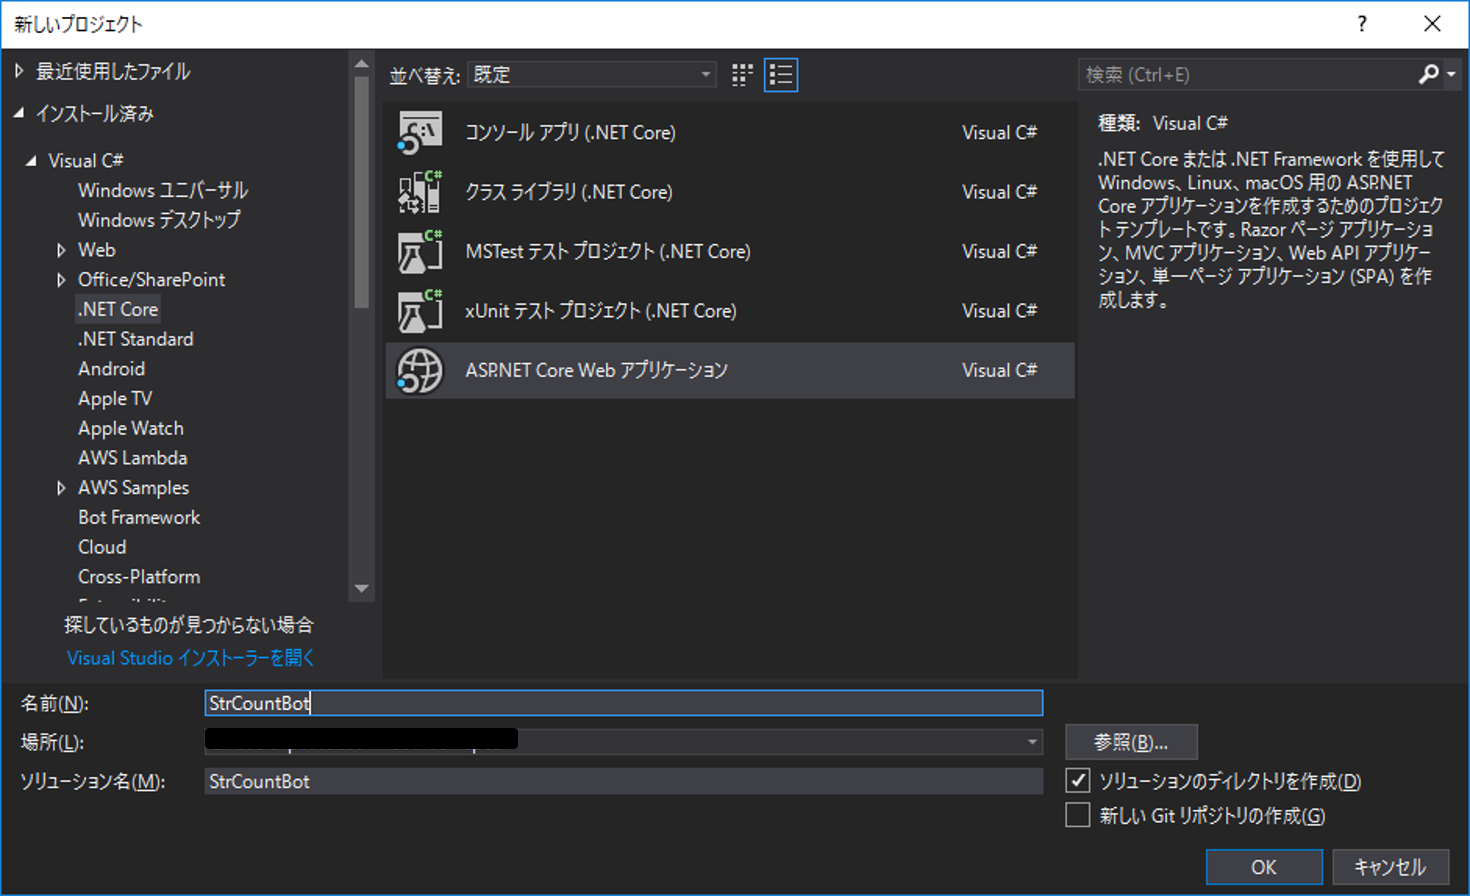
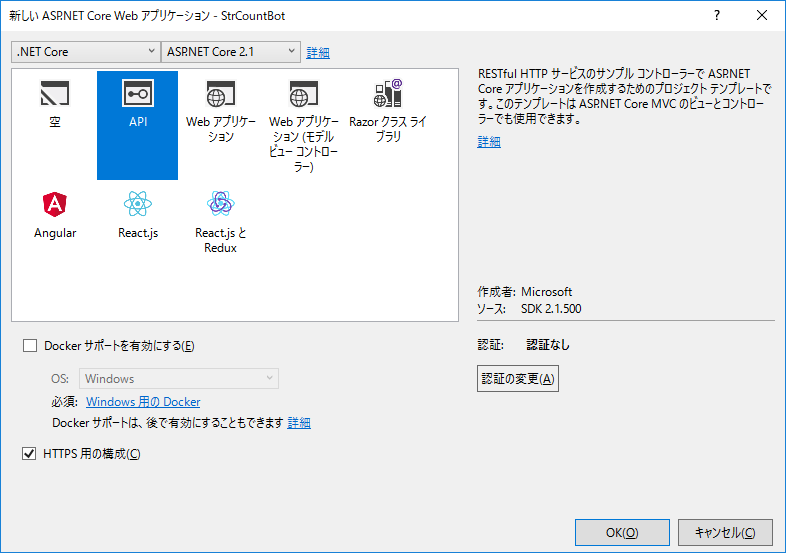
- 「API」を選択し、「OK」を選択することでWebAPIプロジェクトが作成されます
Botにするための改修
ここは主に@kenakamuさんの記事を参考にさせていただいています。
- コントローラは不要なので、Contollersフォルダを削除
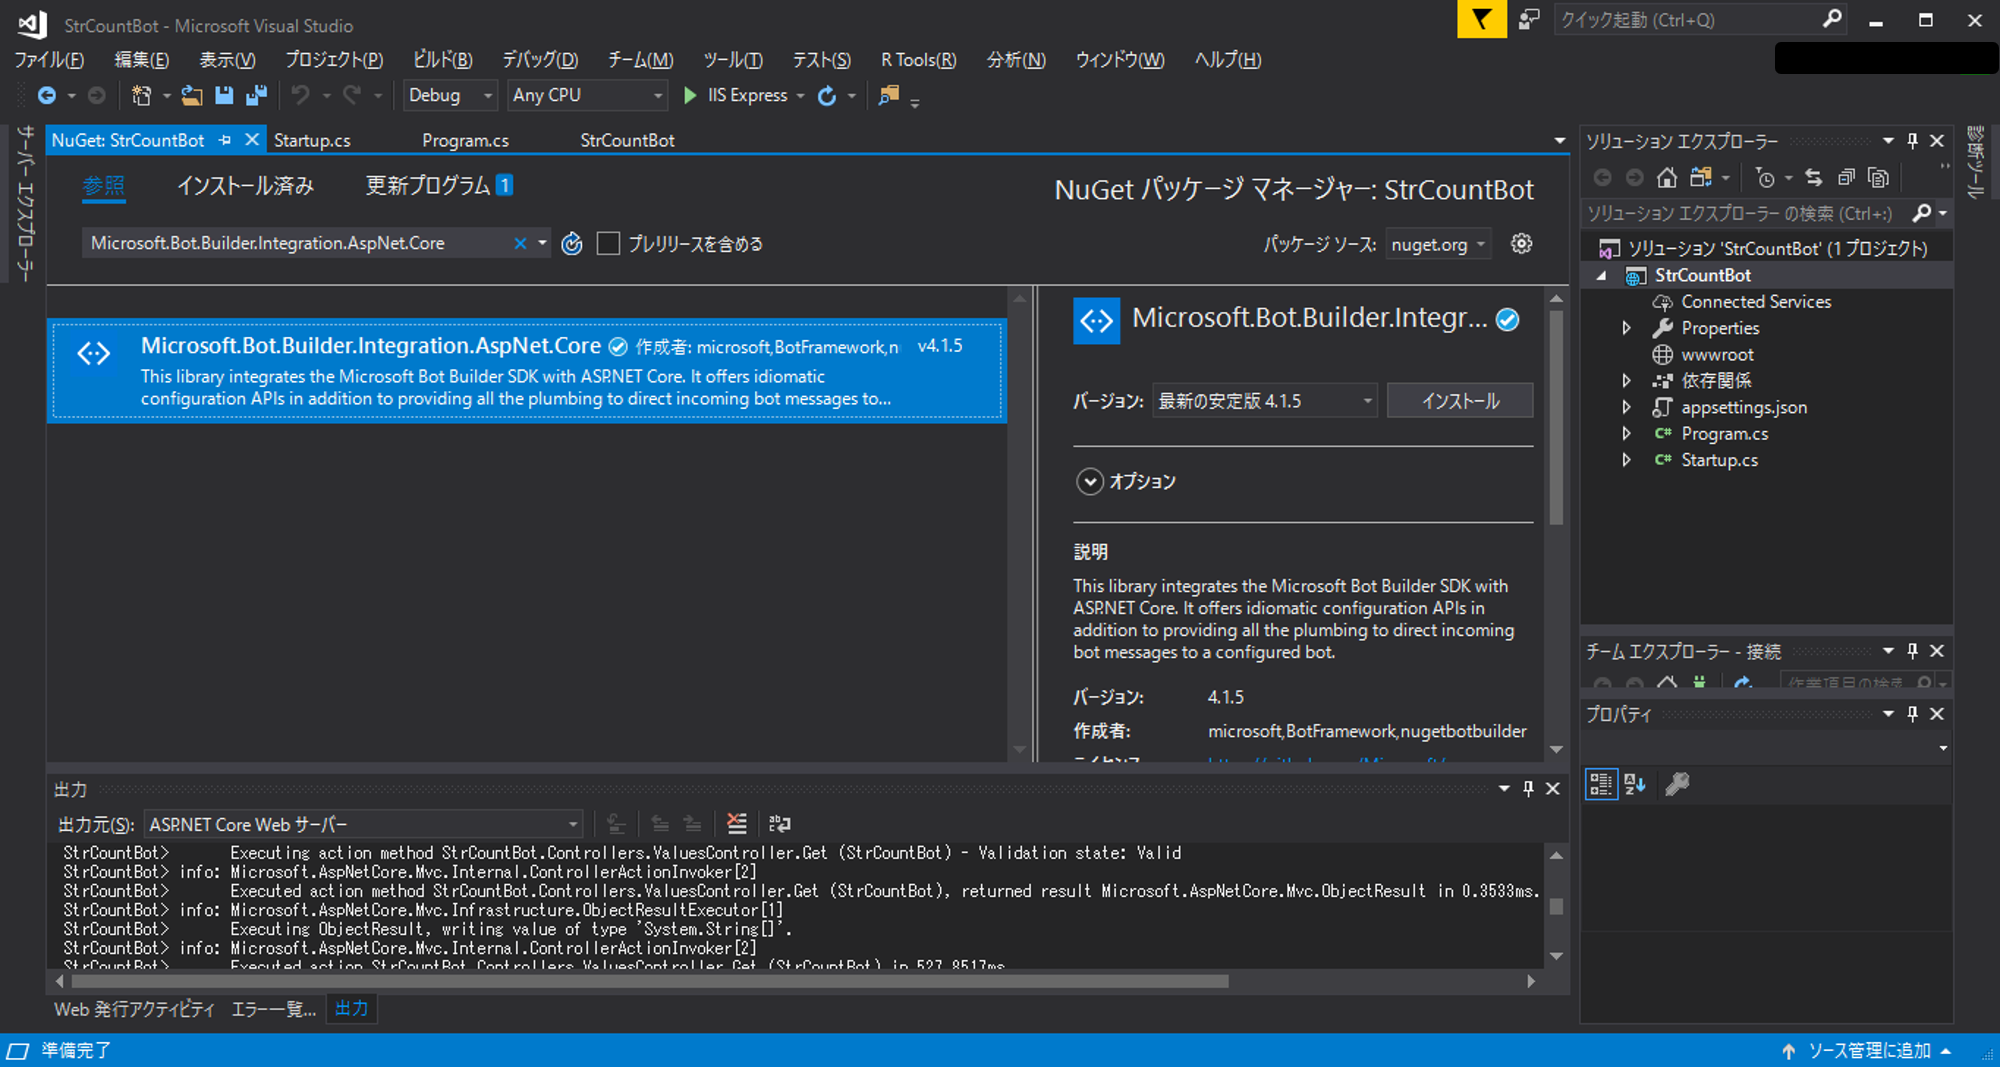
- プロジェクト名を右クリック、「NuGetパッケージの管理」を選択
- NuGetパッケージマネージャが表示されるので、参照のタブで「Microsoft.Bot.Builder.Integration.AspNet.Core」を検索し、インストール
-
プロジェクトにStrCountBot.csを追加し、コードを以下のようにする
using System.Threading; using System.Threading.Tasks; using Microsoft.Bot.Builder; using Microsoft.Bot.Schema; namespace StrCountBot { public class StrCountBot : IBot { public async Task OnTurnAsync(ITurnContext turnContext, CancellationToken cancellationToken = default(CancellationToken)) { // ユーザが入力した文字とその文字数を返す if (turnContext.Activity.Type == ActivityTypes.Message && !string.IsNullOrEmpty(turnContext.Activity.Text)) await turnContext.SendActivityAsync("「" + turnContext.Activity.Text + "」の文字数は" + turnContext.Activity.Text.Length + "文字です"); } } } -
Startup.csのコードを下記に修正
using Microsoft.AspNetCore.Builder;
using Microsoft.AspNetCore.Hosting;
using Microsoft.Extensions.Configuration;
using Microsoft.Extensions.DependencyInjection;
using Microsoft.Bot.Builder.Integration.AspNet.Core;

namespace StrCountBot
{
    public class Startup
    {
        public Startup(IConfiguration configuration)
        {
            Configuration = configuration;
        }

        public IConfiguration Configuration { get; }

        // This method gets called by the runtime. Use this method to add services to the container.
        public void ConfigureServices(IServiceCollection services)
        {
            services.AddBot<StrCountBot>();
        }

        // This method gets called by the runtime. Use this method to configure the HTTP request pipeline.
        public void Configure(IApplicationBuilder app, IHostingEnvironment env)
        {
            app.UseBotFramework();
        }
    }
}
以上で、ボットが作成できたので動作を確認してみます。
(なぜこんなコードになるのか気になる人は冒頭で述べたようにこの記事を見てください。非常にわかりやすいです。)
Botをローカルでテスト (Bot Framework Emulator)
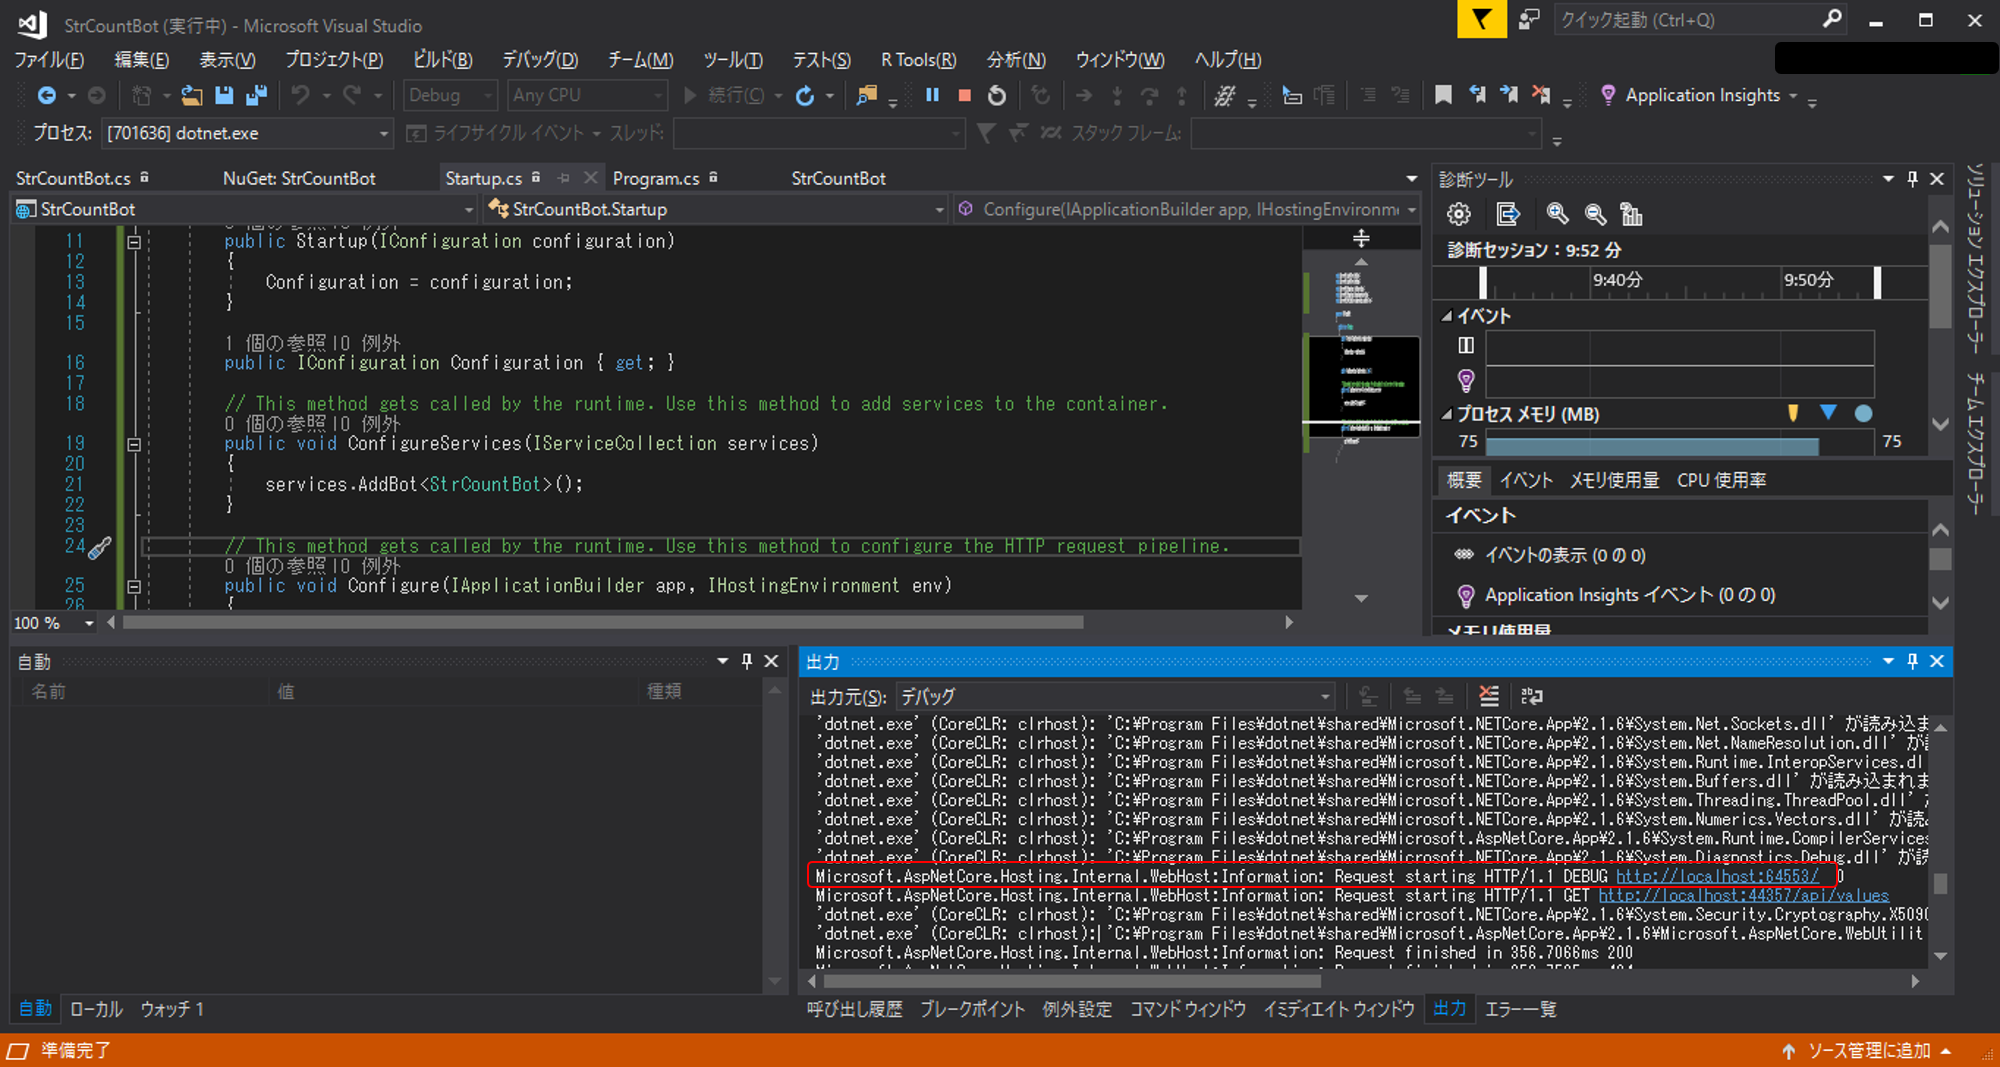
- 「デバッグの開始」を押して実行
- Visual Studioの出力タブより、ローカルで接続するhttpのポートを確認する(今回は64553)
- Bot Framework Emulatorを起動
- Welcomeタブにある「create a new bot configuration.」をクリック
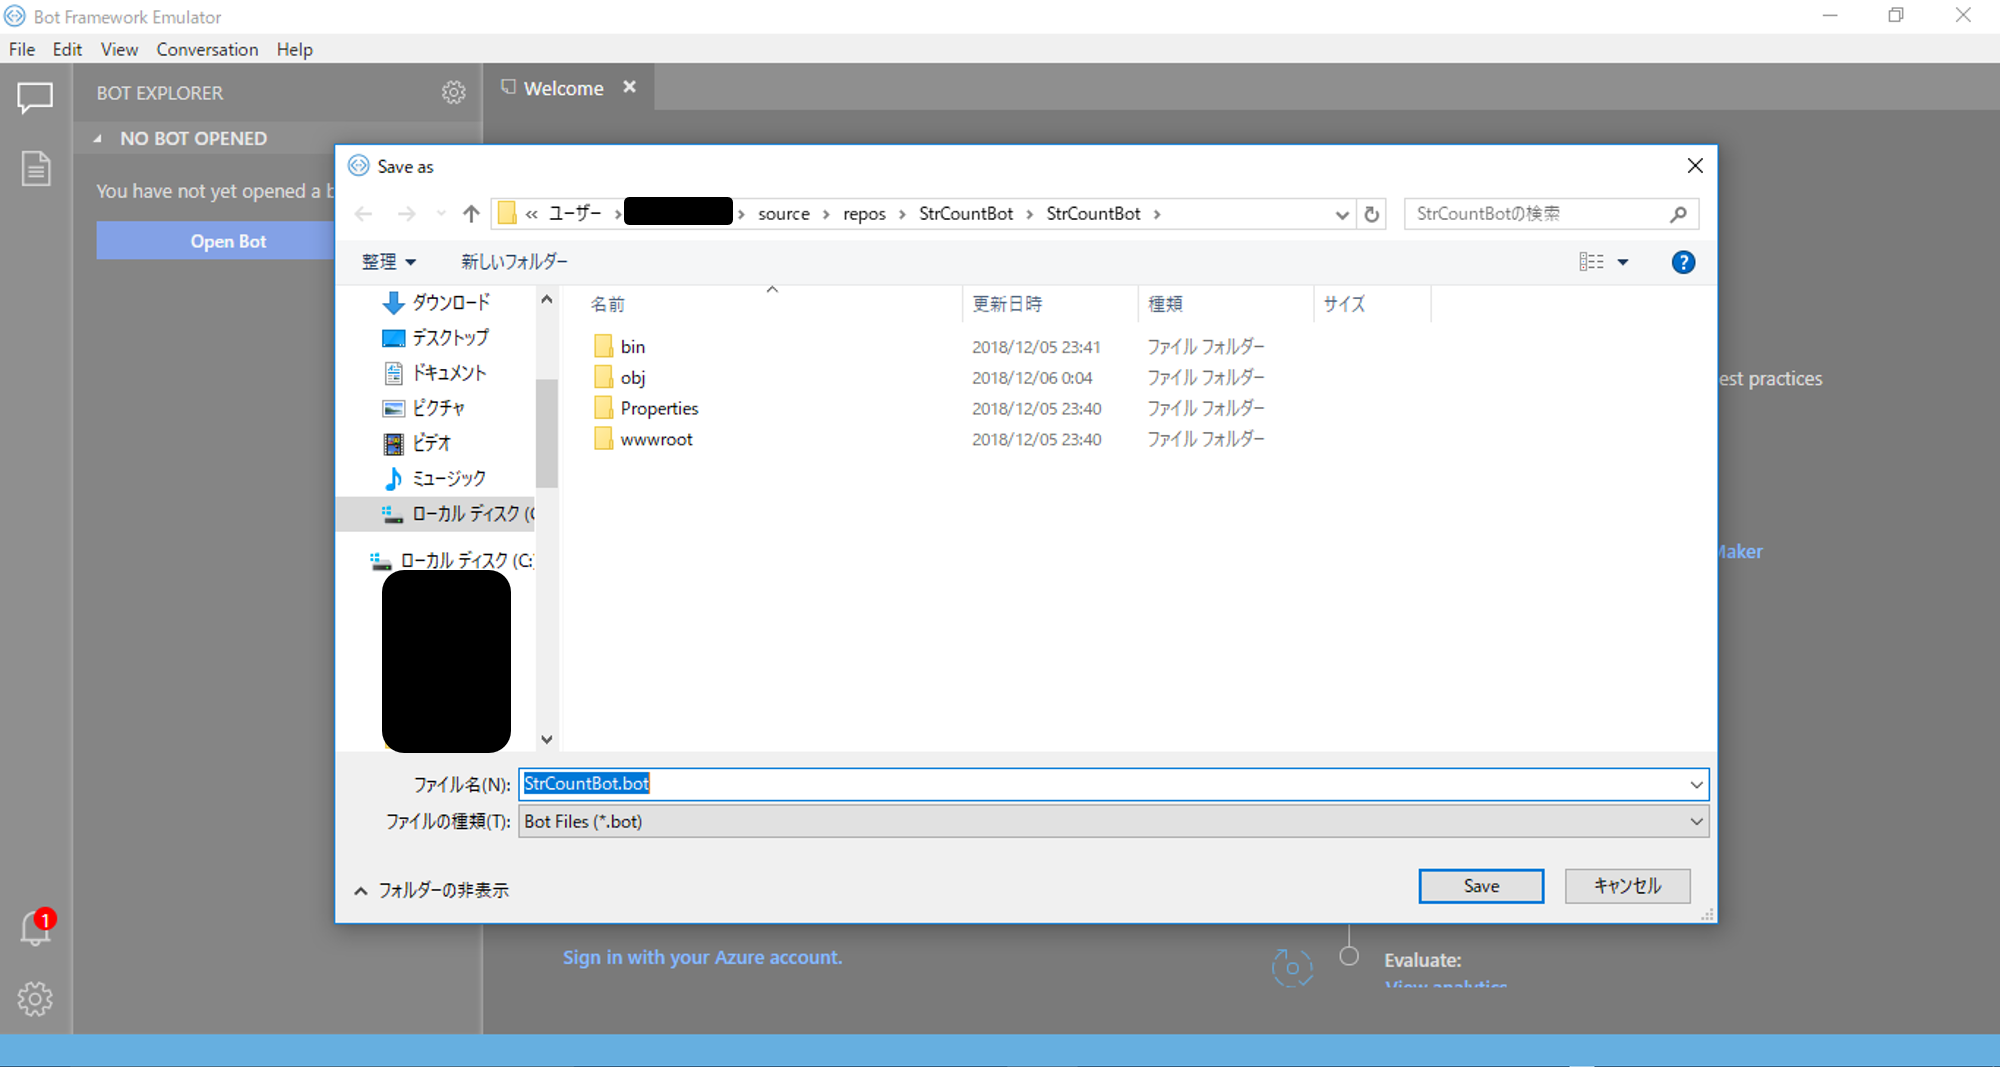
- 「名前」を「StrCountBot」、「Endpoint URL」を「http://localhost:64553/api/messages」と入力し、「Save and connect」をクリックして、.botファイルをプロジェクトフォルダに保存

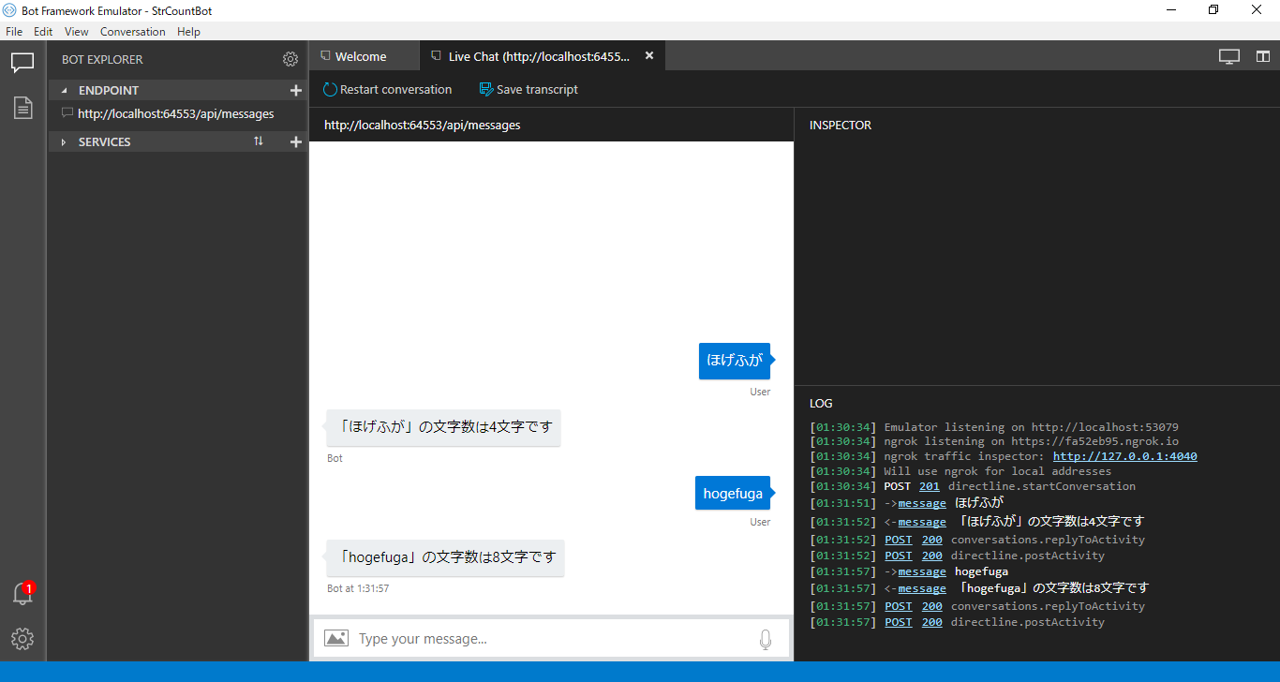
- チャット画面が表示されるので、メッセージを送信して動くことを確認する。
Azureにデプロイ (Viusal Studio 2017)
ローカルで動作することを確認したのでAzureにデプロイします。
1. プロジェクト名を右クリック、「発行」を選択
2. 発行先を「App Service」を選択し、「詳細設定...」を選択
3. ファイル発行オプションの「発行先の追加オプションを削除する」にチェックマークを付けて保存
4. プロファイルの作成を選択
5. 「アプリ名」「サブスクリプション」「リソースグループ」「ホスティングプラン」「Application Insights」の各項目を入力して作成 (「リソースグループ」「ホスティングプラン」は既存のものがない場合は新規作成しましょう)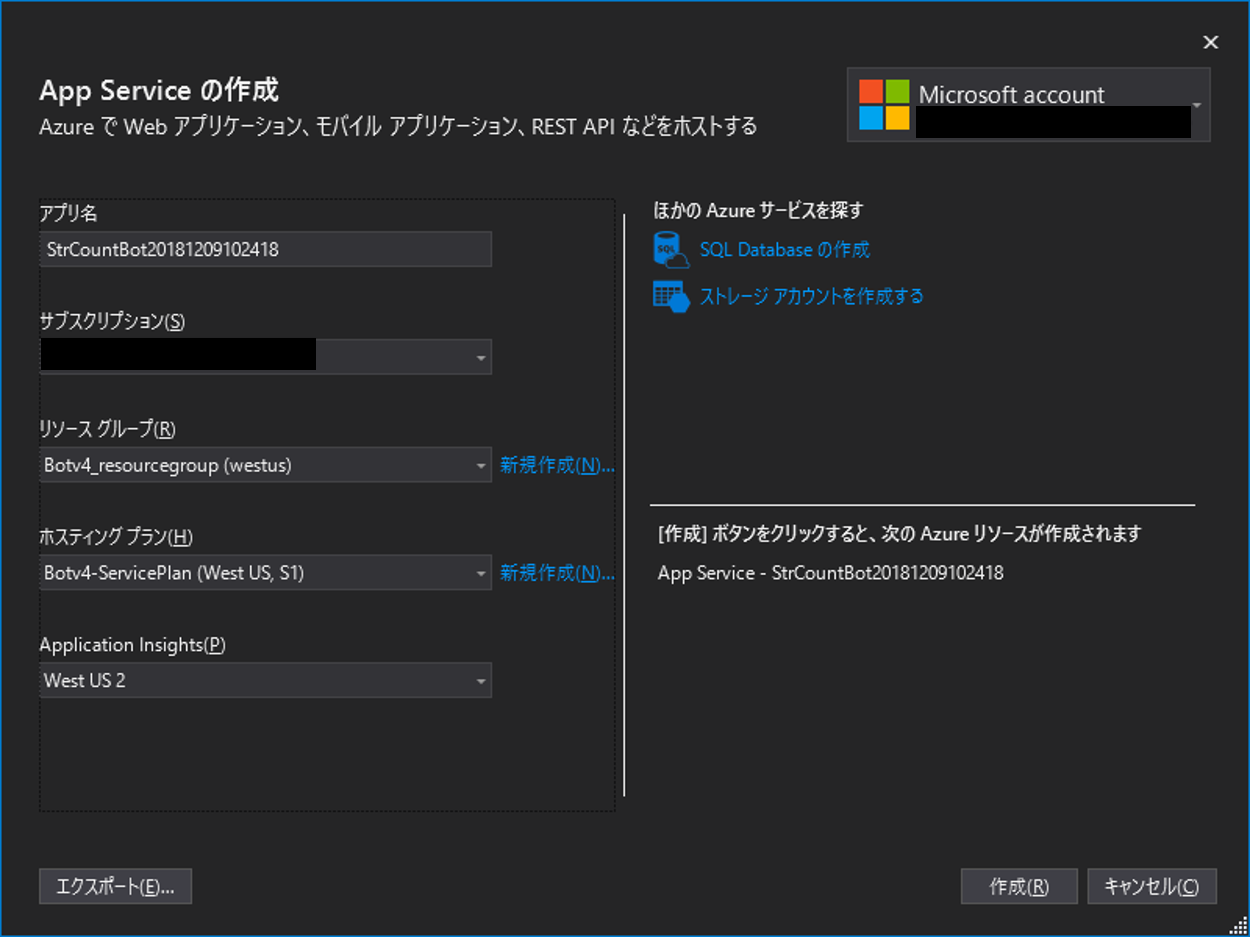
6. 作成が完了したら「発行」を選択
以上でAzureにデプロイができました。次は、Bot Serviceへの登録作業になります。
Bot Channels Registrationを作成 (Azure Portal)
Azureにデプロイしたボットを登録します。
1. Azure Portalで「リソースの作成」で「Bot Channels Registration」を作成
2. 「ボット名」「サブスクリプション」「リソースグループ」「場所」「価格レベル」「メッセージングエンドポイント」「Application Insights」「MicrosoftアプリIDとパスワード」の各項目を入力して作成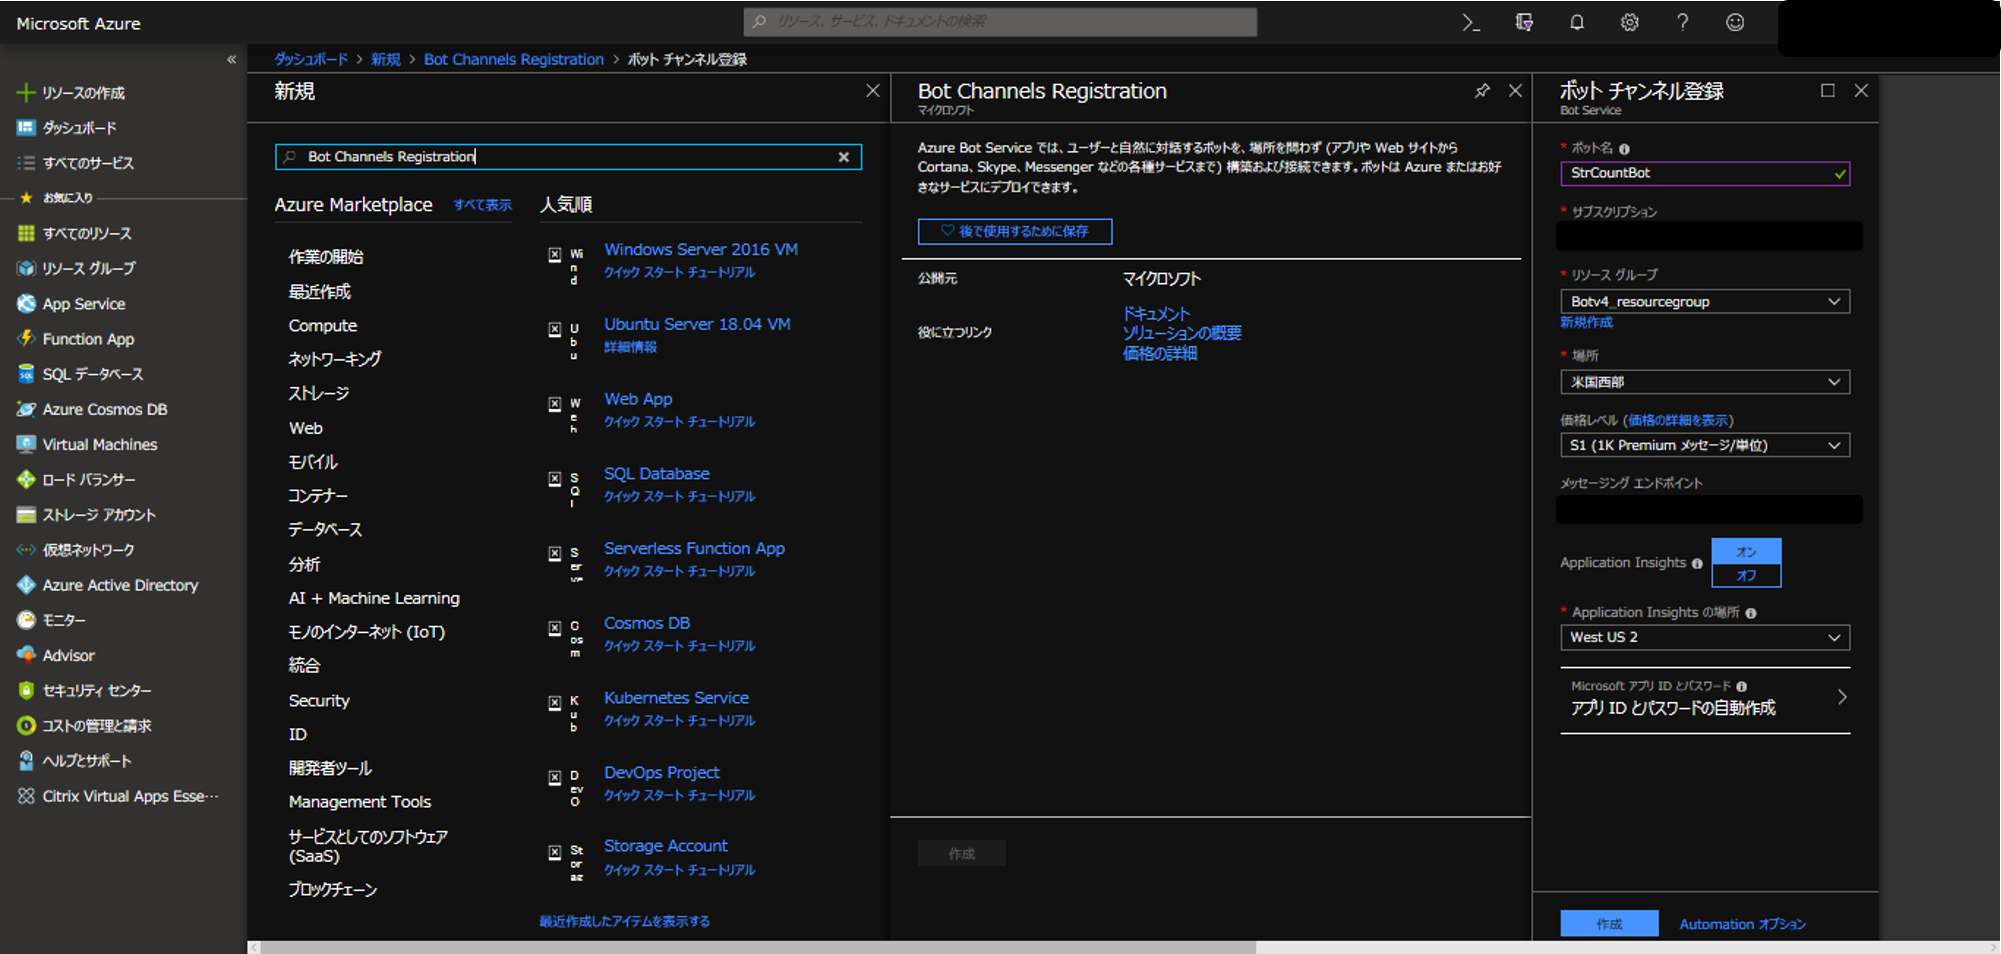 *「メッセージングエンドポイント」は、https://~.azurewebsites.net/api/messages
3. 作成が完了したら、種類が「ボットチャンネル登録」の項目ができているので選択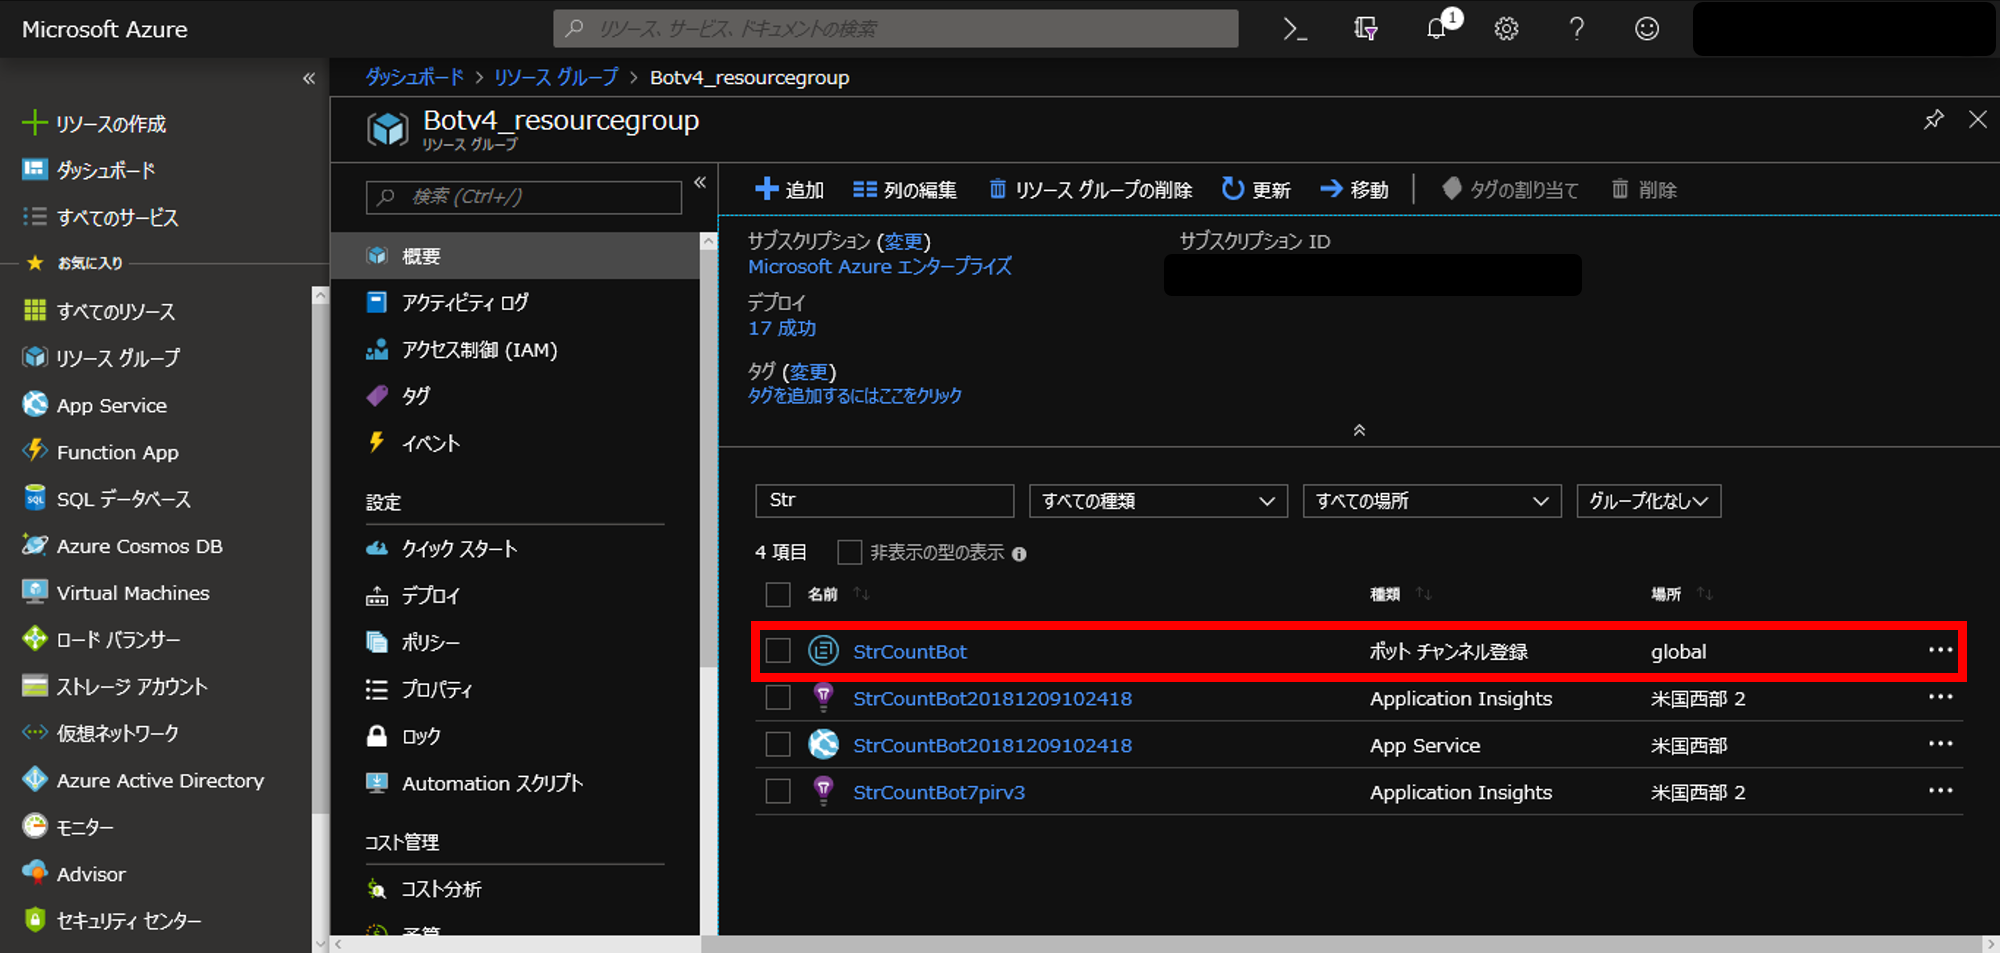
4. 「Webチャットでテスト」で動作確認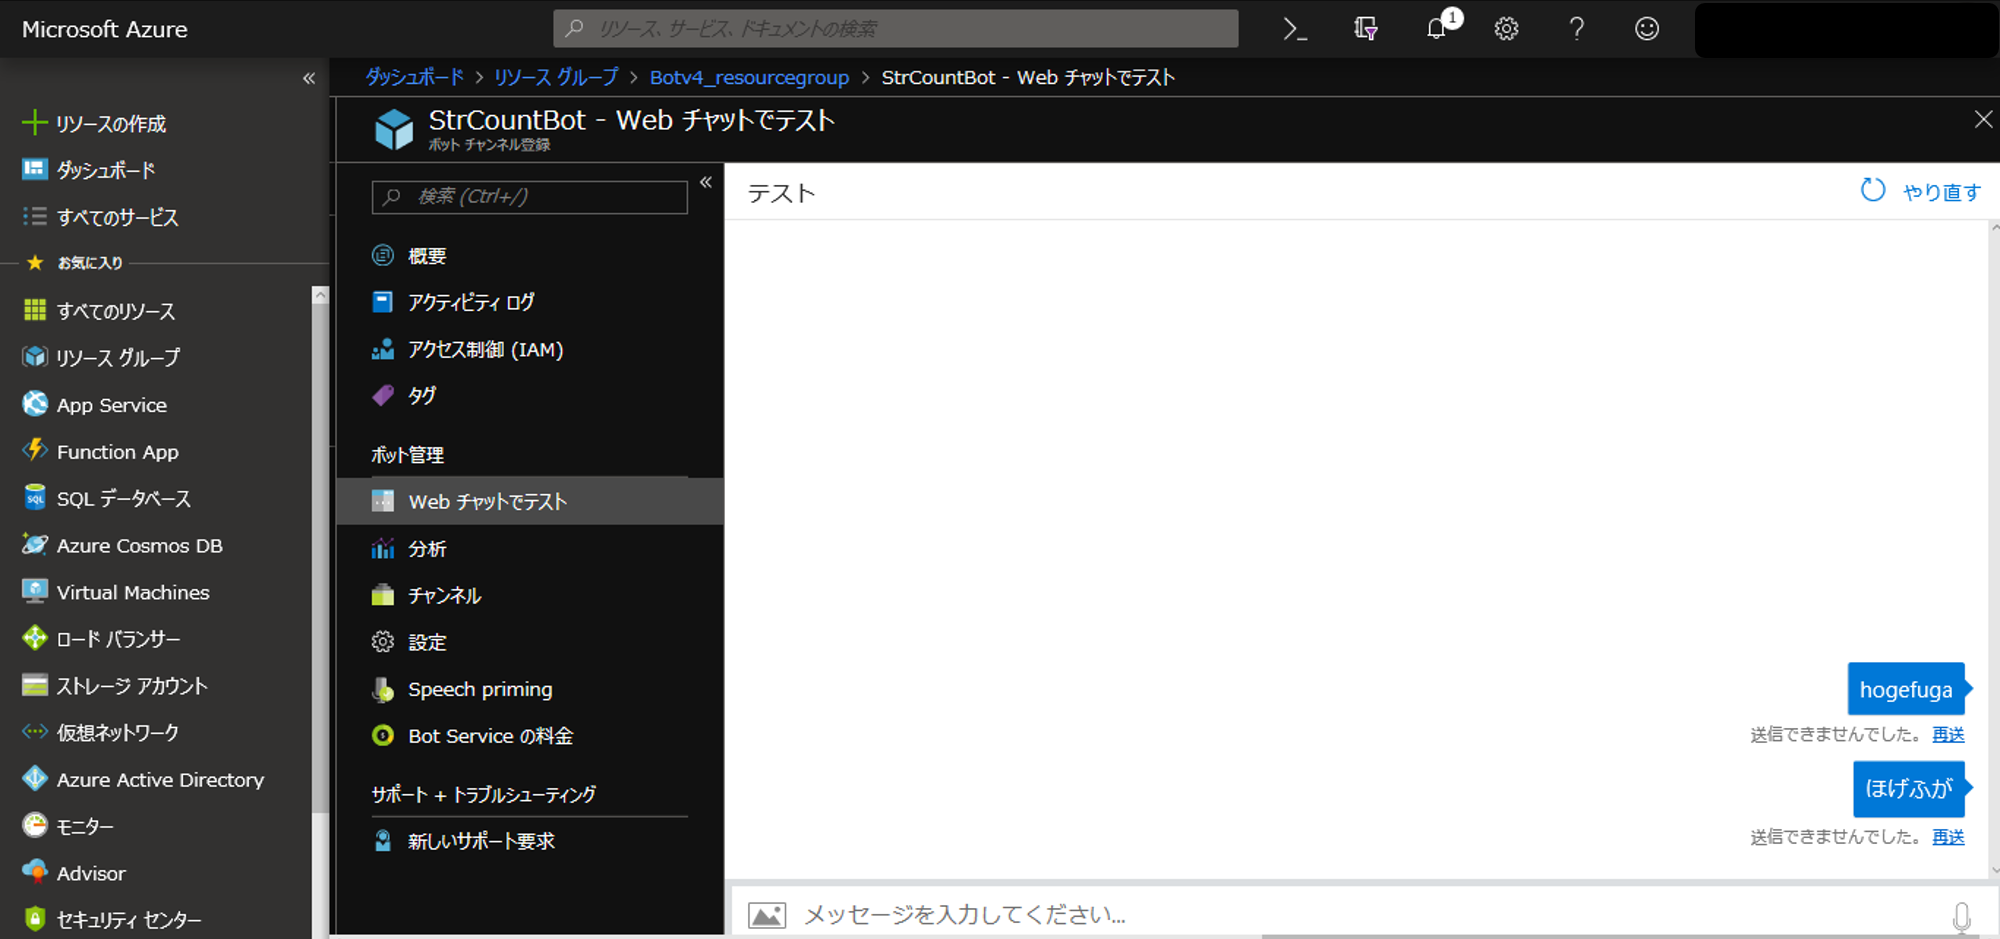 しかし、この画像のようにメッセージが送信できません...
これは当然の結果で、Bot Framework Connectorを使用してボットを接続するためには、Bot Framework認証が必要で、作成したボットにはその部分が入っていないためメッセージが送れません。なので、次は認証部分をボットに追加してみましょう。
Botにセキュリティ認証部分を追加
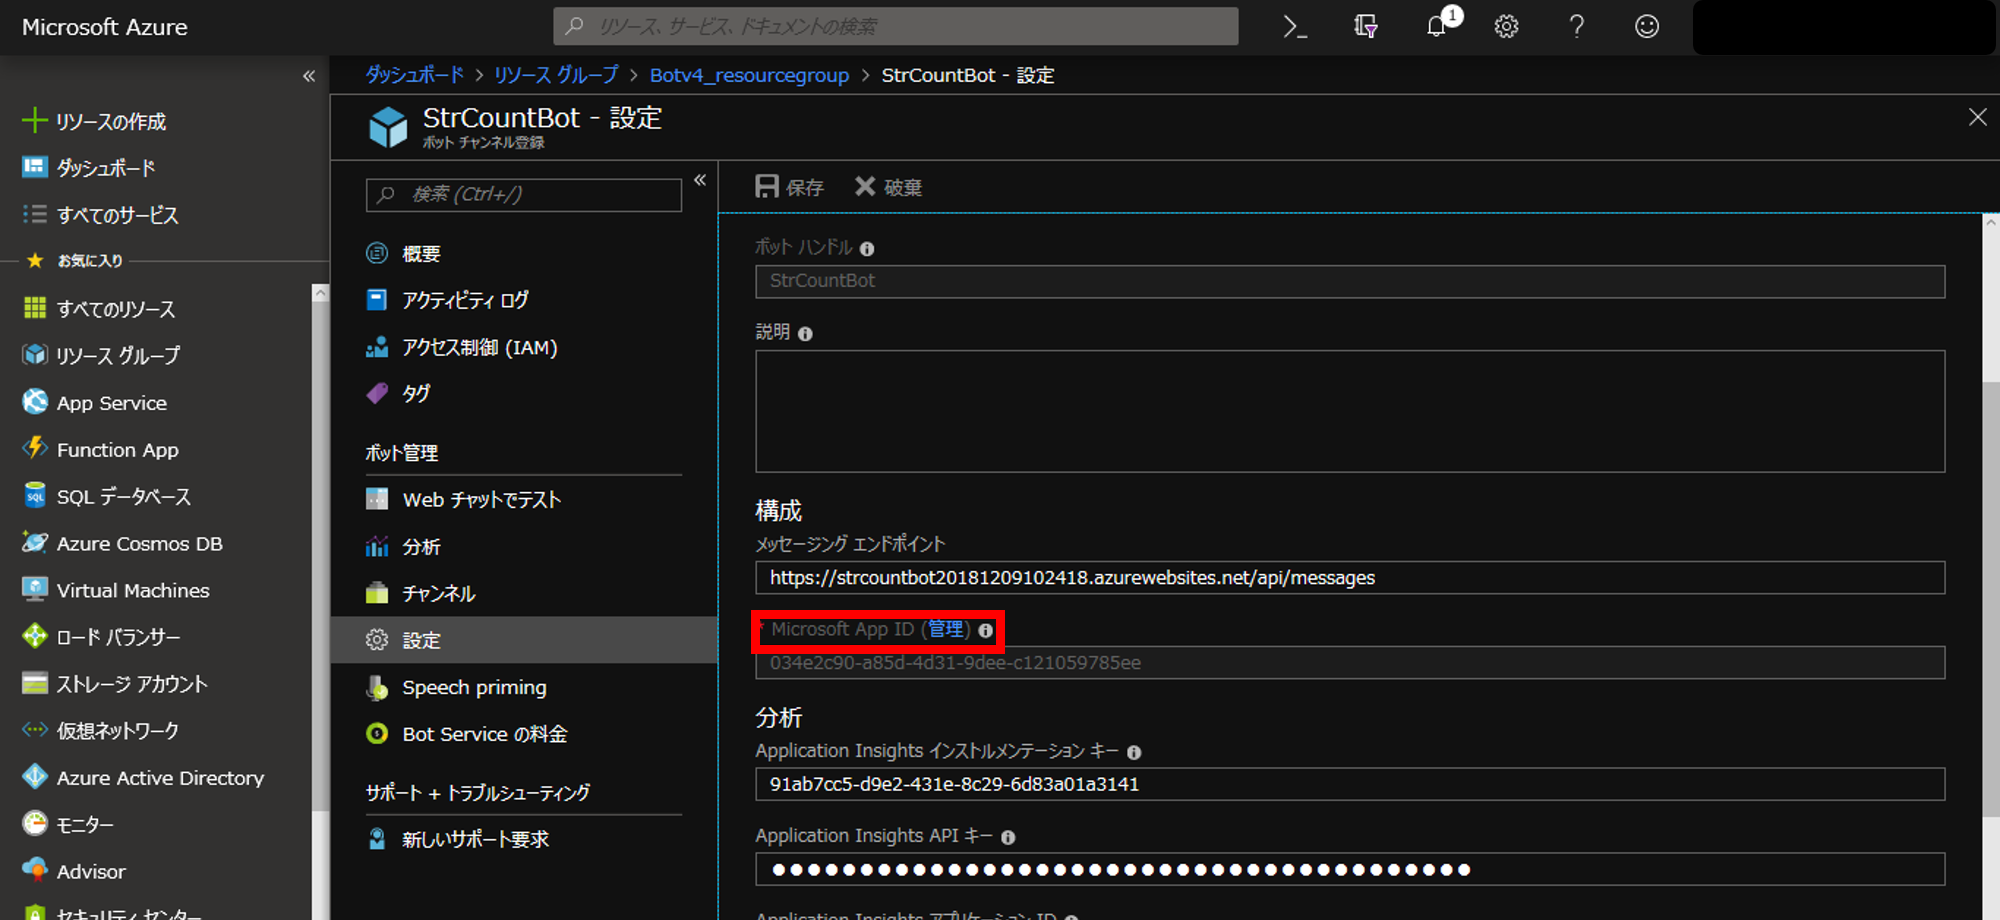
前節で述べたように、Bot Framework Connectorを使用してボットを接続するためにはBot Framework認証が必要となります。これはマイクロソフトアプリケーションとして登録されていることが必要になるのですが、実はBot Channels Registrationを作成した際に既に登録されています。(「MicrosoftアプリIDとパスワード」の部分)
- 「設定」のノードで、Microsoft App IDの「管理」を選択
- ボットの登録情報が記載されているページから「アプリケーションID」と「パスワード」を確認し、どこかに控えておきましょう。
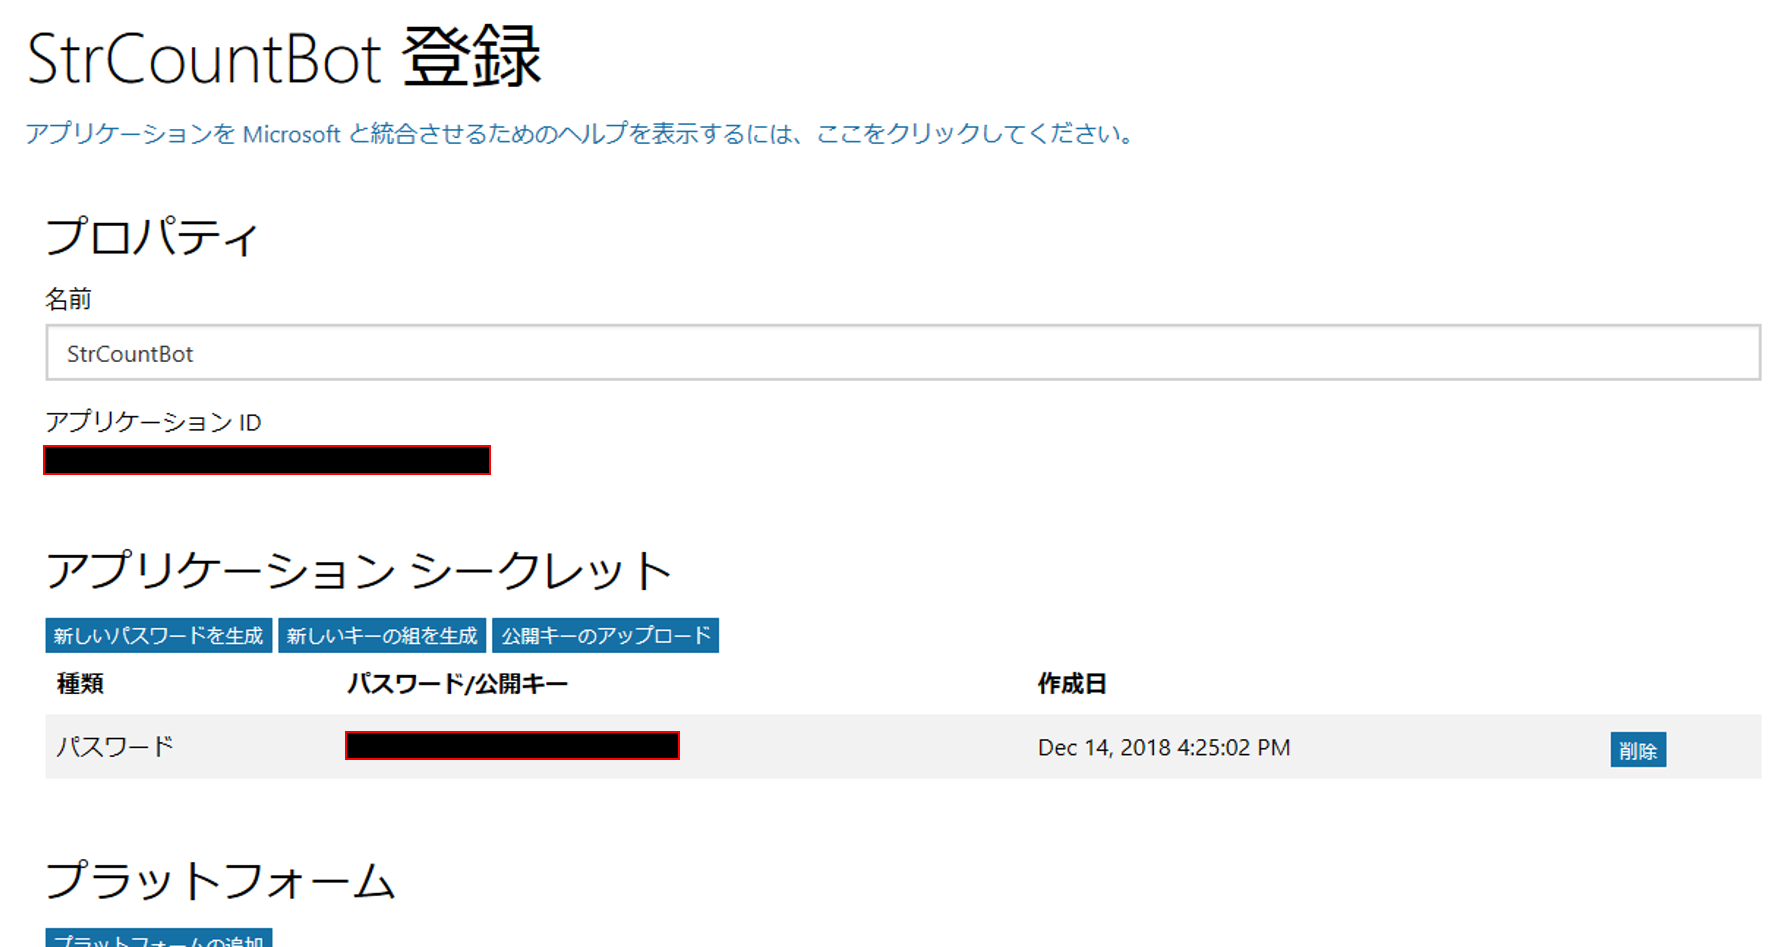 *既に作成されているパスワードは表示することができないので、「新しいパスワードを生成」から新たに作成したパスワードを使用してください。またその際に保存を忘れずに...
 -
Startup.csのコードを下記に修正("アプリケーションID","パスワード"は控えたものを使用)
using Microsoft.AspNetCore.Builder;
using Microsoft.AspNetCore.Hosting;
using Microsoft.Extensions.Configuration;
using Microsoft.Extensions.DependencyInjection;
using Microsoft.Bot.Builder.Integration.AspNet.Core;
using Microsoft.Bot.Connector.Authentication;  //認証

namespace StrCountBot
{
    public class Startup
    {
        public Startup(IConfiguration configuration)
        {
            Configuration = configuration;
        }

        public IConfiguration Configuration { get; }

        // This method gets called by the runtime. Use this method to add services to the container.
        public void ConfigureServices(IServiceCollection services)
        {
            services.AddBot<StrCountBot>(options =>
            {
                //APP認証
                options.CredentialProvider = new SimpleCredentialProvider("アプリケーションID", "パスワード");
            });
        }

        // This method gets called by the runtime. Use this method to configure the HTTP request pipeline.
        public void Configure(IApplicationBuilder app, IHostingEnvironment env)
        {
            app.UseBotFramework();
        }
    }
}
Azureに再デプロイして、「Webチャットでテスト」で動作確認
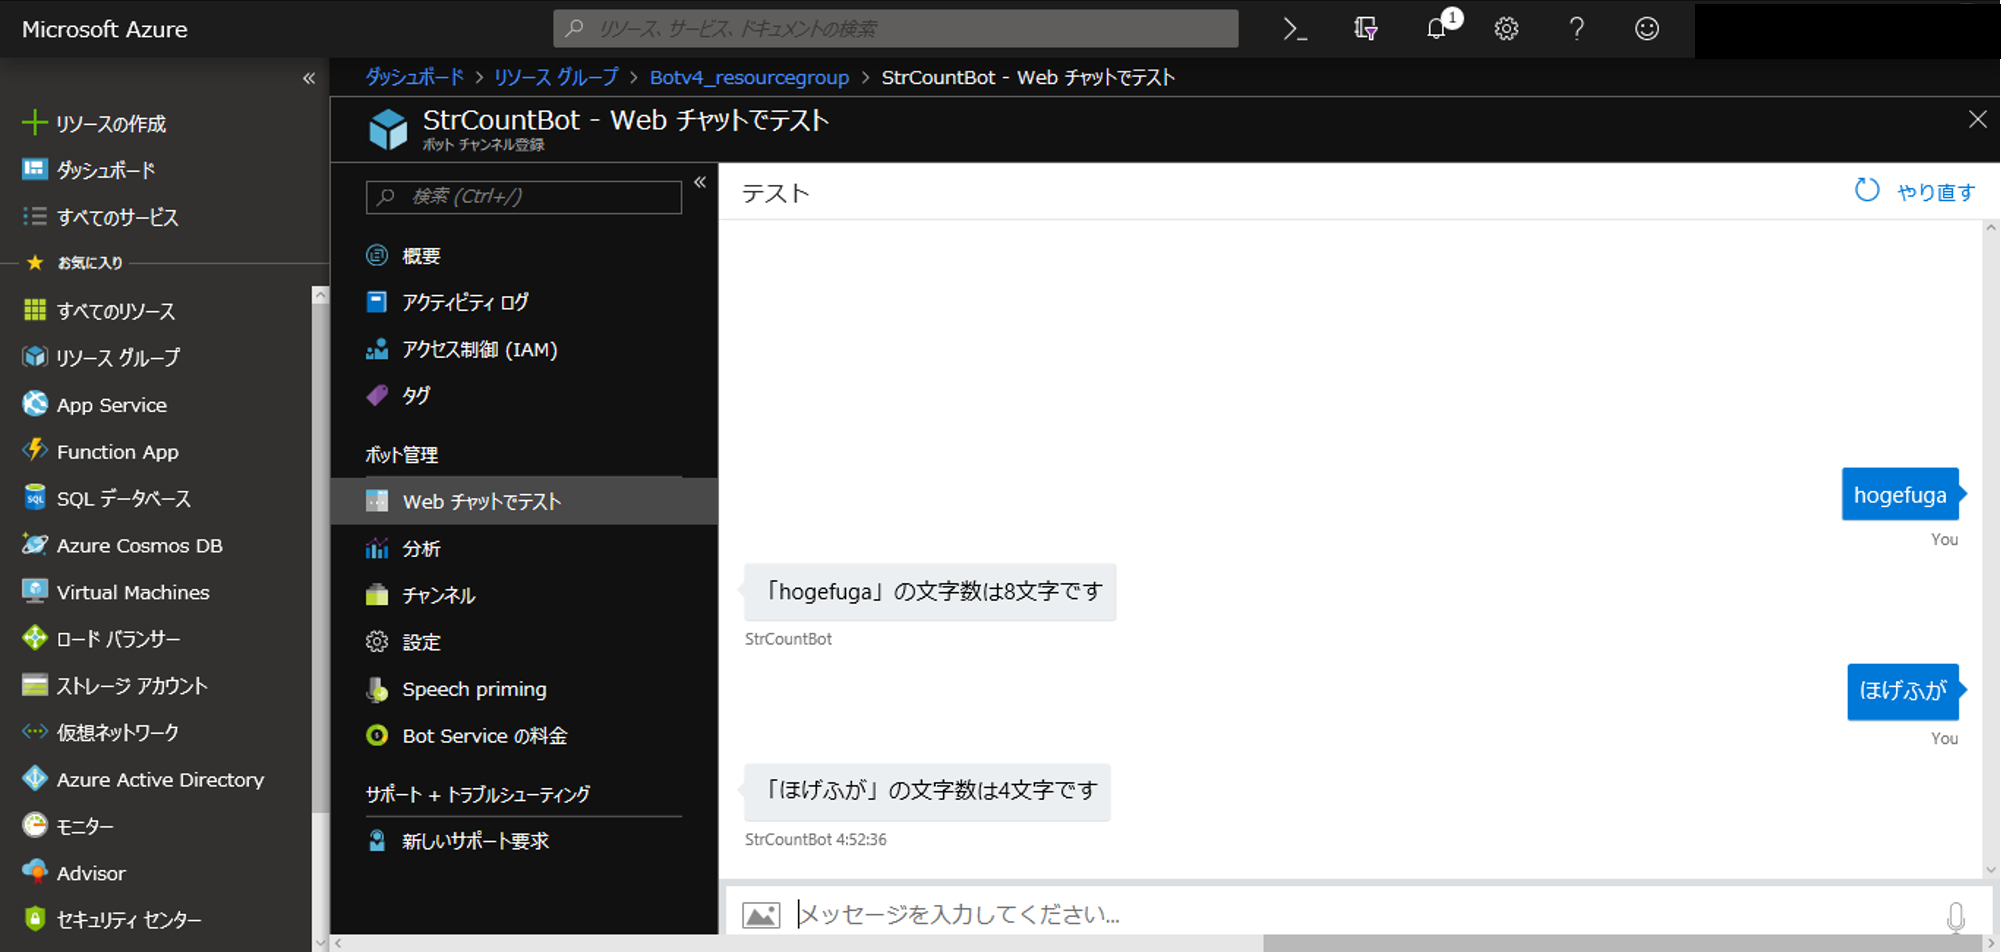
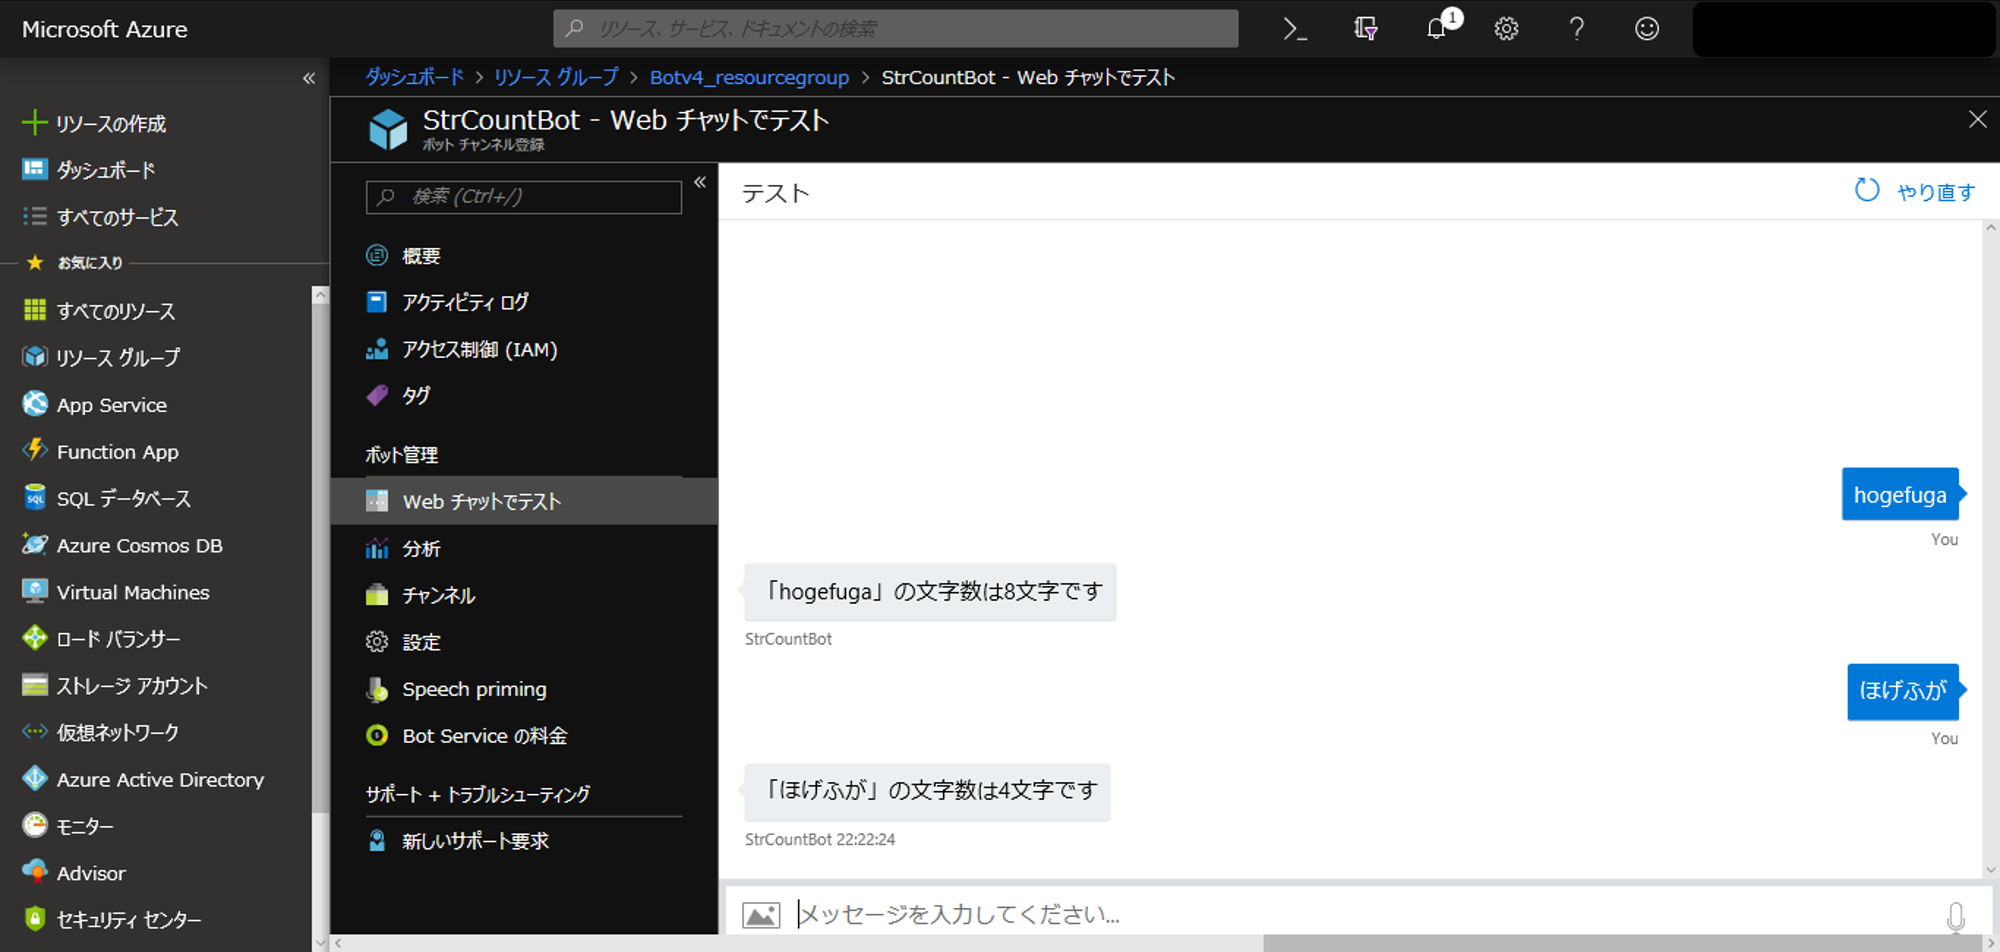 無事メッセージが送れるようになりました!ボットもしっかりと返答しています。
これで、ローカルで作成したボットをAzureにデプロイして動作させるところまでの一連の流れができました。今後は、ローカルでコード修正・動作確認して、Azureにデプロイ!という循環を回して自分用にカスタマイズしていきたいところですが、Startup.csに認証部分を実装するだけの修正方法ではこれから開発する上で問題が生じます。
というのも、この実装だとクラウドでは動くのですが、ローカルでは動かなくなりますw (アプリケーション登録しているのはクラウドの方だけなので、ローカルで実行すると認証部分でむしろエラーになります...)
また、IDやPasswordをコードに直接書き込む行為はセキュリティ面からいってあり得ないと思われます。
なので、セキュリティに少し配慮しつつ、ローカル/クラウドのどちらでもボットが動くように修正していきます。
Botをローカル/クラウドで動作できるように改修
Bot Framework V4ではボットファイル(.bot)がボットに関わる全ての設定を定義するようになっています。実際にボットをローカルでテストする際にBot Framework Emulatorで作成した.botを見てみると、
{
    "name": "StrCountBot",
    "description": "",
    "services": [
        {
            "type": "endpoint",
            "appId": "",
            "appPassword": "",
            "endpoint": "http://localhost:64553/api/messages",
            "id": "89534f60-f8a9-11e8-a165-e702897bc7f2",
            "name": "http://localhost:64553/api/messages"
        }
    ],
    "padlock": "",
    "version": "2.0",
    "overrides": null,
    "path": "C:\\Users\\<username>\\source\\repos\\StrCountBot\\StrCountBot\\StrCountBot.bot"
}
となっていて、servicesのキーに対する値として、ローカルでテストするときのエンドポイント情報が書き込まれています。現在のコードでは.botを参照せずに実行していますが、Bot Framework V4ではリソース管理をこのボットファイルで行うため、参照して実行するのが普通となります。
なので、.botにクラウドでのエンドポイント情報を追加し、コードに.botを参照すること、また実行環境がローカルかクラウドかを認識させて認証するかしないかの分岐をすることでローカルでもクラウドでも動作できるようになります。その作業をしていきましょう!
- .botにクラウドのエンドポイント情報を追加
-
.botのローカル/クラウドのそれぞれのエンドポイントのnameのキーに対する値をdevelopment/productionにしておく
{
    "name": "StrCountBot",
    "description": "",
    "services": [
        {
            "type": "endpoint",
            "appId": "",
            "appPassword": "",
            "endpoint": "http://localhost:64553/api/messages",
            "id": "89534f60-f8a9-11e8-a165-e702897bc7f2",
            "name": "development"
        },
        {
            "type": "endpoint",
            "appId": "アプリケーションID",
            "appPassword": "パスワード",
            "endpoint": "https://~.azurewebsites.net/api/messages",
            "id": "345",
            "name": "production"
        }
    ],
    "padlock": "",
    "version": "2.0",
    "overrides": null,
    "path": "C:\\Users\\<username>\\source\\repos\\StrCountBot\\StrCountBot\\StrCountBot.bot"
}
*"id"は適当な文字列で問題ないです。
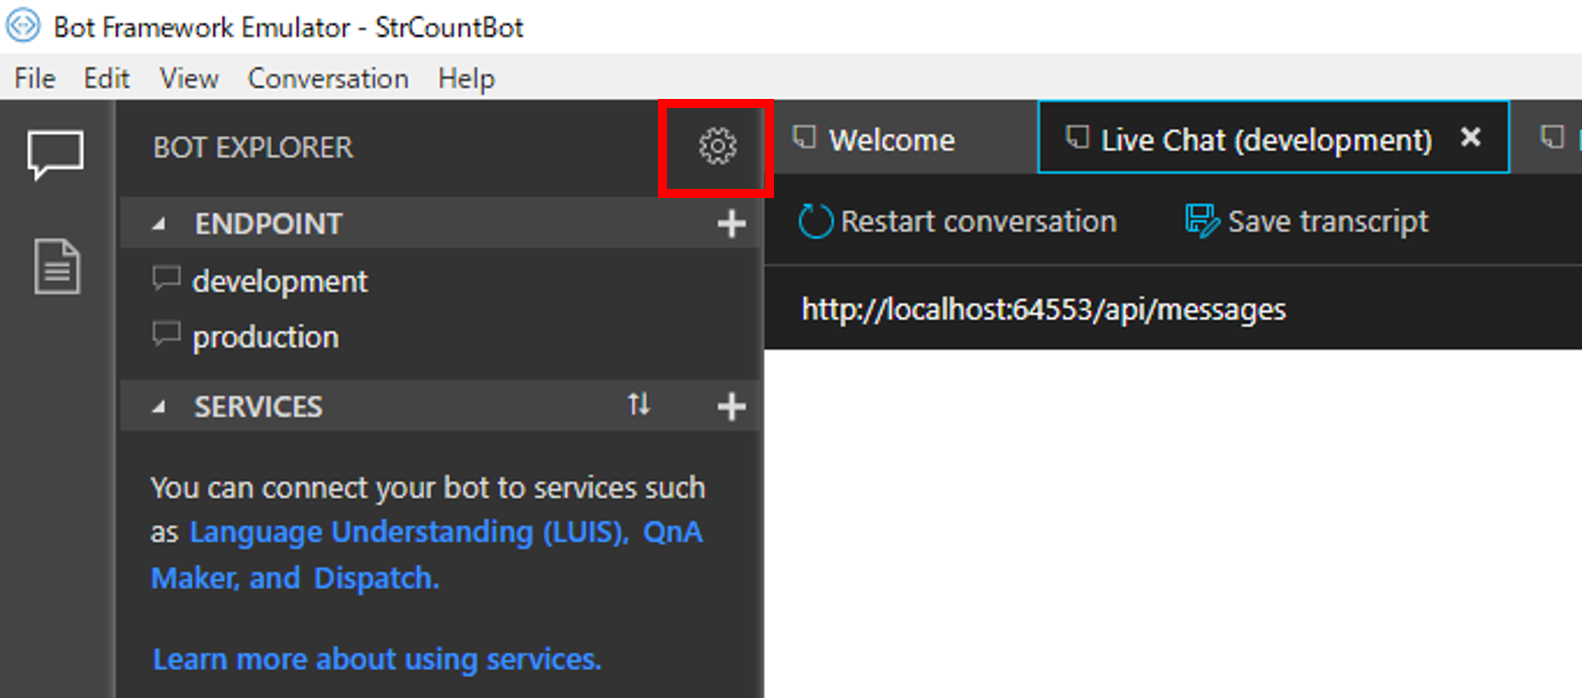
Bot Framework Emulatorで、.botを開き、歯車のマークを選択
「Encrypt keys stored in your bot configuration」にチェックマークを付け、.botを暗号化(Secretキーは控えておきましょう!)
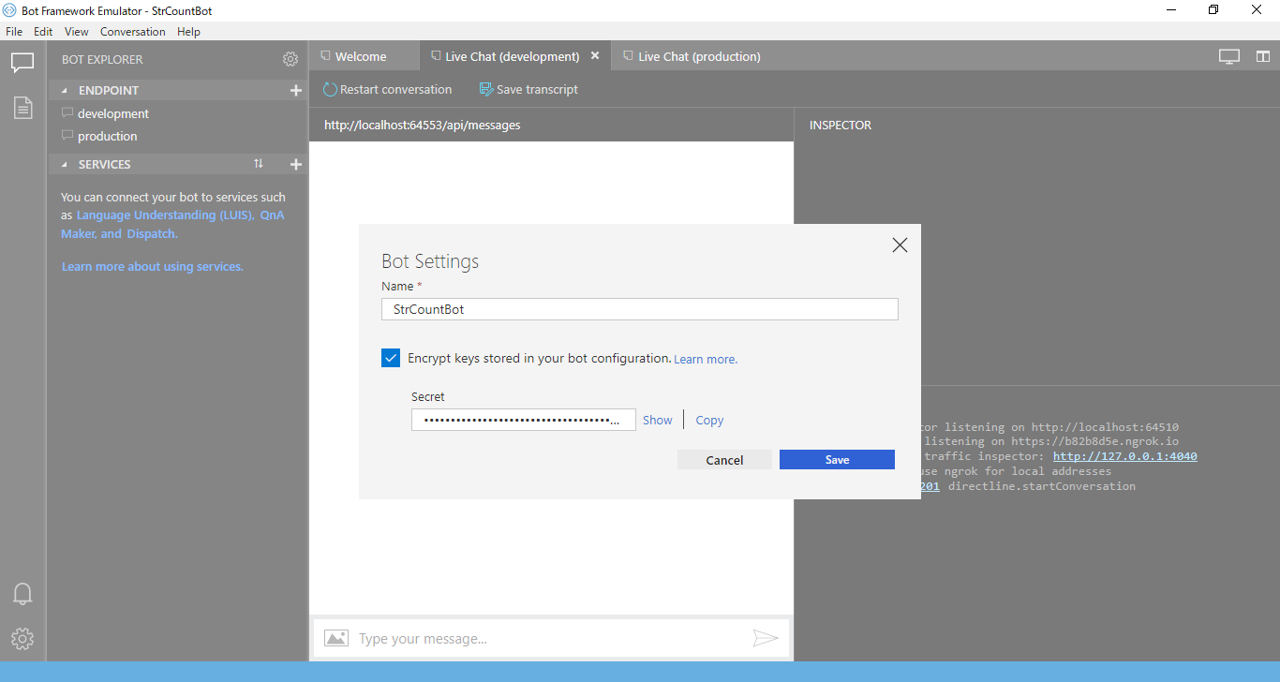 *.botは初めに述べたように、設定を持つファイルなので取り扱いに注意する必要があり、Bot Framework V4では .bot の中のセキュリティに関する値を暗号化する機能があるため、この作業をしています。
-
appsetting.jsonを下記に修正 ("Secretキー"は控えたものを使用)
{ "Logging": { "LogLevel": { "Default": "Warning" } }, "botFilePath": "./StrCountBot.bot", "botFileSecret": "Secretキー", "AllowedHosts": "*" } -
Startup.csを下記に修正
using Microsoft.AspNetCore.Builder;
using Microsoft.AspNetCore.Hosting;
using Microsoft.Extensions.Configuration;
using Microsoft.Extensions.DependencyInjection;
using Microsoft.Bot.Builder.Integration.AspNet.Core;
using Microsoft.Bot.Connector.Authentication;  //認証
using Microsoft.Bot.Configuration;
using System;
using System.Linq;

namespace StrCountBot
{
    public class Startup
    {
        private bool _isProduction = false;

        public Startup(IHostingEnvironment env)
        {
            //現在の実行環境がProductionかチェック
            _isProduction = env.IsProduction();

            //AppSettingsと環境変数を取得
            var builder = new ConfigurationBuilder()
                .SetBasePath(env.ContentRootPath)
                .AddJsonFile("appsettings.json", optional: true, reloadOnChange: true)
                .AddEnvironmentVariables();

            Configuration = builder.Build();
        }

        public IConfiguration Configuration { get; }

        // This method gets called by the runtime. Use this method to add services to the container.
        public void ConfigureServices(IServiceCollection services)
        {
            // .botのパスとシークレット取得
            var secretKey = Configuration.GetSection("botFileSecret")?.Value;
            var botFilePath = Configuration.GetSection("botFilePath")?.Value;

            // .botの読み込み
            var botConfig = BotConfiguration.Load(botFilePath ?? @".\BotConfiguration.bot", secretKey);
            services.AddSingleton(sp => botConfig ?? throw new InvalidOperationException($"The .bot config file could not be loaded. ({botConfig})"));

            // 現在の実行環境におけるエンドポイントを取得
            var environment = _isProduction ? "production" : "development";
            var service = botConfig.Services.Where(s => s.Type == "endpoint" && s.Name == environment).FirstOrDefault();
            if (!(service is EndpointService endpointService))
            {
                throw new InvalidOperationException($"The .bot file does not contain an endpoint with name '{environment}'.");
            }

            services.AddBot<StrCountBot>(options =>
            {
                //APP認証情報
                options.CredentialProvider = new SimpleCredentialProvider(endpointService.AppId, endpointService.AppPassword);
            });
        }

        // This method gets called by the runtime. Use this method to configure the HTTP request pipeline.
        public void Configure(IApplicationBuilder app, IHostingEnvironment env)
        {
            app.UseBotFramework();
        }
    }
}
*Microsoft.Bot.Configurationはおそらくないはずなので、「Nugetパッケージの管理」からインストールする必要があります。
ローカルで動作することを確認

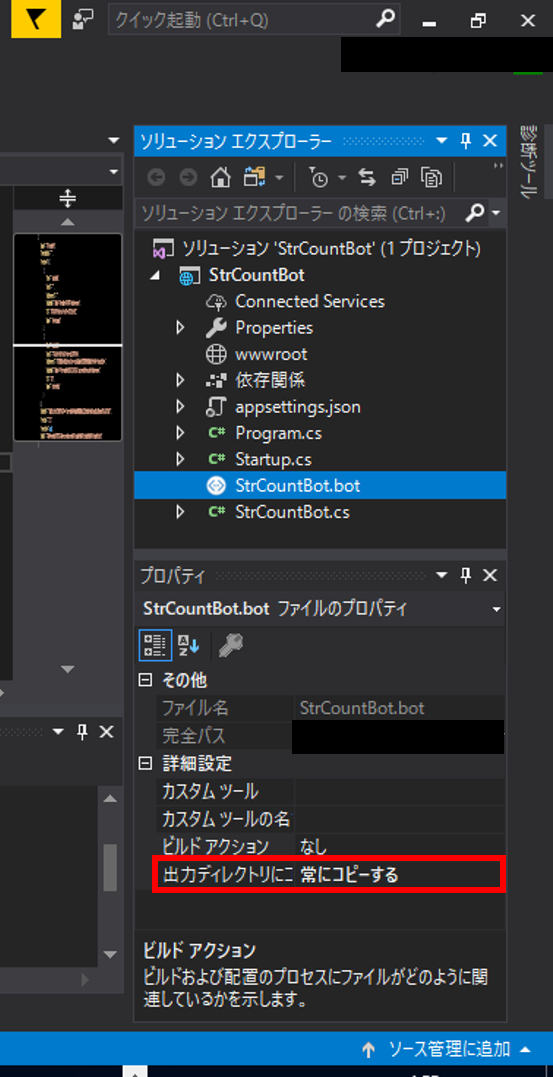
Visual Studio 2017で.botのプロパティで出力ディレクトリにコピーを「常にコピーする」に変更してAzureにデプロイ
Webチャットでテストして動作確認
これで、セキュリティに少し配慮しつつ、ローカル/クラウドのどちらでもボットが動くようになりました!
最後に
ちょっと長くなりましたが、いかがでしたでしょうか?(手順通りやったのにできないとかあったらすみません...)
これで、ローカルでもクラウドでも動くようなベースとなるボットができたので、あとはBot Framework V4について理解を深めるなりして、LUISと連携させたり、ステート管理した対話をさせたりなどカスタマイズしてみてください。